Color Me Happy Heart Pendants with Air Dry Clay

This post brought to you by ACTIVA Products.
Children's Valentine Craft Idea with ACTIVA Hearty ClayYou’ve probably heard me say this a thousand times, but kids love making jewelry.  Here’s a quick idea you can play with that uses washable markers to make colored clay.Making Jewelry with kids ideas using Hearty Clay and cookie cutters. Good Valentine's craft
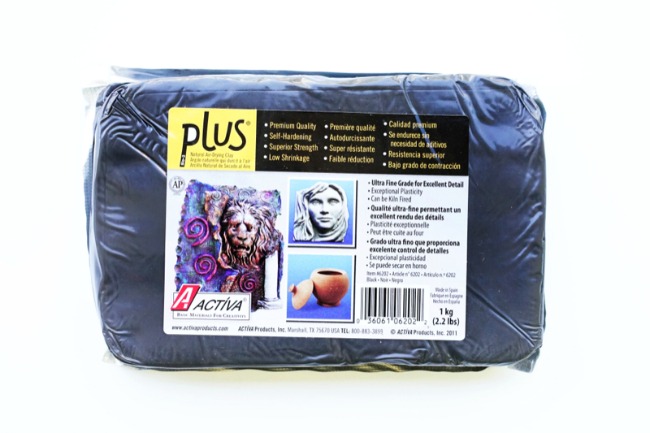
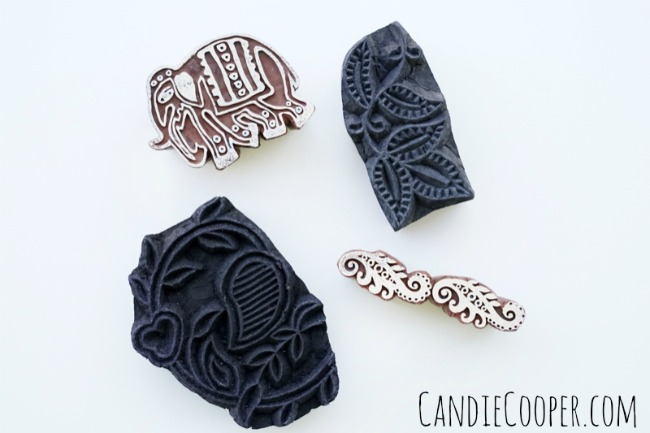
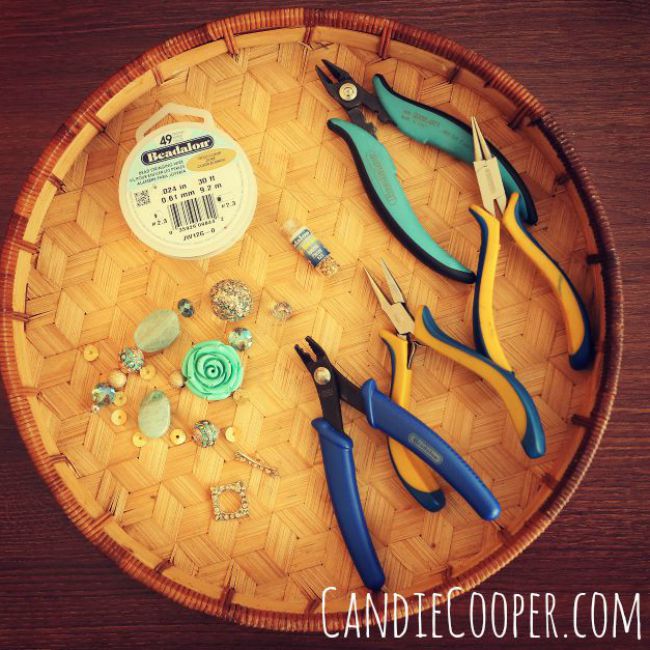
This is the crafty ingredient list.  Pretty simple!  Use Hearty Clay because it doesn’t crumble and fall apart when it’s dry.  #NoCraftFails 😉Valentines Craft Idea with Air Dry Hearty Clay. Tint the clay with markers
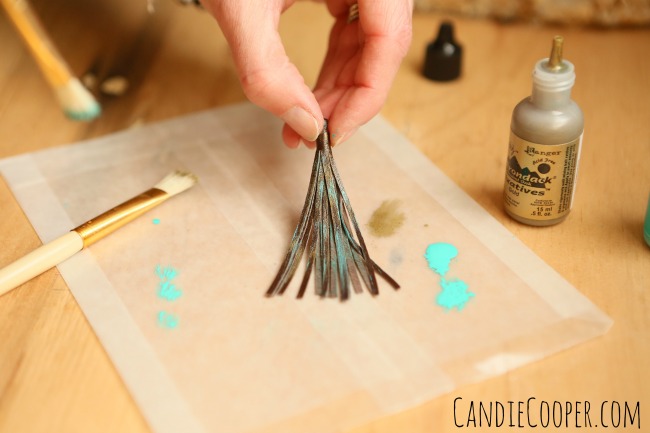
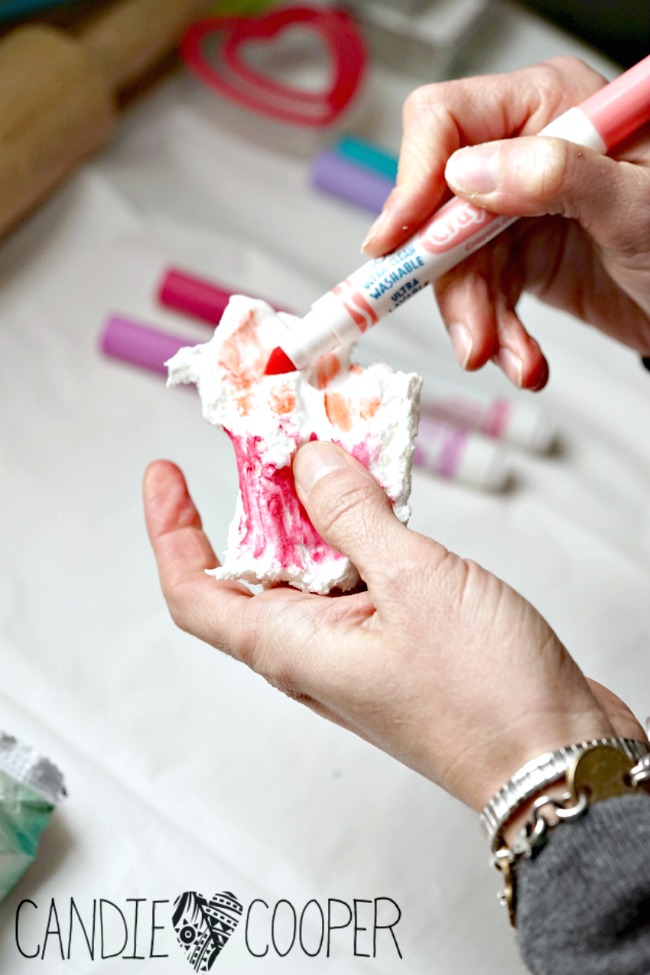
Grab a hunk of Hearty Clay and start coloring it with markers.  It’s a good idea to stay with markers in the same color family (i.e.  red and orange or blue and purple).  It’s fun to twist and smoosh the clay and see how the colors marbelize.  Add more color at any point–even right before you roll out for vivid results.Valentines Craft Idea with Air Dry Hearty Clay that shows how to make colored clay
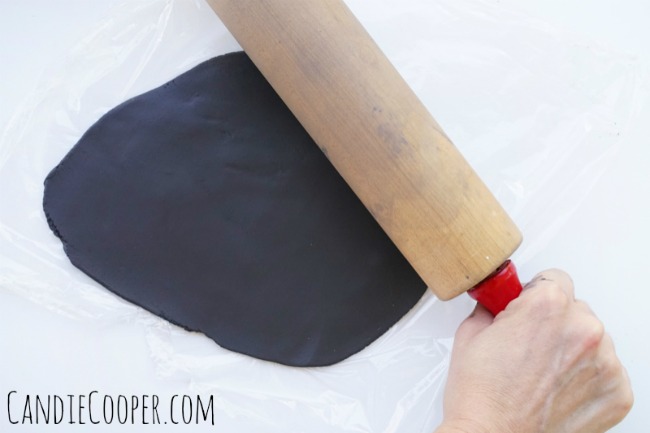
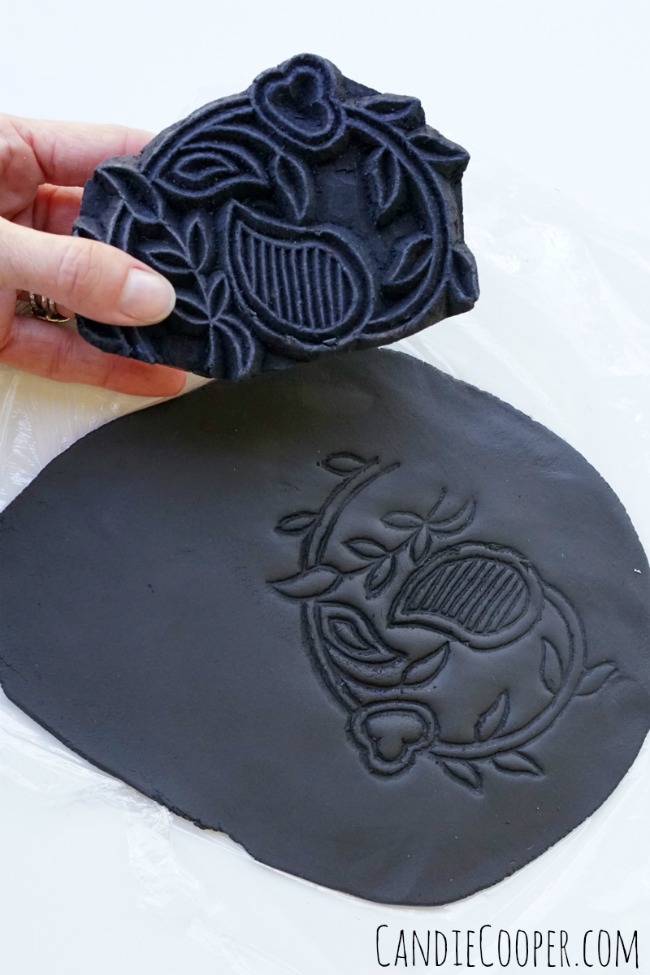
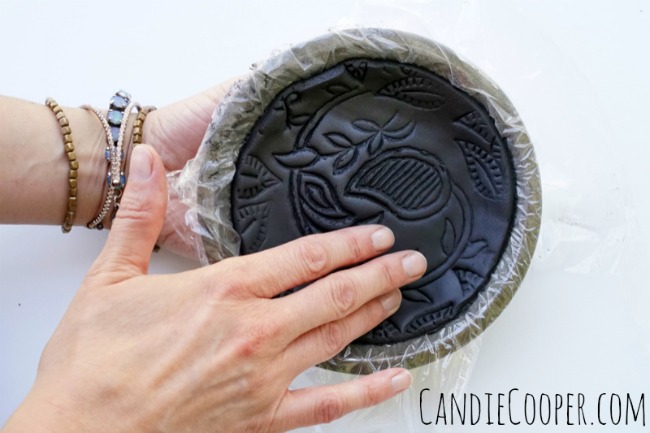
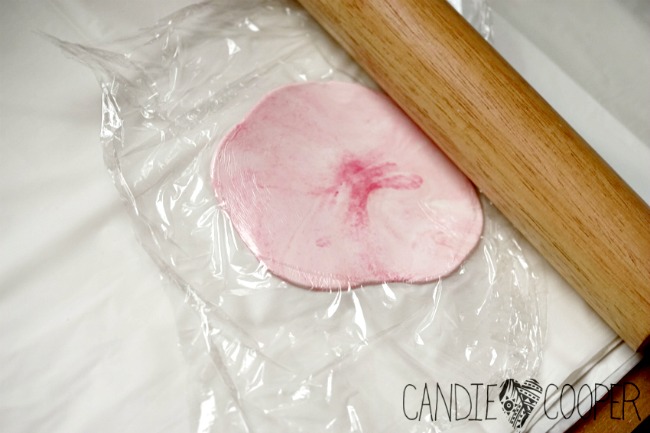
Place your ball of clay between plastic wrap and roll out to approximately 3/8″ thick.
Valentines Craft Idea with Air DryHearty Clay-making heart pendants
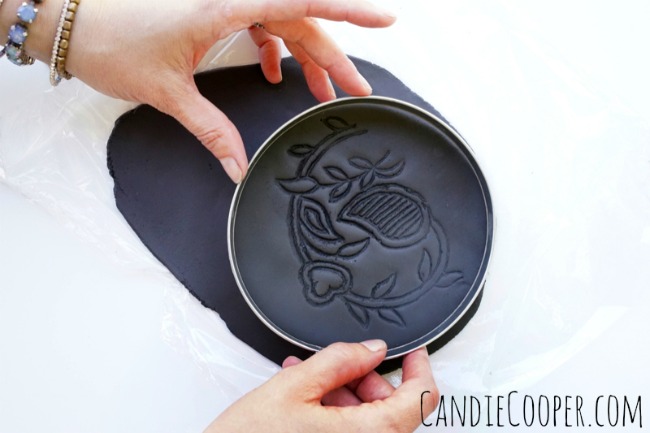
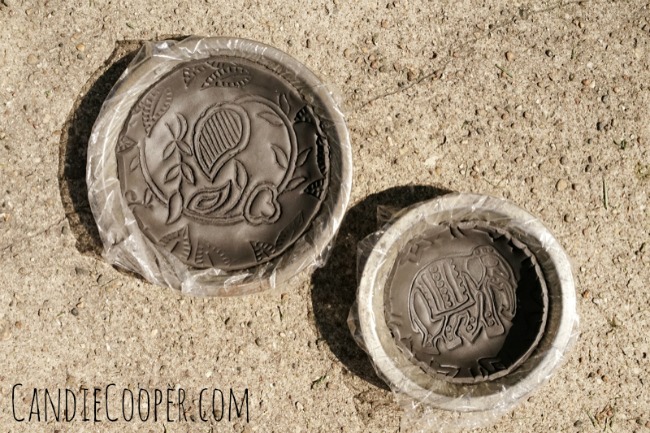
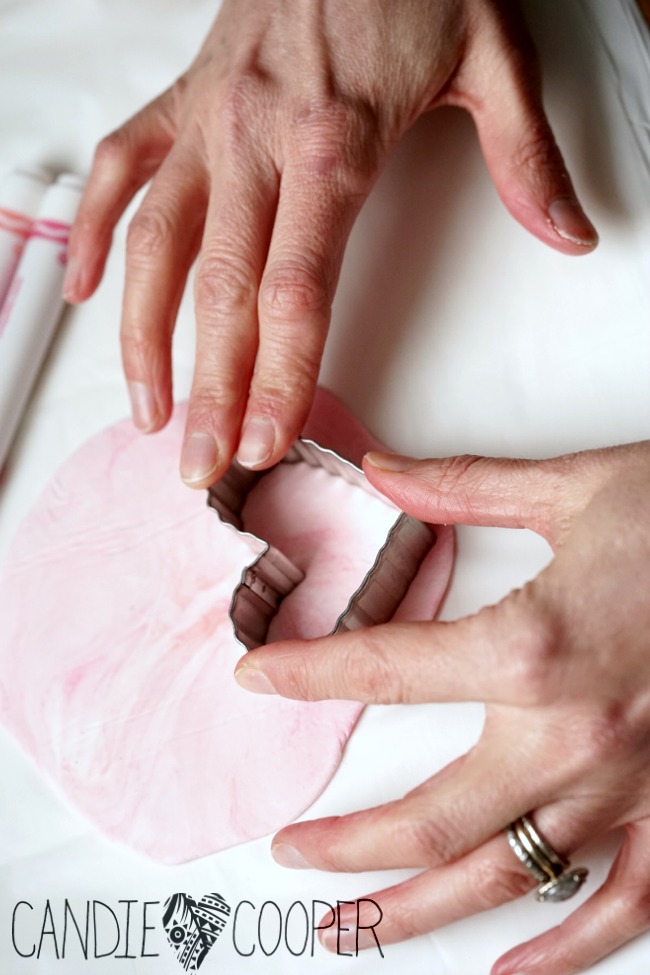
Cut your shapes out–you’ll need 2 identical ones.
Valentines Craft Idea with Air Dry Clay. Make heart jewelry
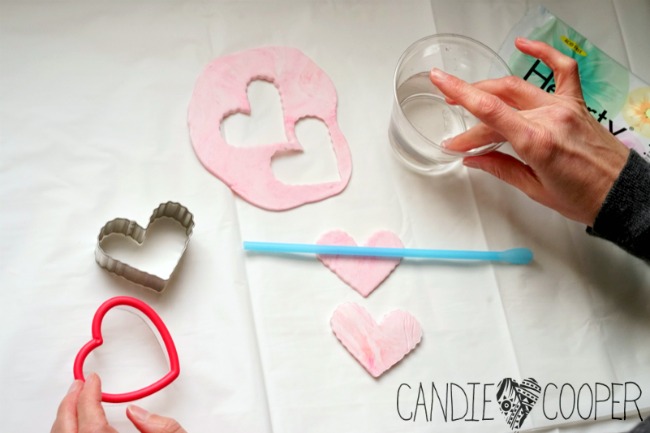
Place a straw across the top center of the shape and dab water around the edge.
How to Make Air Dry Clay Jewelry
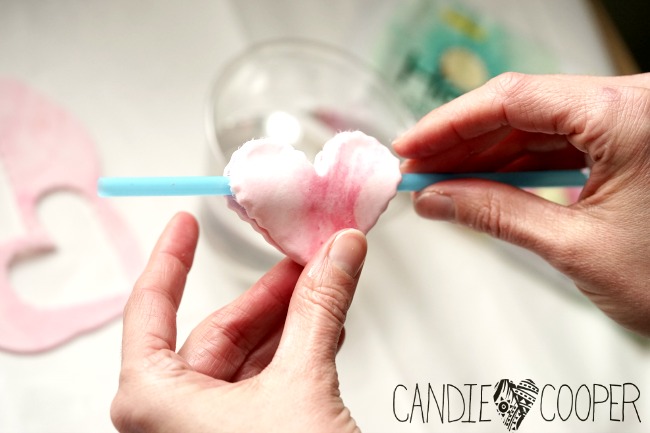
Gently press the edges together to seal.
Making air dry clay jewelry with Hearty Clay
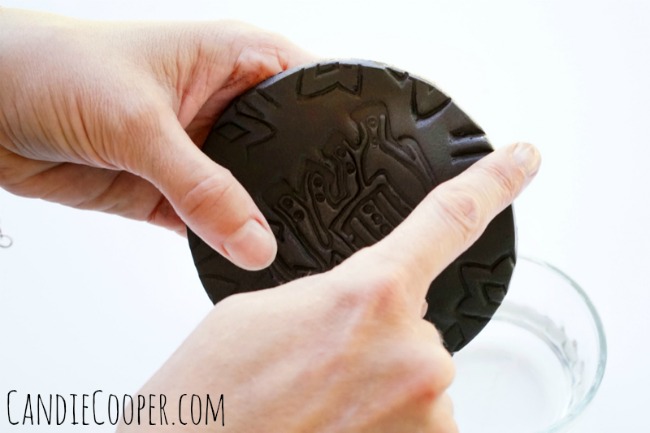
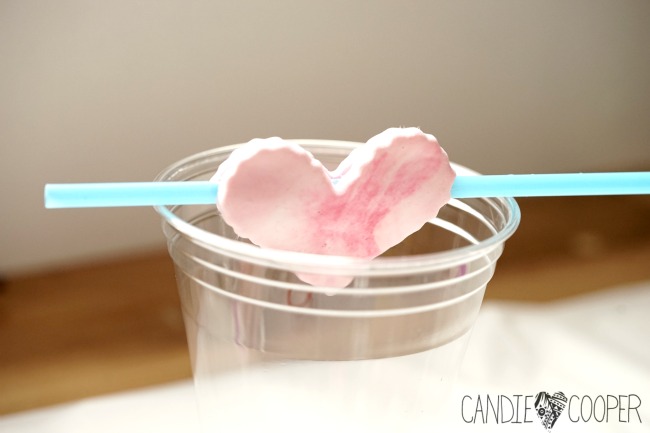
Place the piece on top of a cup to dry.
Mod Podge Jewelry idea with air dry Hearty Clay and gems
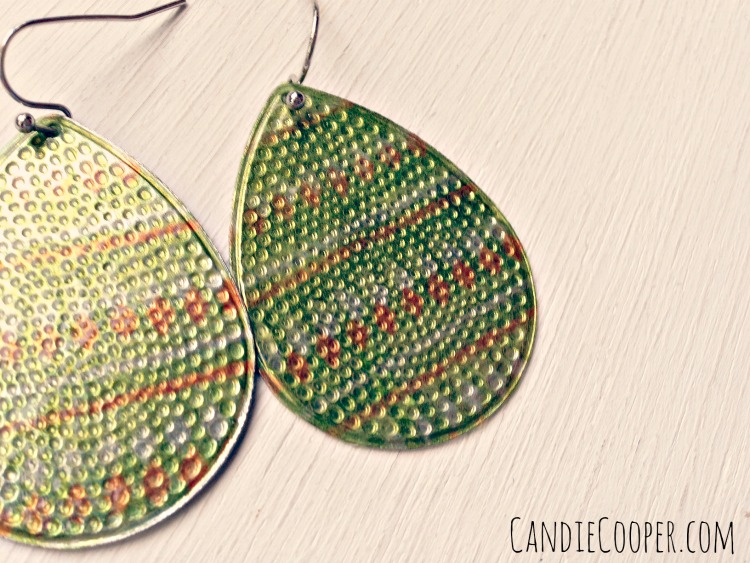
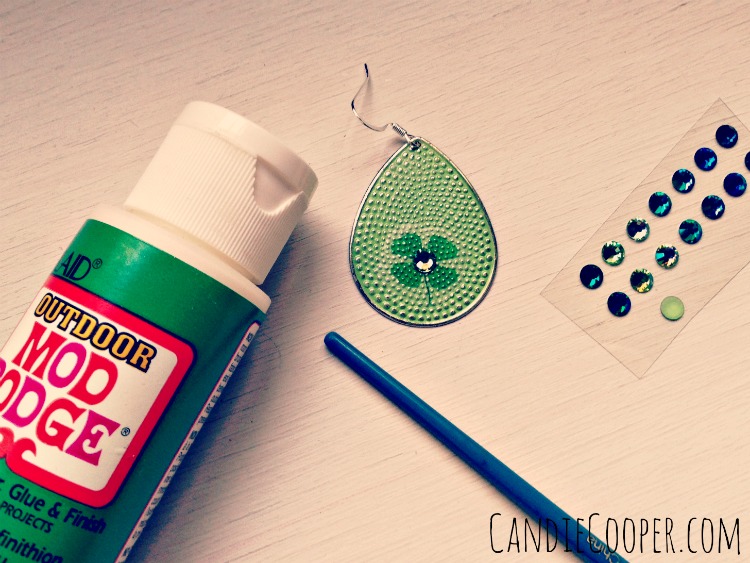
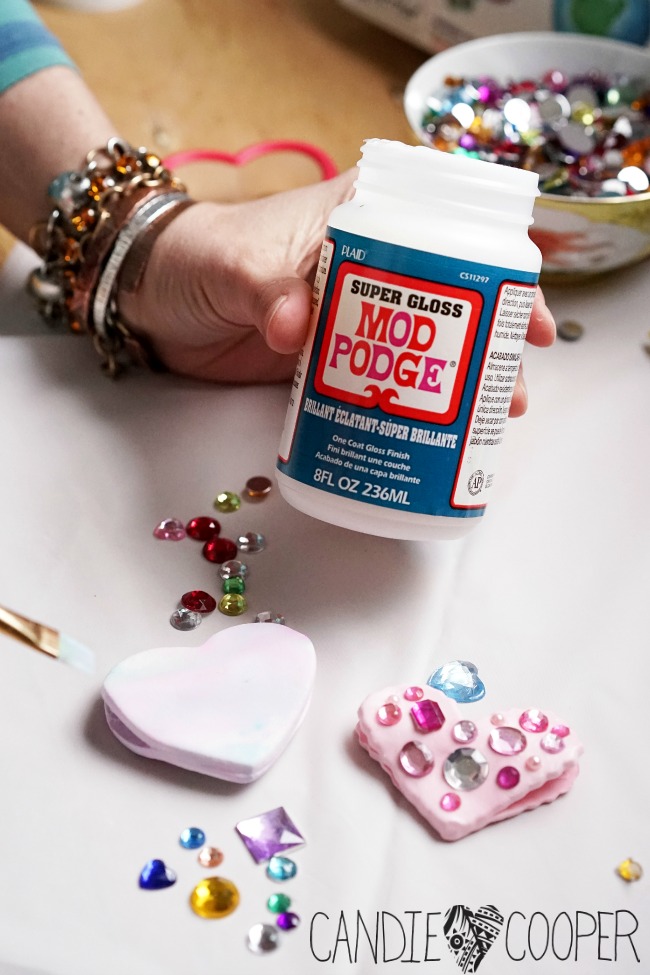
Remove the straw.  You can embellish dried Hearty Clay with all sorts of things–paints, doodles with a marker, or gems like I am here.  I like using Mod Podge to attach the gems.
How to make clay jewelry heart pendants
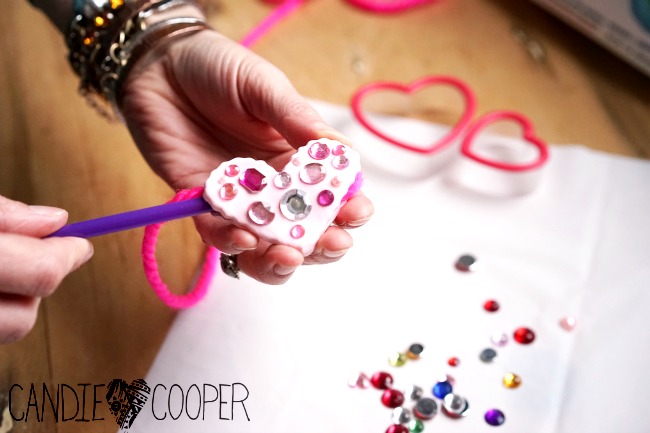
Push the yarn or cording through the heart pendant.  If the yarn is extra fluffy, you may need the straw to help push it through.
Children's Valentines craft idea--make a necklace with air dry Hearty Clay
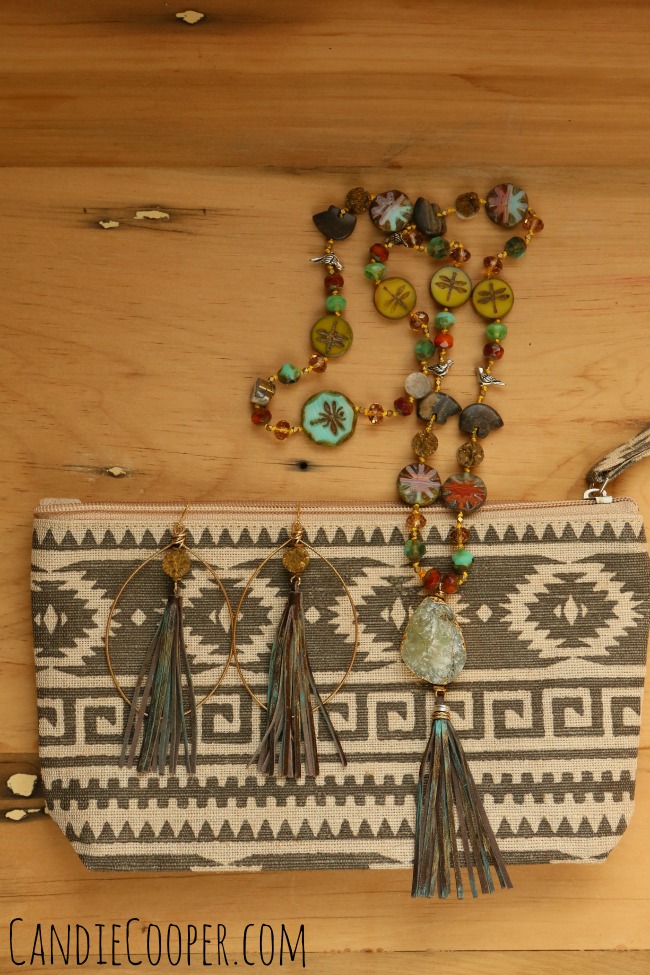
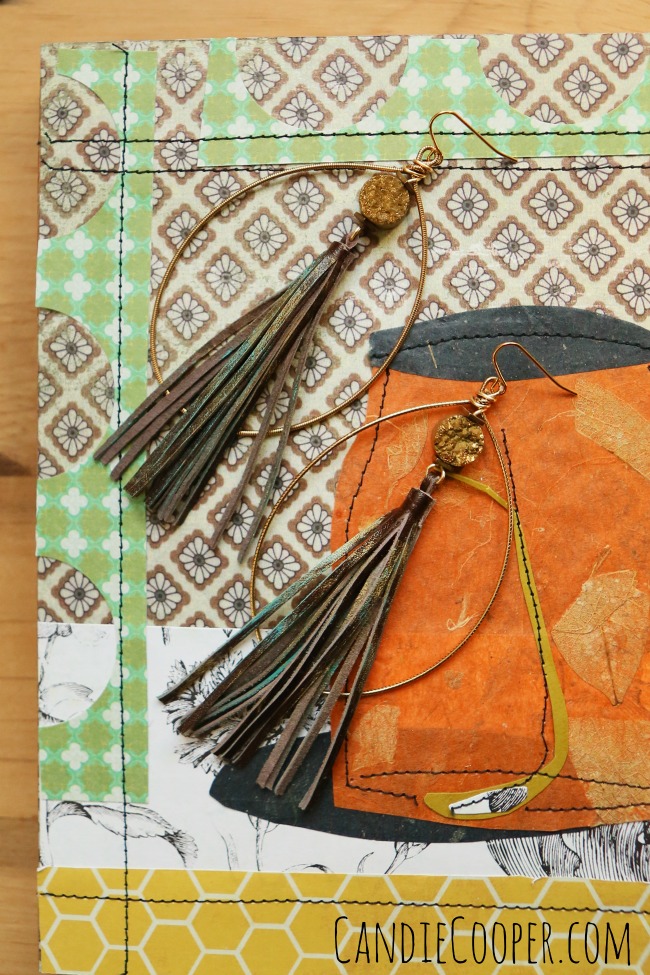
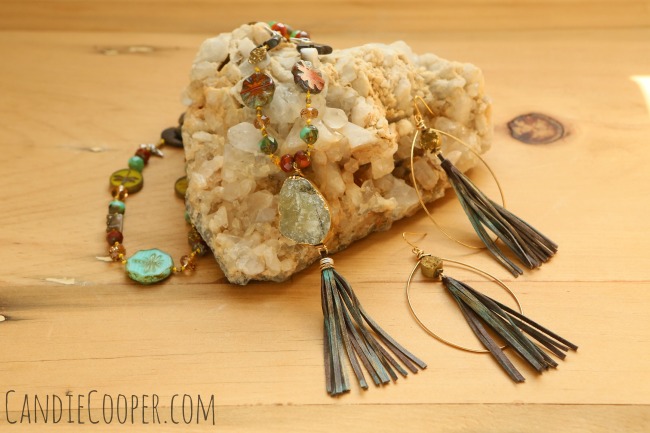
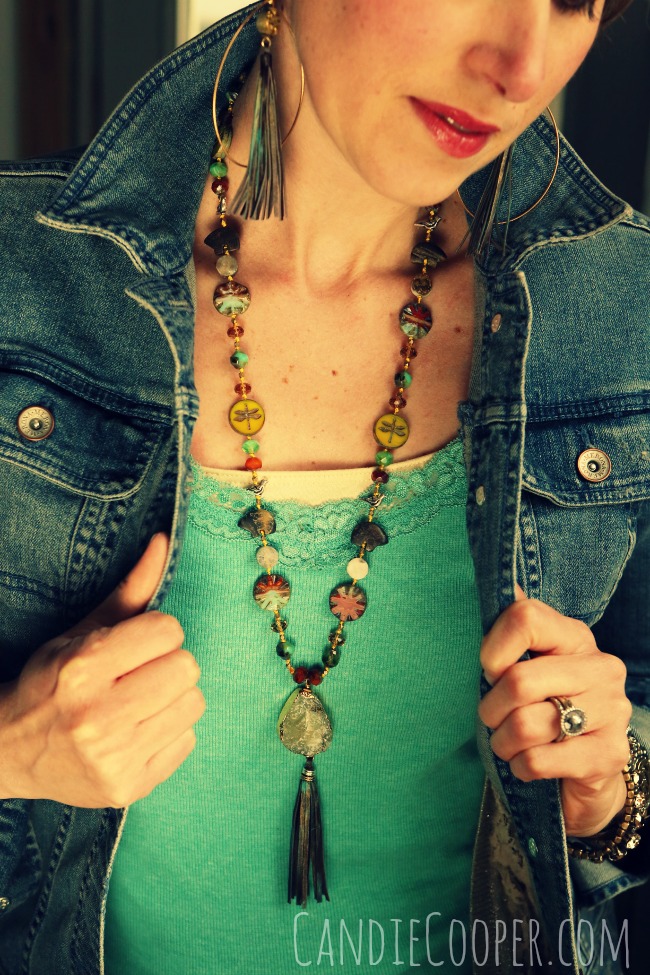
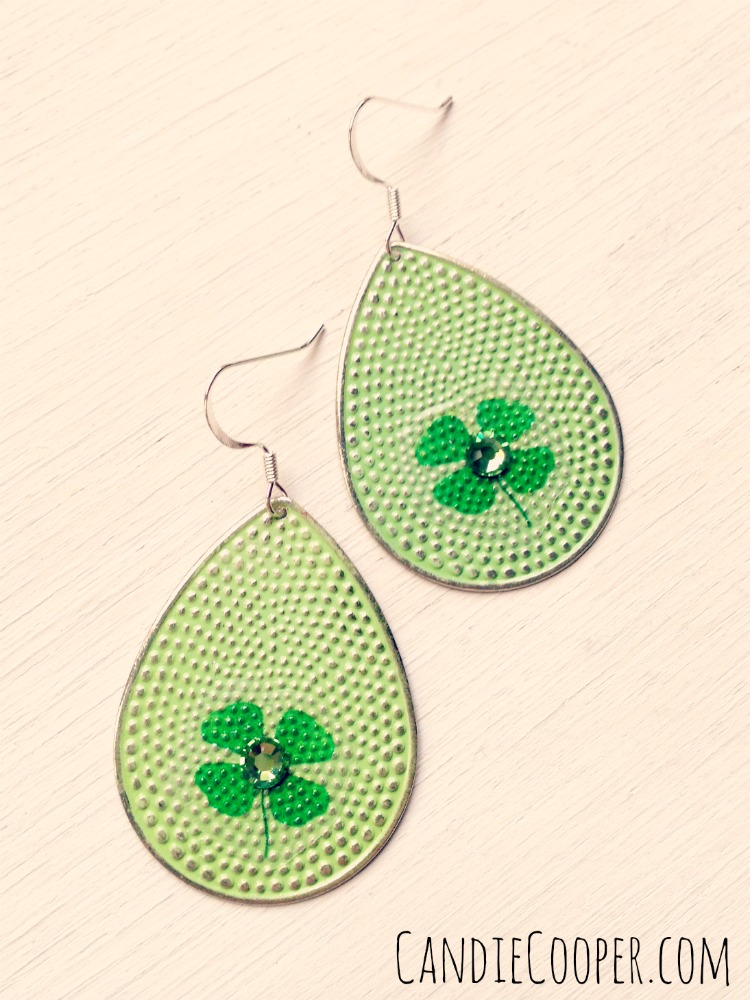
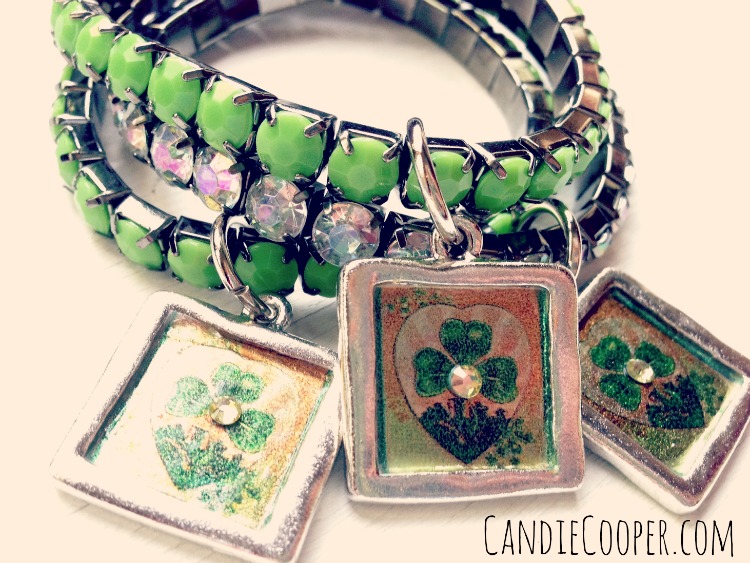
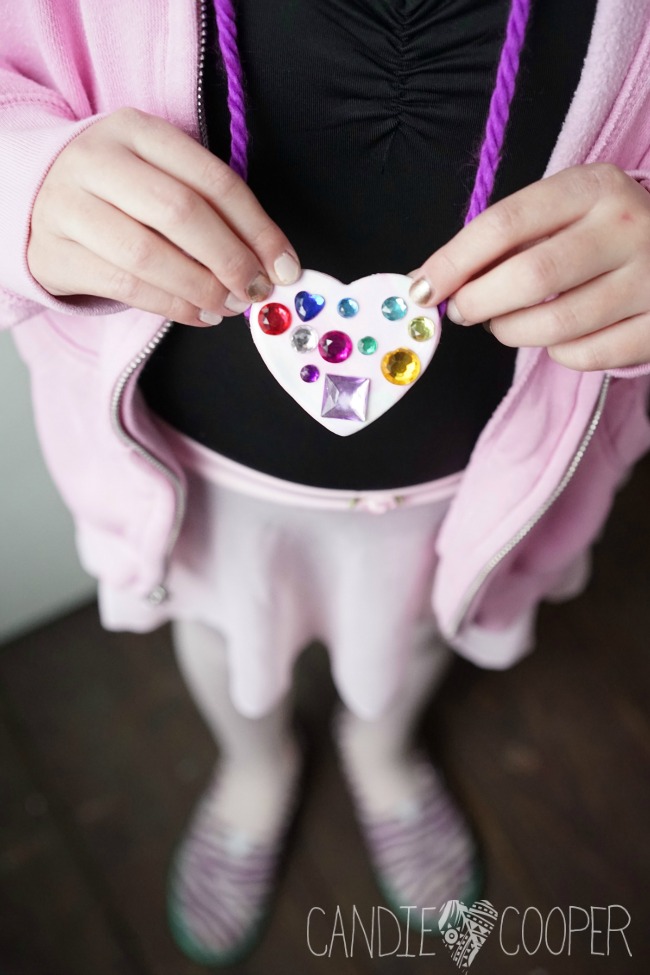
Ready to wear!  I love the possibilities with these bead-like pendants.

Here’s a link to the Hearty Clay at ACTIVA or you should be able to get it at your local craft store.

Happy Valentine’s!

Make your own Boho Pottery Dishes

This post brought to you by ACTIVA Products–makers of the best air dry clays!ACTIVA PRODUCTS Boho Dishes with black Plus clay17In college, I took a few courses in ceramics.  I had the best instructor–Dana.  She got me hooked on “hand-building” which simply means using your hands to construct a piece from clay instead of the pottery wheel. This is a really easy project that you can do at home.
ACTIVA PRODUCTS Boho Pottery with black Plus Clay--airdry clayI’m using ACTIVA Plus clay in jet black.  You can buy it at your local craft store or online and it comes in other colors; white and terra cotta.
Air Dry clay Idea - ACTIVA PRODUCTS Boho Pottery with black Plus clay4This is my craft-only rolling pin.  I roll the clay out to about 1/8-1/4″ thick.  It may take a couple tries to get it just right.
ACTIVA PRODUCTS Boho Pottery with black Plus clay-texture with @plaidcrafts wood block stampsFor texture and design, you can stamp it with these wood block stamps.  The black ones are the real deal from India.  The white ones are from Plaid Enterprises–I saw them in Hobby Lobby or you can get them online. Stamped-ACTIVA PRODUCTS Boho Pottery with black Plus clayStamp your piece so you get an all over pattern.
Making bowls with ACTIVA PRODUCTS Boho Pottery with black Plus clayYou can use an extra large circle cookie cutter to cut out a circle or use a knife with round template (like a plate).ACTIVA PRODUCTS Boho Pottery with black Plus clay--stamp the edges to add textureStamp the edge a little more if you like…
ACTIVA PRODUCTS Boho Pottery with black Plus clay--smooth out the clay with a little water and your fingerthen dip your finger in water and run it along the edge of the clay to smooth out.
ACTIVA PRODUCTS Boho Pottery with black Plus clay--pat the clay into the bowl form (pie plate)Drop your piece into a plastic lined mini pie plate (or other bowl form) and set in the sun to dry.
ACTIVA PRODUCTS Boho Pottery with black Plus clay-dry the bowls in the sunshineOnce the front is set up, you can pull them from the pie plate, flip over and leave to dry completely.  You could also put them by a heater.
ACTIVA PRODUCTS Boho Pottery jewelry dishesTo finish, I sprayed them with clear Krylon gloss spray paint.  Then, I dipped a paper towel in water and Apple Barrel white acrylic paint and rubbed over the surface of the bowl.  Use a dry paper towel to wipe up excess paint.  Optionally, you can seal them again with the Krylon gloss paint.

Why spray them with gloss first?  Because this seals up the clay surface so the paint doesn’t get too settled into the porous surface.ACTIVA PRODUCTS Boho Dishes with black Plus clay17You know I love jewelry–and these bowls are just the thing to keep on my dresser to hold it all.  Now I only need about seventy-five more.

**These are not food-safe.  For pretties only.

Simple Bead Stringing

This post brought to you by JesseJamesBeads.comHow to string beads for a bracelet using JesseJamesBeads.comI’ve been coveting these teal beads from JesseJamesBeads.com for a long time.  This is one of my very most favorite colors.  It makes me think of the ocean.  I feel calm just looking at it.  After all, if we can’t be at the beach, we might as well be beading.
Simple stringing tutorial from Candie Cooper and Jesse James BeadsSupply list:

#2 Crimp Tubes

Acrylic flower bead

7″ Bead Strand in your fave color

Clasp

Beading Wire

Crimping pliers

Wire cutters
Beadalon 49 strand gold wireString those beads.  You know, like we do!  I used the order they came on the strand, but you can shake it up and make your own.  Jesse James Beads has a garden of acrylic flower beads right now.  Pick one (or a few because they are so dang sweet).
Simple bracelet stringing tutorialSparkle is something that almost all JJB strands have a touch of and that’s perfectly ok with me.  I support sparkle.
Unique boho beads from JesseJamesBeads.comCheck the fit.  You could use a ruler for sizing, but who knows where it is!  I blame my husband.
Sparkly clasp from JesseJamesBeads.comSecure the loop end of the toggle to the beading wire with a crimp bead.
Crimping pliersPlace the crimp bead in the “U” shape notch first on the crimping pliers and then turn it 90 degrees and place it into the “eye” shape.  Smoosh it down, rolling the crimp over.
Stringing tutorial with JesseJamesBeads.comSlide all the beads next to the finished end of the bracelet…  P.S.  That’s a pastel drawing of oranges my great great gram did.  It’s one of my most favorite possessions.
Crimping beads on a wire tutorialand crimp the toggle to the wire.
DIY BRACELET with JesseJamesBeads.comPerfectly simple.
How to string beads for a braceletThirsty for more?  Seed Bead Bracelet tutorialCheck out my “Seed Bead Bracelets” tutorial on the JesseJamesBeads.com blog.  It’s another one of my fave projects over there.


Coachella Jewelry Idea

This post brought to you by LeatherCord USA.Painted Leather Leathercord USA Tassels from Candie CooperHave you seen all the Coachella fashion love on Pinterest and in magazines?  Coachella is actually a music festival where you’ll see free spirited fashions galore.

This set started with the knotted strand I had hanging (unfinished) on my bead wall.  I was thrilled when LeatherCord USA sent a batch of their tassels for me to play with.
Leather Cord USA tasselsHere the tassels are in raw form.  They come in suede and nappa finishes and in two sizes.  I opted to play around with the nappa finish which is a little smoother and slicker compared to the suede.
Paint Leathercord USA tasselsTo customize the tassels, I brushed them with Ranger/Vintaj Patina paints.  I used a stiff brush so I got the scratchy lines of paint on the leather.  Start with metallic gold…
Painting Leather Tassels from CandieCooper.comand brush both sides of the leather.  A little dab of paint will do you!  I like to brush most of it off on the wax paper before touching the leather. Painting Leather with Ranger InksBrush a layer of turquoise (both sides) and end with one last coat of gold.

Finishing with a layer of gold tones down the straight turquoise, making the layers blend and look really good!
Jazz up leather with paint!You can do this treatment on thin or thick tassels.  The wheels are turning for more patina’d tassels!
DIY Coachella Inspired JewelryHere’s how I used them in my finished jewelry designs.  I love how the tassels look with the Czech beads!Painted Tassel Earrings-How-to from Candie CooperFor the earrings, I used 20g. Artistic Wire to wrap the druzy bead and tassel to the big hoop (which is from Snapeez).  So fast to make!
LeatherCord USA Tassel Earrings and Necklace from Candie CooperFor the pendant I strung on a big chunky druzy on 20g. wire and finished the ends with loops.  The top of the tassel was wire wrapped with more gold and silver wire.  This gives it a nice finished look.
Coachella Inspired DIY Jewelry from Candie Cooper

You can shop for tassels here!

Now who’s ready for a road trip to the Coachella music fest?!


**To knot your own strand of Czech beads like this—check out this tutorial.


DIY Clothespin Fairy Doll Tutorial

Clothespin Fairy dolls from CandieCooper.comWanna know the way to my heart?  Nostalgia.  These little dolls are so sentimental to me.  My mom used to make them when we were little.  I think they were ornaments.  She and I worked this little pair of acorn fairies up together actually.  She paints.  I add the 3D embellishments.  Yin and yang.  It’s a good thing.

For the paints, we used acrylic Folk Art paints and Extreme Glitter.DIY clothespin doll tutorialBase coat the little bodies however you like.  We love denim A LOT, so naturally our boy got denim trousers.  Our girl is outfitted with a ruffly skirt.  Keep it simple.  Or at least try.  We find it very VERY hard to keep it simple.Painted Clothespin doll tutorial from Candie CooperHere’s a detail of those ruffly paint lines sealed with Extreme Glitter paint to add sparkle.  You could also spread Mod Podge onto the clothespin and dunk in glitter if you want more sparkle!  THAT would be pretty.Easy painted faces on clothespin dollsAlso, keep it simple when it comes to painting faces.  Blushy cheeks can be done with a Q-tip and pink paint, while the face could be done with a fine tip pen.  Mother Jean has the steadiest hand this side of the Mississippi so she always does the faces with paint and brush.  My clothespin doll faces would wind up looking more like Tammy Faye Bakker in a rainstorm if I allowed myself to use a brush that tiny with black paint.Make an acorn fairy dollNow comes my part of the party–the embellishments!  Leaves for wings, little acorn cap hats, a few seed beads strung on thread for a necklace, ribbon scarf and skirt, I could go on AND on.Acorn hat on clothespin dollOptionally, you can seal your acorn hats with Mod Podge or clear acrylic varnish so they are nice and shiny.  Actually, the whole doll can be sealed if you like.Clothespin Fairy Dolls from Candie CooperPut it all together and here’s what you get!  You can use tacky glue, a glue gun, or even a kids glue gun to add the embellishments.

How to Set Up an Art Fair Tent

Art Fair Tent Ideas 4Once or twice a year I sell my jewelry at an event locally.  This time it was the Charley Creek Arts Fest.  If I did this every weekend the pictures would look differently.  I’m positive! Starting with simpler furniture and displays.  However, since I only do this once every blue moon, my sister and I drag everything but the kitchen sink with us because we like stuff and we want it to look like a real live boutique.  In other words…we play shop.

Art Fair Tent Ideas 5I’ll try to point out some things that have really worked for us.

The first:  screens hung with fishing line!  We staple gun screen into everything from old cabinet doors to picture frames.  Use ornament hooks to connect necklaces or carded earrings to the screens easily.

Zip ties.  Use zip ties to hang things easily (see white boxes hanging on back side walls).  Art Fair Tent Ideas 2Third, make a garland.  The past two years my friend has made a fun garland for me to hang from the cross bars in the booth.  For some reason it makes the ceiling feel higher.

Another fun element:  RUGS!  I started putting rugs in my booth years ago to cover the ugly pavement or patted down grass.  They are so welcoming, I think.Art Fair Tent Ideas 4Then fill it with fluff:  white washed ladders, some plants, postcards and business cards, and seating.  The past two years, I’ve added a big jug of peppermint iced tea to keep folks cool and refreshed (and hydrated!  see the chalk sign on the pavement?).  It’s an easy treat!  Here’s a look at last year’s booth:2013 Candie Cooper art fair tentMore pennants hanging from above!  A tower of sea shells filled with earrings.  The white shells really show off the colorful elements in the earrings.Art Fair Tent Ideas 3A plant hanger turned upside down for a butterfly chandelier.

Twine.  We love twine!  You’ve got to have twine.Art Fair Tent IdeasAnd last year I was trying to think of something other than a rug because we were in the grass and came up with straw.  It worked great!  Especially since it had been raining.

You also need a cool older sister that puts up with all your bossin’ around.  She can also decorate.  Plus she’s sweet which makes her a triple threat!


DIY St Patrick’s Day Jewelry

Jewelry Attitude St Patrick's DayHello there awesome people!  I’m back with more festive jewelry ideas for you featuring Craft Attitude’s Jewelry Attitude film!  But before we get rolling, have you ever seen the movie, Darby O’Gill and the Little People?  Filmed in 1959 with young Sean Connery (insert sizzling hot sound)! I always think about it when St. Patty’s rolls around.  I’m going to have to rent it on Amazon Prime for old times sake.  And fast forward through the banshee part…..for old times sake.

Now back to the Craft Attitude Jewelry project ideas!!

Candie Cooper St. Patricks Jewelry MaterialsFor materials (working L to R) we have exhibits:

A: Jewelry Attitude B: tacky earrings from Wal-mart C: layering bracelets (also from Wal) and D: Tierra Cast pewter bezel frame charms.

If only you could have seen my husband’s face when I dropped those earrings into the shopping basket.  “They’re for a craft project, Honey,” I said reassuringly with a few pats on his back.  Sorry, if you own those earrings by the way.

Print onto Jewelry AttitudeAre you looking for some great St. Patty’s images?  The Graphic’s Fairy is your new BFF then because she has a ton of amazing, vintage St. Patrick’s themed art waiting for you.

Next, print your images onto the Jewelry Attitude film so they are the perfect size.  Remember to flip your images before printing–especially if there is text on them.  Check this post for tips on resizing and flipping images.

Jewelry Attitude collage filmTrim around your images and apply permanent glue to the printed side of the image.  Place face down on your surface and peel back the white paper (like a temporary tattoo).

Before and After Craft AttitudeThe thing we all love about Craft Attitude is its ability to pick up the texture of the surface it’s on along with its transparency.  By the way, did you recognize the earrings from the clearance rack?  I took them apart.

Green Earrings with Craft AttitudeThis is one of my favorite things to do with the film:  find a simple surface and cover it with a fun printed image.  Done.

Shamrock JewelryFor this pair, I cut around the printed image and Mod Podged to the metal earring part.

Mod Podge green sparklesI like using Mod Podge Outdoor formula because of the durability.  Use it to add sparkles to your pieces all day long!

Candie Cooper St Patrick's Day Jewelry CharmsThis image is from the Graphics Fairy too.  My thinking is you can give one of these bracelets to all your friends who forget to wear green on the 17th.  Of course I tried them all on at once, but I sounded like a dog with a collar that has id tags, vaccination tags, and last year’s vaccination tags when I walked around.  Loud.

Candie Cooper St Patricks Day Jewelry CharmsThat’s all there is to it!  Let me know if you have questions. Ok?


This post brought to you by Craft Attitude.  All opinions are “yours truly” though.