Take a Beading Class in Philly!

Urban Cowgirl Necklace with Candie Cooper
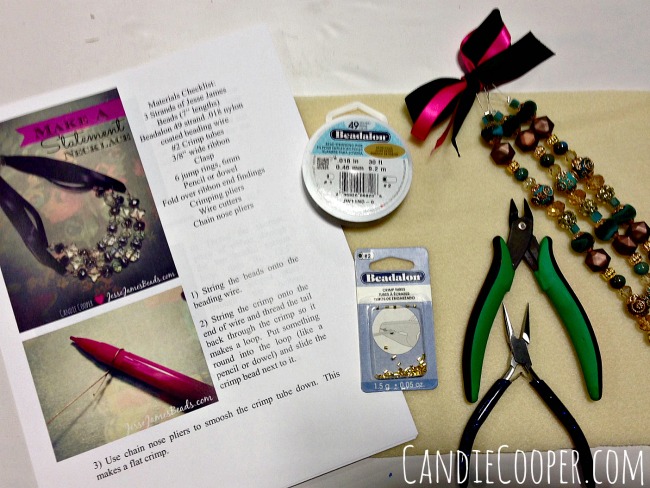
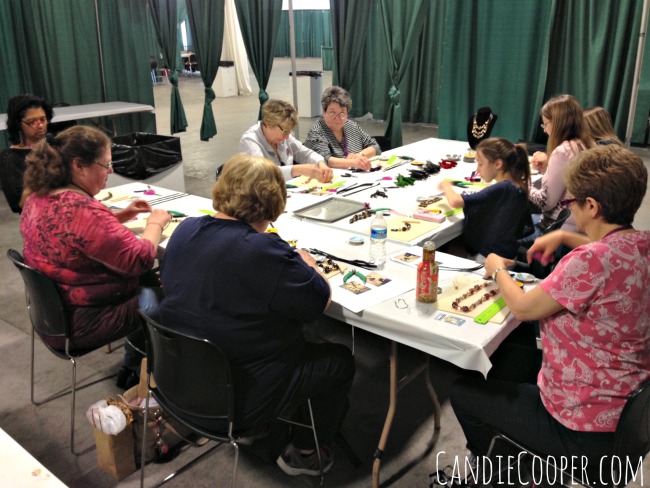
It’s been all hustle lately getting ready for the Bead Fest party in Philly next weekend!  Writing instructions, photographing, laundry, packing etc…  I’m ready to get this shindig started!  Ok, I still have some things to do (like a lot of things actually), but you know what I mean.  I can’t wait to hang with my fellow jewelry makers and JesseJamesBeads.com crew.

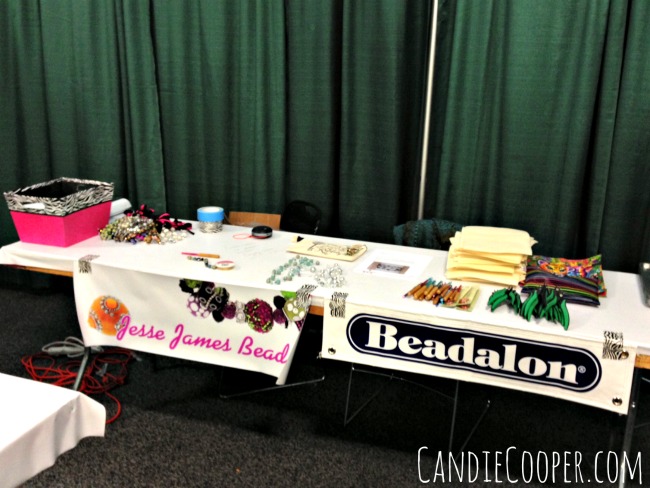
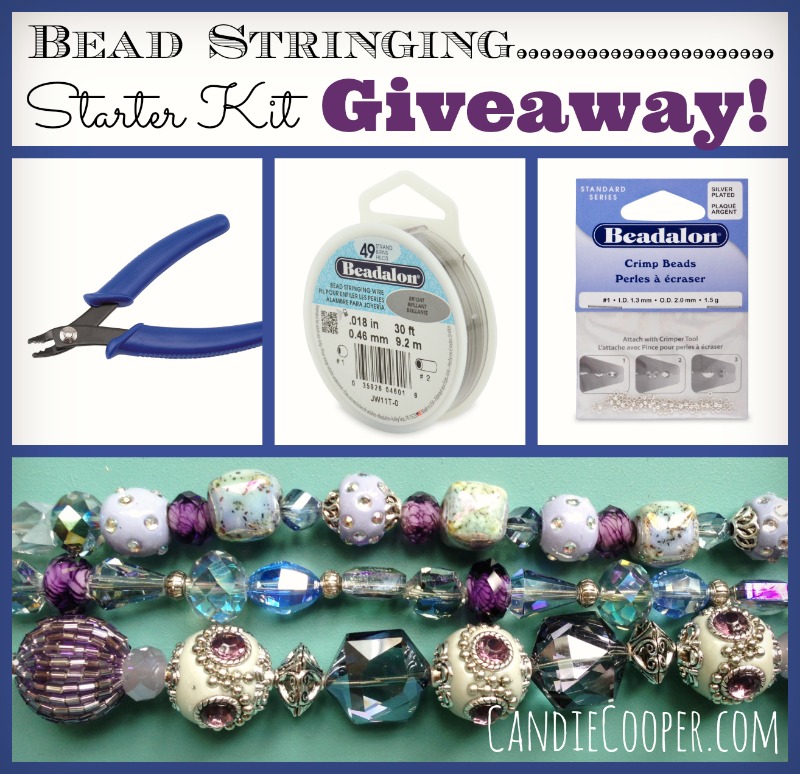
If you’re in the area, may I invite you to a class?  This one is $26 and includes EVERYTHING thanks to the sponsors above.

Now, I better get back to it y’all!
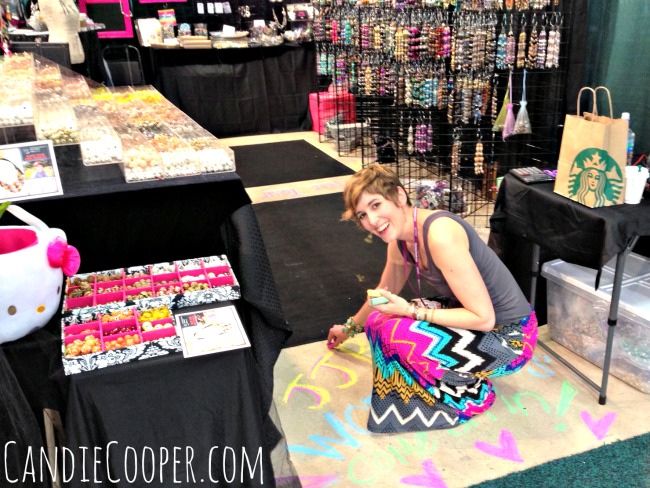
Back to Bead Fest with Jesse James Beads

Candie Cooper and Sarah James at Bead FestIt’s time for round two of Bead Fest near Philadelphia!  I’ll be there teaching jewelry making classes, partnering with Jesse James Beads!Beading classes with Jesse JamesDoesn’t this look appetizing?!  Beadalon and Jesse James Classes with Candie CooperWe are also collaborating with Beadalon–makers of great findings and tools!  Jesse James Bead Fest ClassI taught two classes there in the Spring and the ladies were delightful.  The other thing I love about working with them is everyone’s jewelry project turns out differently because we bring lots of beads to choose from.Candie Cooper Chalkin' Up the Jesse James Bead BoothHere is a handy link so you can take a peek at the class offerings and if you can’t make a class, come say howdy at the Jesse James Beads booth! <3  It’s always a good time being around my fellow jewelry makers, playing in the piles of beads and talkin’ shop.  I really do love it!

How to Make A Statement Necklace with Resin Chain and Beads

Jewelry Making Orchid Burst Necklace Tutorial2Have you seen the resin chains at Hobby Lobby?  I like them so much because they are reminiscent of Bakelite.  They are bold and bright, fun for spring fashion, but how do you transform them into jewelry pieces?  Here is one easy idea from me to you with love.

P.S.  Sorry in advance for my color tint issues.  I’m just not that savvy with my photo edits (YET!), but I’ll get there.  Thanks for hanging in with me.

Jewelry Making Materials 1Basic supplies for this necklace are:  chain nose pliers, wire cutters, 2, 7″ chain pieces, 7″ strand of Jesse James Beads,  silver seed beads, 2 12mm jump rings, Beadalon duet clasp, 49 strand .018 nylon coated beading wire and #2 crimp tubes.

String the Jesse James Beads onto wireString the beads onto the beading wire.

String the crimp beadsFollowed by 2, #2 crimp beads.

It’s so important that the crimp beads match the beading wire.  Too big of crimp beads equals potentially-embarrassing-beads-crashing-to-the-floor scene.  Never good.

String a row of seed beadsNow string 20 silver seed beads onto the wire.  Don’t be like me and mix and match your silver seed beads (see in the bag), thinking, I won’t care if I have to pick out the same colored ones.  I do care, past self.  That was a bad idea.

Row of seed beadsOk, so now we have 2 crimps and 20 seed beads.

Thread the tail of wire through 2 crimp beadsLoop the tail of wire through the end of the chain and back through the crimp beads, creating a seed bead loop.  Now, you might have a couple questions….

1)  Why are you using 2 crimp beads?

A)  Because of the flat crimping technique and the large beads, I want to add double the security.

2)  Why the seed bead loop?

A)  See the splits in the chain?  The seed beads add a bit of thickness (and design aesthetic is a bonus) so the wire can’t sneak out of the split.  This gets us out of another potentially embarrassing moment.  I’ve had jewelry break on me in front of people and it’s SO humiliating.  I always say, “who made this anyway!?!?” with a big smile and a wink.

Slide crimps up next to seed beadsSlide the two crimp beads up next to the seed beads to cinch up the loop.

Jewelry Making How to flat crimpUse your chain nose pliers to smash the crimp beads down.  That’s right, I said smash.

Trim the wireSlide the big colorful beads up, threading the tail through the first bead and trim away the excess.

Slide the beads towards the finished endNow, scoot all the beads over towards our crimped end.  Trim the wire so you have 4″ approximately.

Row of seed beadsString 2 crimp beads and 20 seed beads.  Run the tail of wire through the chain, down through the crimps and first bead, pull out all the slack in the beaded section.  This can take some finagling.  Use your chain nose pliers to tug on the end of the wire to help remove the slack.

Finished with crimpingLooks good!  I use the seed bead loop for so many designs.  It is my beady lasso of sorts.

How to open a jump ringLet’s finish’er up!  Open a jump ring with chain nose pliers–from side to side.

Connect the claspConnect one end of the duet clasp to the end of the chain.

Close the Jump ringClose the ring so it’s nice and snug.

Connected duet claspRepeat for the opposite side.  It’s a cute little clasp pair, don’t you think?

Jewelry Making DIY Necklace 2Praise the Lord, we made it!  A burst of color for you!  I’m so excited!

Orchid Burst NecklaceAnd here I am wearing it so you can see the full look and how it hangs.

Expect more resin chain projects here.  I only bought every color they had.  Have you made anything with them?  I wanna see!

Happy day!

XO.

Candie

How to String a Bracelet

How to String a BraceletAre you ready for your life to be changed forever?  Here is a tutorial I created this afternoon to explain how you can transform a pile of beads into a beautiful bracelet.  It’s to kick off my first ever classes at Beadfest Philly in April.  I’m so excited!!!  It only took a mug of chicken soup, 2 raspberries, a cup of coffee, piece of fruit leather and a little chocolate for me to pull it together.  I hope you find it a useful resource and something you want to share with your friends and family.   And if you live in the Philly area, I hope you’ll come take a class with me at Beadfest.

Let’s get rollin’!

Stringing MaterialsThese are the basic materials needed.  Before I forget, this post is brought to you by Jesse James Beads and Beadalon.  They both help keep the lights on in my studio.

Back to the materials:  Wire cutters, crimping pliers, 49 strand .018 nylon coated beading wire, crimp beads, beads and a sparkly Upper Clasp.

One thing that is so very important:  the crimp beads must correspond to the wire diameter.  Look at the bottom of the wire spool–it says use with crimp bead #1 or crimp tube #2.  The crimp bead and tube packages will be marked with #__.

I promise, I’m not making this stuff up.

String the beadsI always use 49 strand .018 Beadalon wire for my stringing projects.  It’s so versatile and can hold the big chunky beads with no problemo.  The Jesse James Beads were strung (almost) exactly like they were on the wire.  I added a few tiny 4mm glass beads in the middle and at the end.  The nice thing about JJB is they come in 7″ strands.  My wrist is 7.5ish so by the time I strung the beads and included the clasp length in the total bracelet length, I had a perfectly sized bracelet.

Row of beads length + clasp width + approx 1/4″ for wire connections = your bracelet length

Crimp beadWhen you are happy with the bead section, string one crimp bead followed by one end of the clasp.

crimp on claspRun the tail of wire back through the crimp bead and slide it up next to the clasp.  Leave a little room for the clasp to move freely.

Crimp 1Crimping pliers have two openings in the jaw–the “U” shape and the “EYE.”  That’s what I call them at least.  First, hold the wires so everything stays in place and put the crimp bead in the “U” shape. Clinch the crimping pliers together to mold the crimp bead into a “U” shape.

Crimping 2Turn the crimp bead 90 degrees and place in the “EYE” shape.  Clinch again so it folds the crimp bead over (kinda like a squashed “C”).

cut the wire from spoolSlide all the beads to the clasp/crimped end of the bracelet and cut the wire from the spool so you have an 1.5″ or so to work with.

I string with the spool attached so I don’t waste wire.  You can pre-cut the wire too.  For me, that’s just too much of a commitment though (laughing).

Pull out the slackRepeat for the other side, stringing a crimp bead and the second part of the clasp.  Run the tail of wire through the crimp bead and pull out all the slack.  Not so tight that the beads can wiggle a bit though.

Final crimpCrimp again as you did before.  It’s helpful to put the flush side of the crimping plier up against the beads (see arrow above).

Cut the wireNow cut the tail of excess wire.  Check twice that you have the right wire and cut once (ancient bead stringing secret).

bracelet 4And that my dear friends, is all there is too it!  Are your ready to get this bead stringing party started or what?! Hokey Pokey time!!!

Bracelet Un-latched Now they are doing the loco-motion!  Woot-woot!

bracelet 3Here they could be doing a little line dancing or the funky chicken dance.

No wait.  They are doing the Macarena.

Heyyyyy Macarena!  These beads came to play, y’all.

Speaking of party….guess what?  I’ve got a little giveaway for you!

Bead Stringing Starter Kit GiveawayThis is a beginning bead stringing kit!  It has Beadalon wire, crimping pliers and crimp beads along with the infamous Jesse James Beads below.  It will also include a sparkly Upper Clasp like the one on my bracelet above.

Is that Macarena song stuck in your head too?  Mine too.  Sorry about that!

a Rafflecopter giveaway

Happy entering and thanks for showing the like love to these dear sponsors!

Jesse James Beads Giveaway

Candie Cooper Jesse James Beads Giveaway 1Do you need more beads in your life?  The kind people at JesseJamesBeads.com and I thought so.  Enter below to win big time!  5 strands of glory!!

Here’s to a good week, lovely people!

🙂 Candie

a Rafflecopter giveaway

PS-all thoughts shared here are my own.

DIY Elastic Skull Bracelets

Candie Cooper Fancy Skull BraceletDo you ever have an idea that rolls around in your head for a year, but you can never find that extra hour you need to make it? Probably because it was jewelry solely for me.  Anyway, that’s exactly what happened with this stack of bracelets.  It all started with some gum-ball head skull beads.  I wanted to make some Halloween jewelry without it really looking like Halloween jewelry.  Know what I mean?  No orange and black.  No dangling skull charms.  Very sneaky.  This fancy design worked.  People did double takes!  My mother said, “Candice, are those skull beads?”  “Why yes Mother, they are.”  So fun to wear!  Make one.  Make eight!  Don’t over-think the bead order–just string them!  I made mine with hefty 1mm diameter beading elastic and Jesse James focal beads between the skulls.  Tie the ends of the elastic in a surgeons knot and touch the knot with clear nail polish.  Let it dry and go on with your bad self!