Wire Worked Candle Wreaths

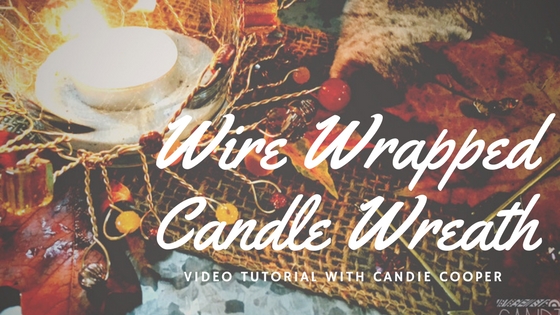
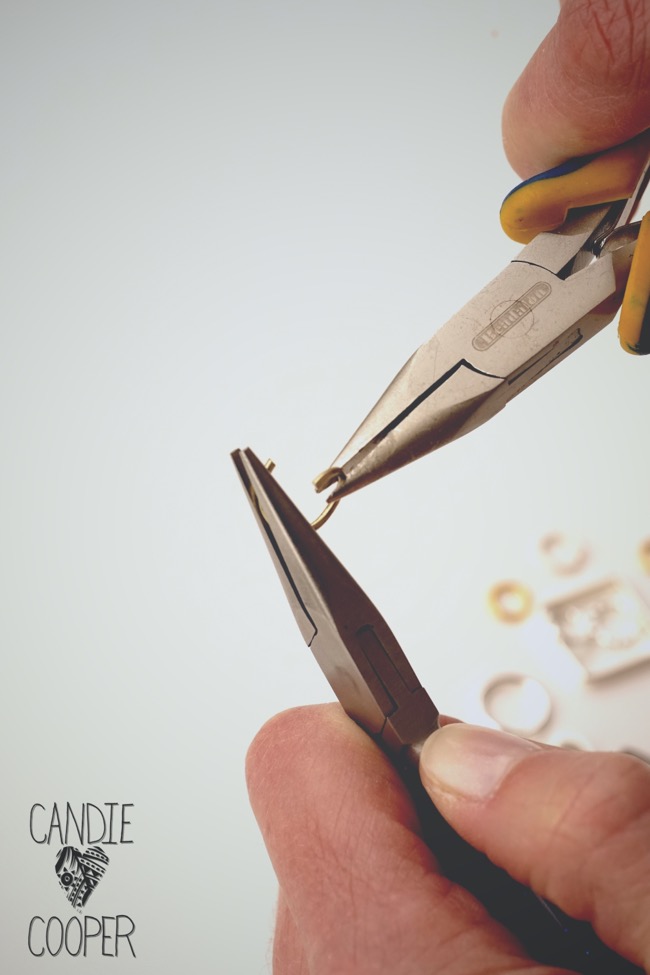
For every holiday I enjoy putting together a special table display. It ties together the feel of the holiday and gives everyone something special to look at while we gather around the table. This year for my Thanksgiving table I have made some wire wrap wreaths to put around candles. Learn how to make wire wrapped candle wreaths for your own Thanksgiving or any other celebration.

Wire Wrapped Candle Wreaths Video Tutorial with Candie Cooper

[Read more…]

Let’s Make a Ring: Beadalon Flat Artistic Wire Ring

Today I will show you how to make a cute ring made with Beadalon Flat Artistic Wire. There are very few tools required for this ring and you don’t have to have a lot of wire working experience to make it. Anyone can make this project and have a great ring to wear in about 30 minutes or less. Let’s get started on our own Flat Artistic Wire Ring.

Read below to see the supplies and steps to create this tab ring. You can also watch the FaceBook live video that I hosted about this project for a step-by-step tutorial.

[Read more…]

Into the Woods Tassel Necklace

In To The Woods Tassel Necklace by Candie CoooperIn this Facebook Live Video I showed you how to make the Into the Woods Tassel Necklace.
This video was sponsored by Jesse James Beads and Beadalon, all opinions are my own.

In the video I show you how to layer a pendant with a tassel and how to do some basic wire wrapping. Tassels have been a hot trend for a while and something that I love to add into my jewelry. Tassels can be made from a lot of different materials but today I will be showing you a chain tassel.

This necklace features Jesse James Beads’ new collection, Into the Woods. This is a beautiful earthy collection that you could use in so many ways. This necklace could be made with any beads but the Into the Woods collection really gives the piece a unique edge.

Keep reading to see where you can purchase the other supplies for this project.

When you make this project you can select any color pallet that you like. You can try to mix different pallets to get a different look each time with the same technique. If you make this project head over to my Facebook page and post a picture so we can all be inspired! While you are there be sure to turn on the notifications to see the LIVE Facebook videos. There is a new video almost every weekday at 2:30pm EST.

Supplies:

We already talked about the beads needed for this tassel necklace but there are a few other items you will need to finish the project.

You can find wire and chain for this project on Beadalon’s website. If you need a bail making plies to complete the project you can pick up the bail making plier with your Jesse James Beads order or you can see the full selection of jewelry making pilers on Beadalon’s website.


How to open and close jump rings-for DIY jewelry

Here is a quick project to show you the ins and outs of using a jump ring.

This post is brought to you by Beadalon–thanks Beadalon for sponsoring my blog posts and supporting my love of DIY jewelry.Jump Ring Assortment

One of the very first things I show people how to do when making jewelry is how to open and close a jump ring.  It’s such a simple act and you can make so many things by knowing this technique for making connections in DIY jewelry.  That’s how I made this sweet moth necklace.
Moth Pendants connected with jump ringsThe jump rings at the tip of the wings connect the moth to the chain.  In about 5 minutes, you can have yourself an over the head layering necklace (and a really good time).  Check out the tutorial and video at the end of this post for details on opening and closing a jump ring.
Opening jump ring with pliersIt’s helpful to use two pairs of chain nose pliers (see materials list at the end of this post) when opening and closing rings.  Some people like to use a bent chain nose pliers to help hold their jump ring as well. Beadalon also has a super helpful jump ring tool to make opening jump rings much easier. You will still use your pliers to close the ring when you are finished.

Place the ring’s opening at “12 o’clock” and twist the ring open with the two pairs of pliers.  Don’t open it so the ring looks like a “C” because it’s super hard to get the ring to go back into a perfect circle after this.
Twist open of jump ringConnect your clasp, chain, moth, etc… and twist the jump ring closed.

This is a super quick project with beautiful results. You can use any pendant that has two holes as the top to complete this project, let your imagination take over.

Supply List:

Beadalon Ergo Pliers

Beadalon Jump Rings

Jesse James Bead’s Moth Pendant

LIVE from Beadalon-Wire Wrapped Cabochon Pendants with Wyatt White

This post sponsored by Beadalon.  All opinions are my own.  Thanks Beadalon for supporting mine and many others love of DIY jewelry.Wire Wrapping BailsIs anyone else intrigued with pendants like these?

They just. don’t. stop.

Wire turning and twisting, up then down and around and ta daaaa–you’ve got a pendant.

Yesterday on the live show, I had Wyatt White from Beadalon show the basics of making wire wrapped cabochon pendants.  He actually shows how to make the wrapped crystal on the right using a Swarovski faceted flat back.

According to Wyatt, you can set lots of things with this technique.  He’s a wizard and if you’re curious about wire wrapping and setting cabs, definitely watch this video.  He has designed special banding pliers from Beadalon that make the wrapping process really easy.  So many comments were expressing excitement about these pliers.  We like easy around here so thanks Wyatt!Beadalon Wire Wrapping Giveaway

Materials:

Wire Wrapping Component & Stone Setting Booklet, by Wyatt White

Double Band Banding Pliers

Single Band Banding Pliers

Practice Wire Kit

Candie Cooper and Wyatt WhiteWatch the replay of the live video for how to make amazing pendants like these.  And join us daily on my Facebook page at 2:30 EST for fun daily doses of DIY jewelry and mixed media techniques.


Scenic Drive Stone Slab Necklace

Full Disclosure:  I work with Beadalon and LeatherCord USA.  They are sponsoring this post.  All opinions are mine.
Stone Slab Necklace PendantThis stone slab pendant (here me sigh a sigh of aw).

One of the women in this week’s Facebook Live video said it was picture Jasper.  I believe it because each one is a landscape painting, a forrest, the painted dessert or whatever you see ….
Stone Slab Necklace Flat Wire ConnectionI wire wrapped leather lace with Beadalon’s flat Artistic Wire.  So easy!  Simply make your leather link, then wrap the middle with the flat wire, crimping it with chain nose pliers in between each wrap to cinch it.
Stone Slab Necklace Pendant DetailLittle knots give the ends of the leather a finished look.
Stone Slab Necklace Pendant connection

Materials list:

Beadalon flat artistic wire, 3mm width

Leathercord USA deertan lacing, 1/8″ width

Picture jasper pendant:  etsy.com/shop/candiecooper

Watch the live video recap here and join me almost daily at 2:30 EST for the Candie Cooper Facebook Live Show featuring easy DIY jewelry making ideas.

Fringe Benefits: DIY Tassels

This post brought to you by Beadalon–Makers of great findings and DIY jewelry supplies.  Thanks Beadalon for the sponsor love!IMG_1057Tassels are still having their moment.

Everywhere.

I ain’t mad about it either.  I love flair.IMG_0986You can make your own tassels super easy with Beadalon’s tassel maker and some of that embroidery floss you were gonna use for that cross stitch project.  For a tip-I like suctioning the tool to the top of a plastic bead storage box.IMG_0985This is the tassel maker.  You can adjust the mandrels and make a ton of different sized tassels.  In this tutorial, I’m showing how to make tassel charms.  You can also loop a wire through and make a wrapped loop if you want to add a bead cap over the top of the tassel (see bracelets above).IMG_0984Either way, I like to tie off the top of the tassel so it is bound.  You can use a contrasting thread color too.IMG_0982Loosen the mandrels and slide the bundle off.  I tied mine at both ends so I could get two tassels for the work of one.IMG_0981Cut the bundle in the middle to create the two tassels.IMG_0979You can leave them like this or….IMG_0988Comb them out with a fork to make them nice and fluffy.  You can also wrap wire around the tie or add seed beads.IMG_1052Get the tassel maker tool from Beadalon.com.IMG_0978IMG_1053You just never know where a quick little project like this will take you…All you have to do is start.