Just For Fun-Rose Opal Earrings

DIY Earrings from @candiecooperYesterday the rain hammered down on the roof.  I did a bit of housecleaning, picked up some nice things to eat for dinner and then surrendered to the couch.  Oprah’s channel was having a “Where Are They Now” marathon.  I’d never seen it, but watch one episode and you’re hooked.  Seven hours later….  LOL  There were lots of other things I could’ve, should’ve been working on, but instead I just spaced out.  I think I was in need of some couch potato time after working the last two weekends.

I feel better.

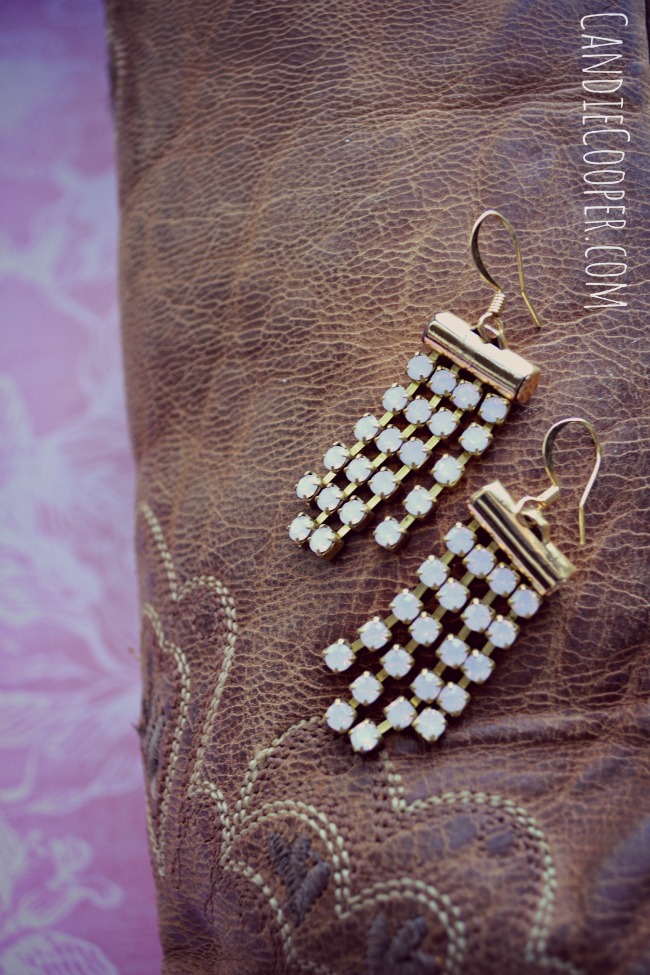
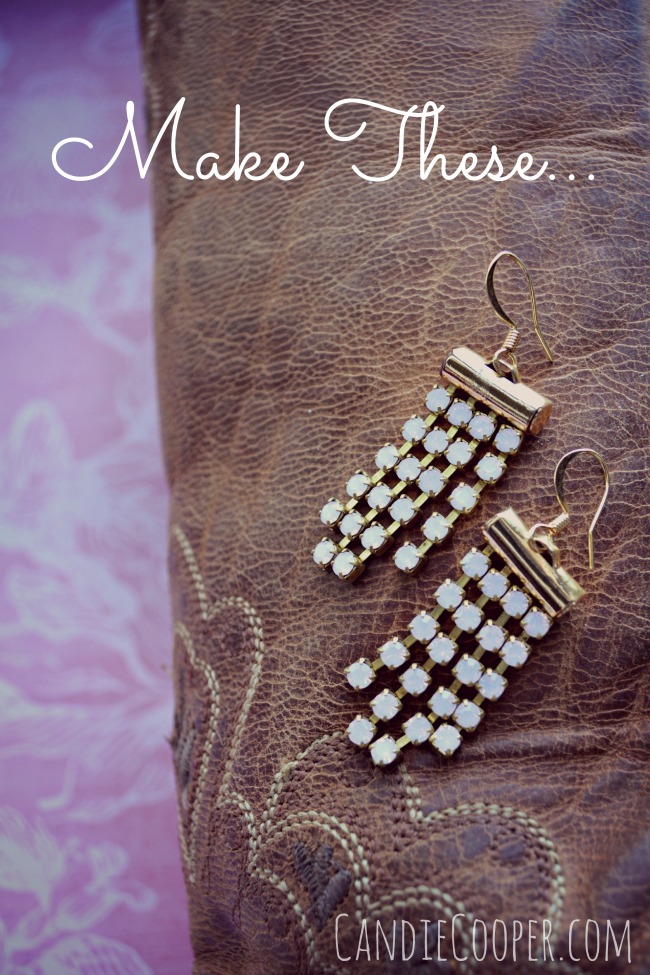
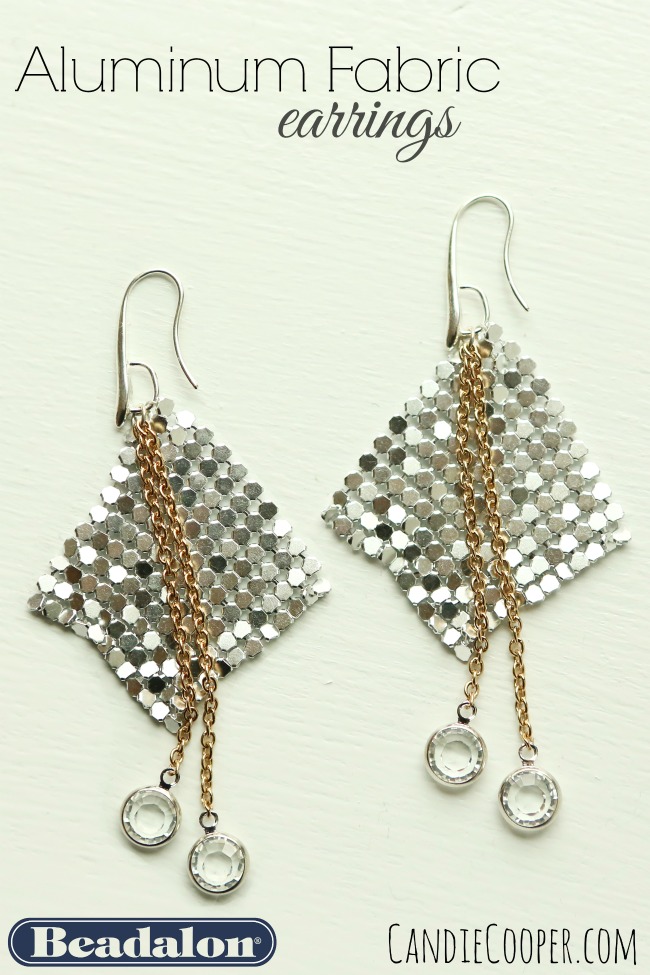
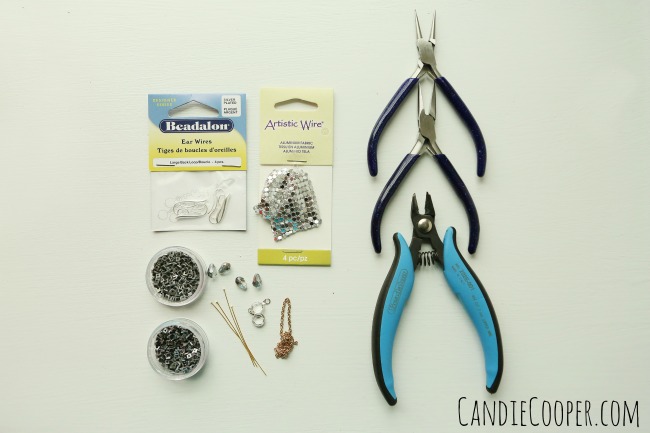
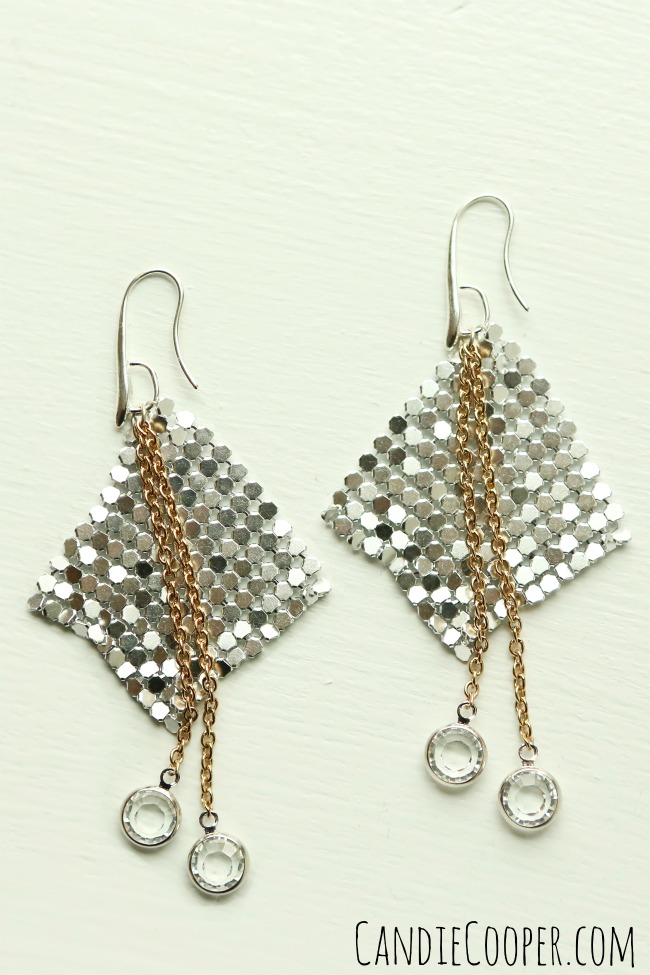
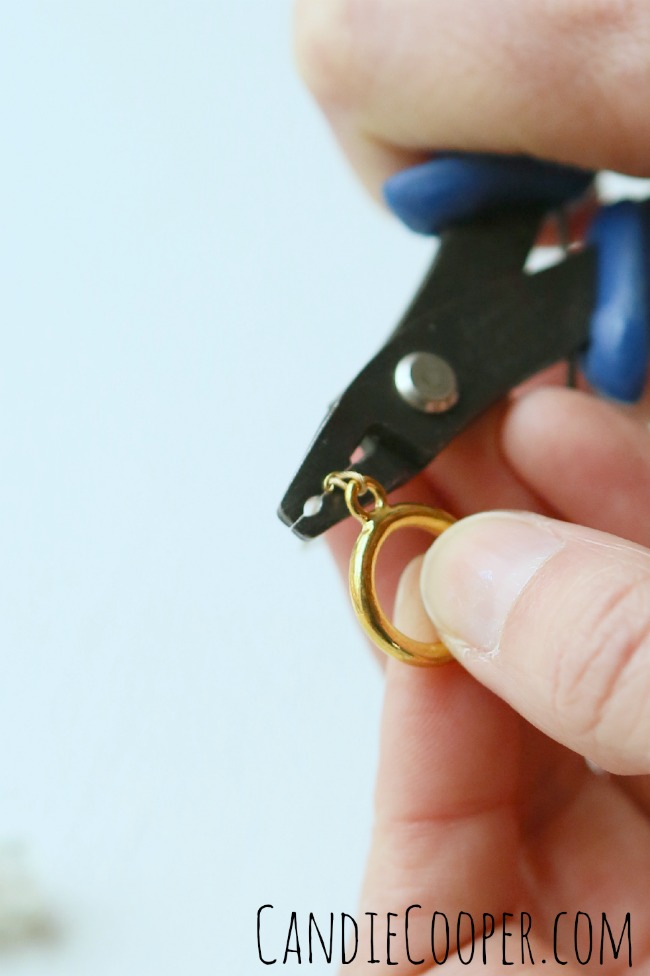
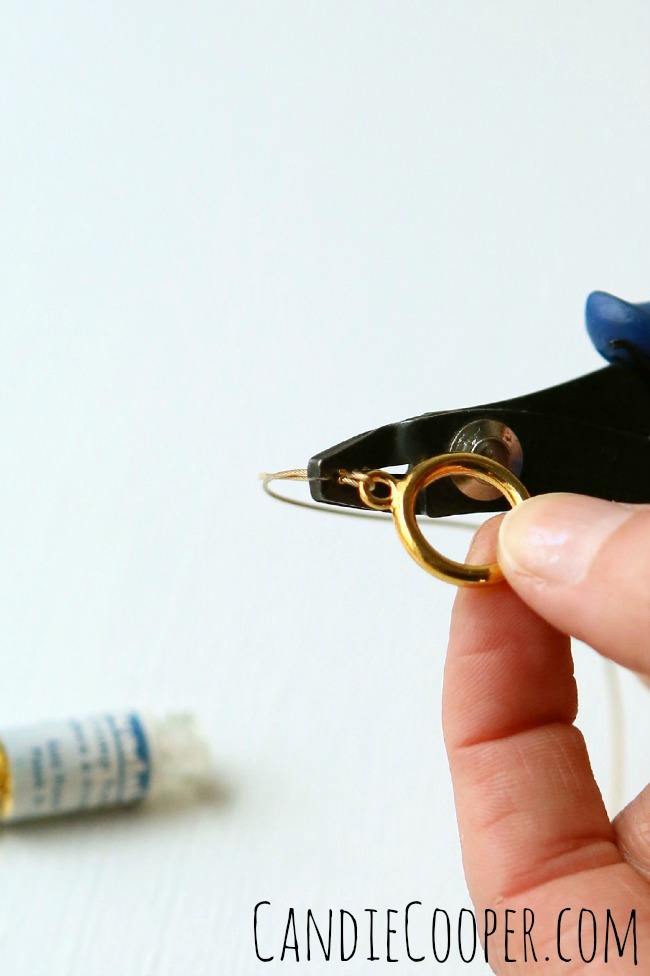
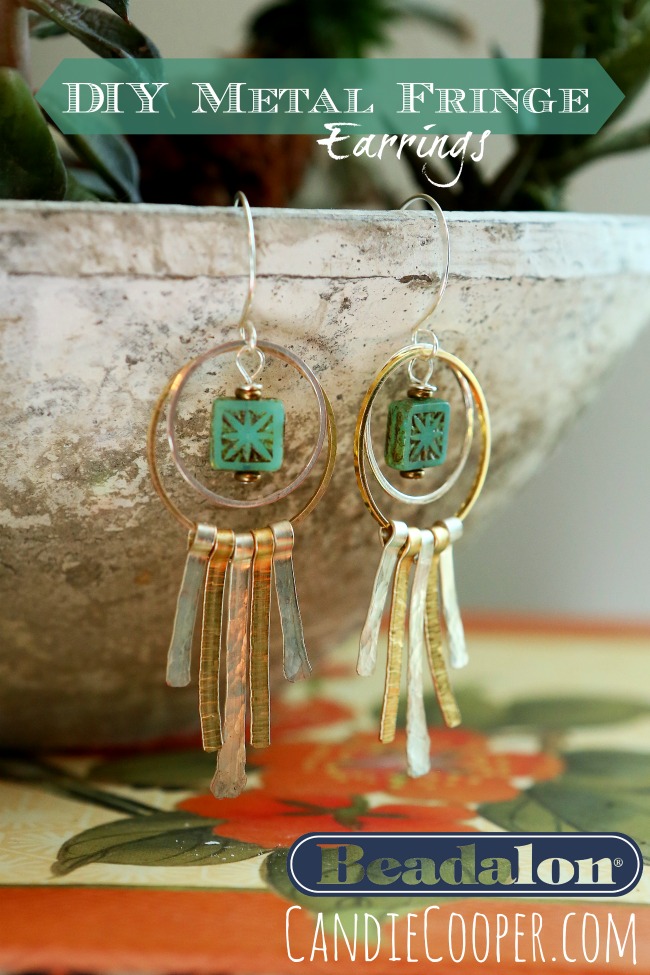
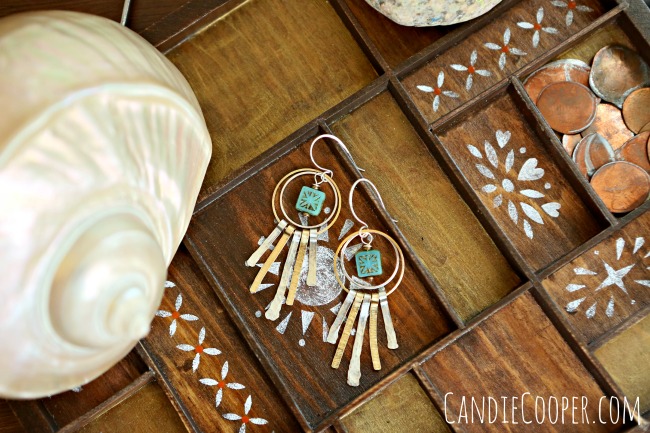
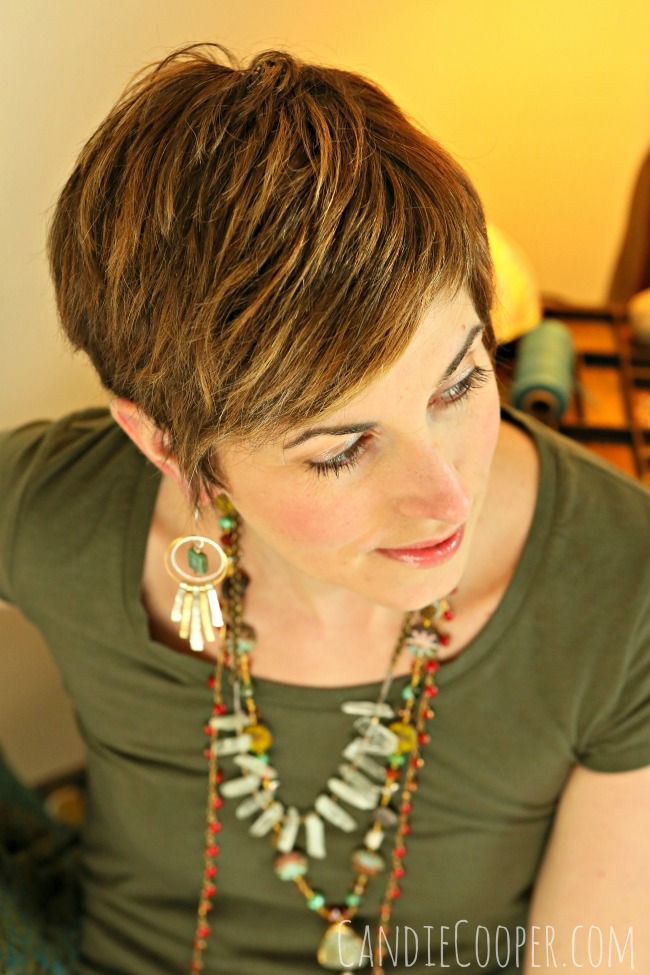
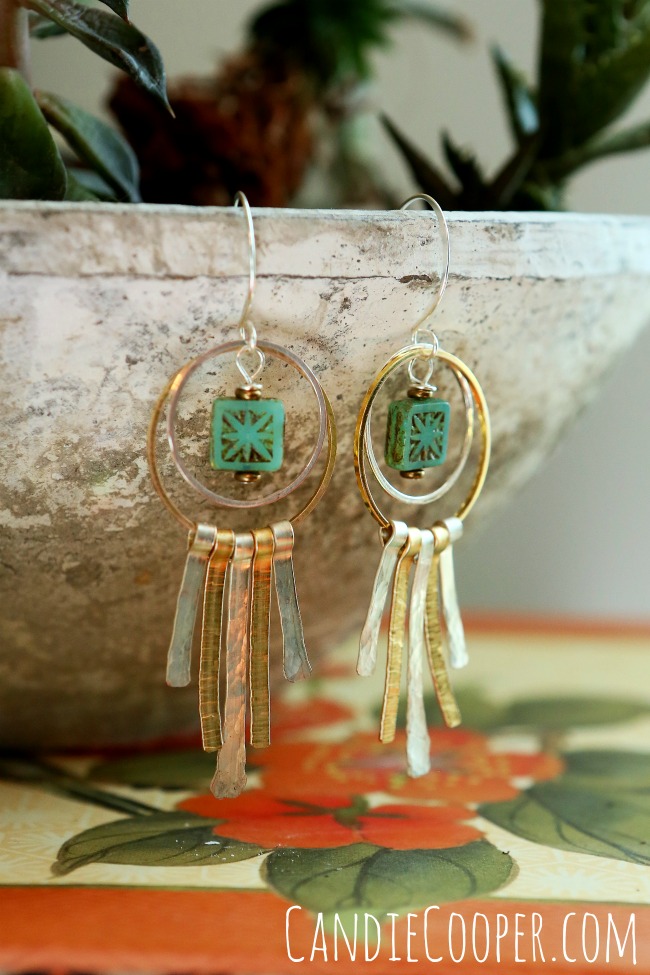
Now about these earrings…  Remember those sparkle statement bracelets I made awhile back?  I made some earrings with the same findings.   SO EASY!  You can whip them up in 5 minutes.  Great for DIY brides and party goers.  This is especially on my brain because I’m off to a bridal shower at noon.DIY Rose Opal Earrings

DIY Sparkle Earrings from @candiecooper
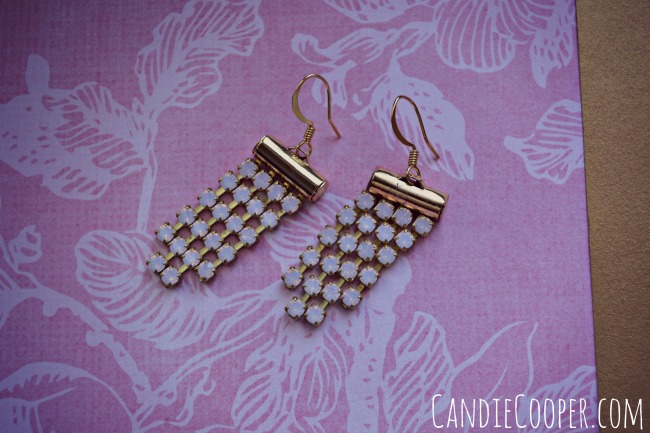
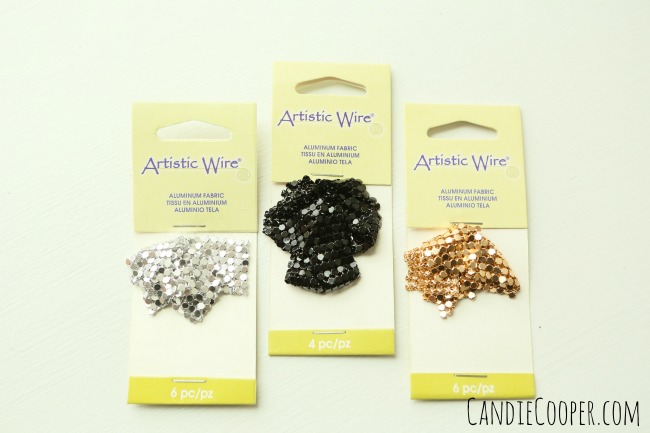
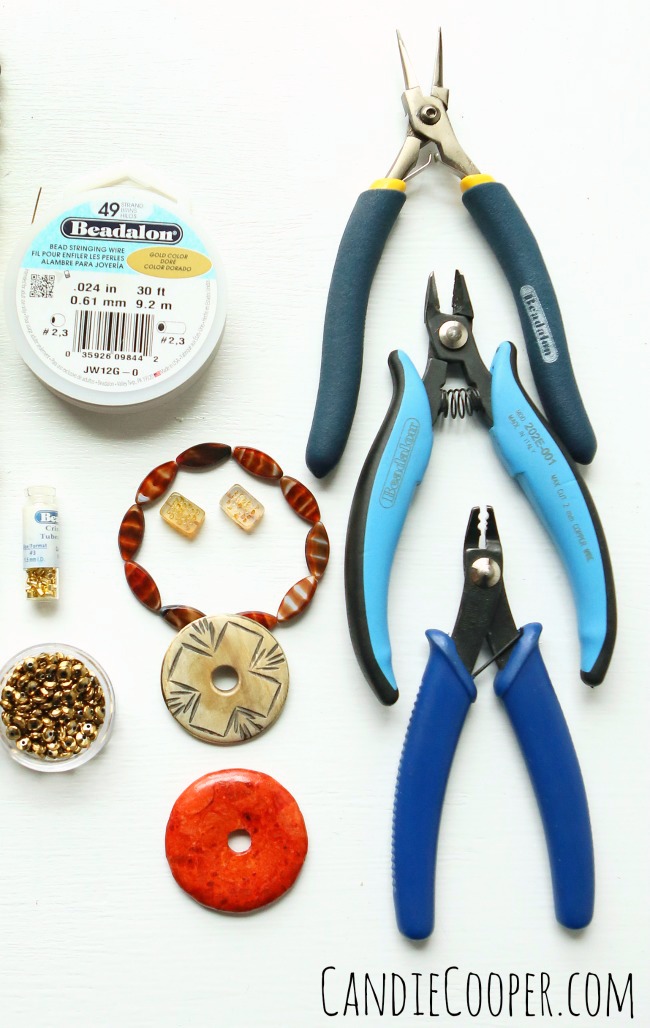
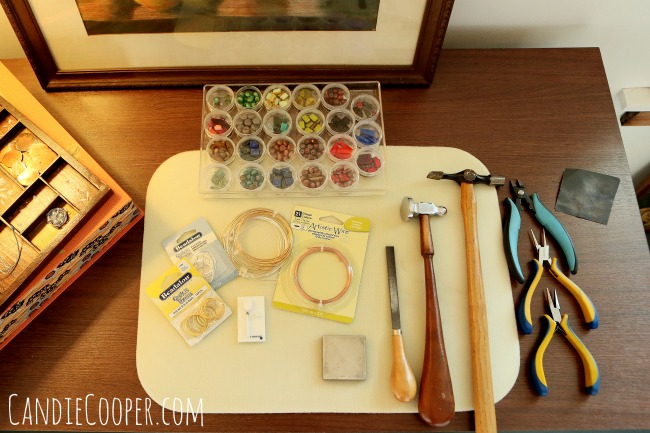
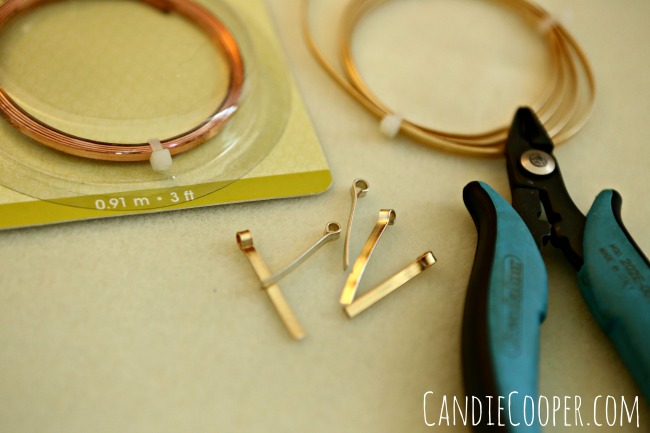
Materials from Jesse James Beads:

TUTORIAL

Rose Opal Chain

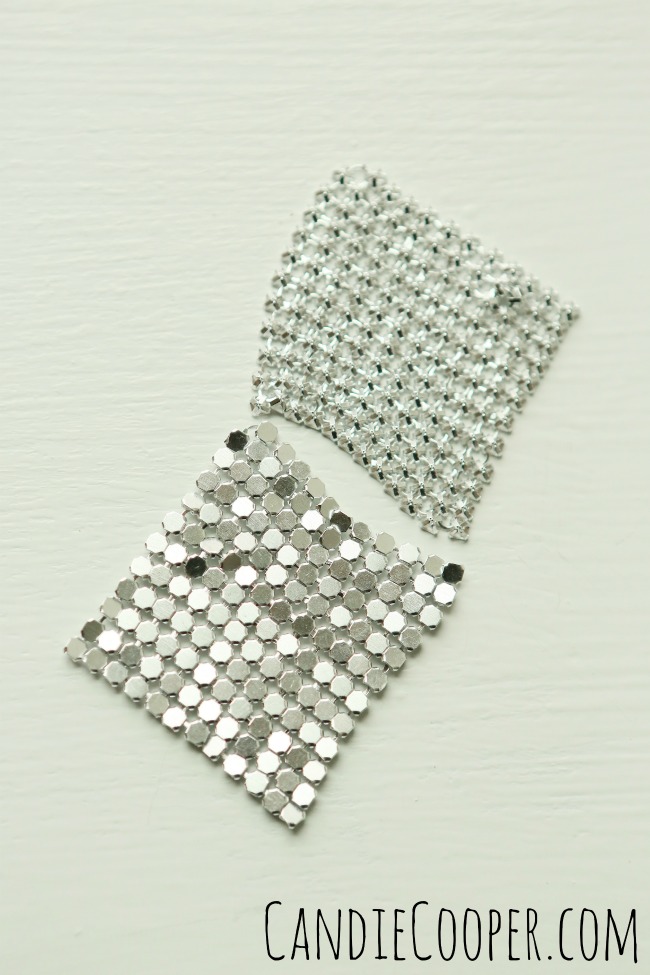
1 set 13mm Slide Connectors

Ear Wires

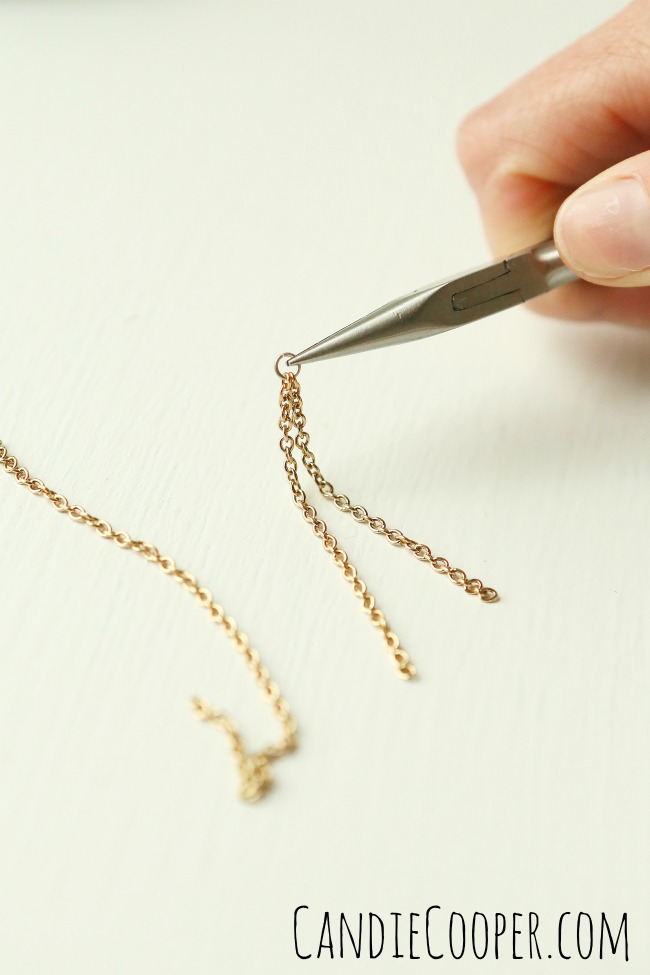
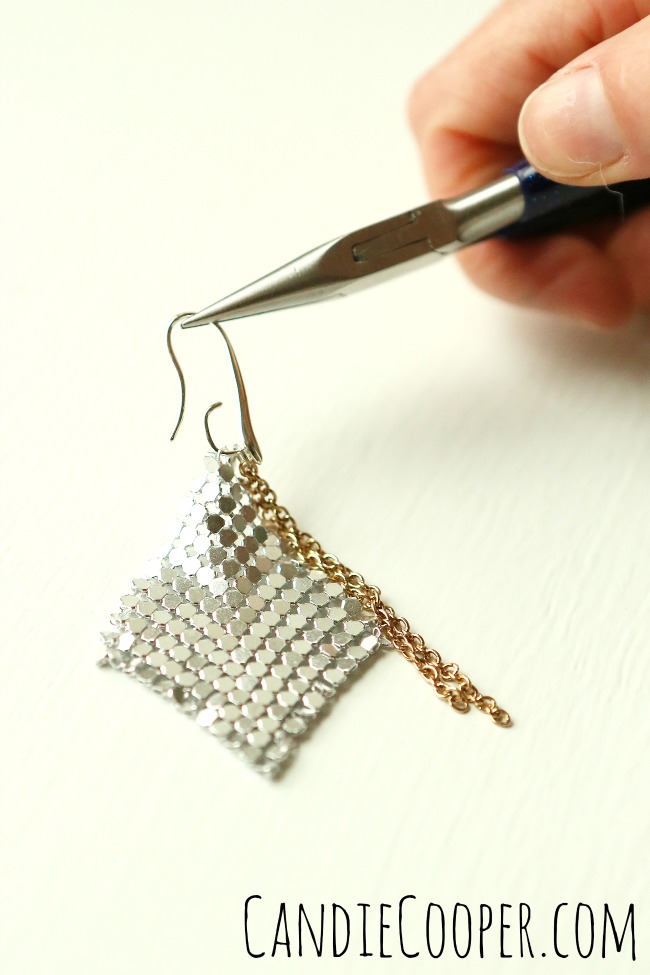
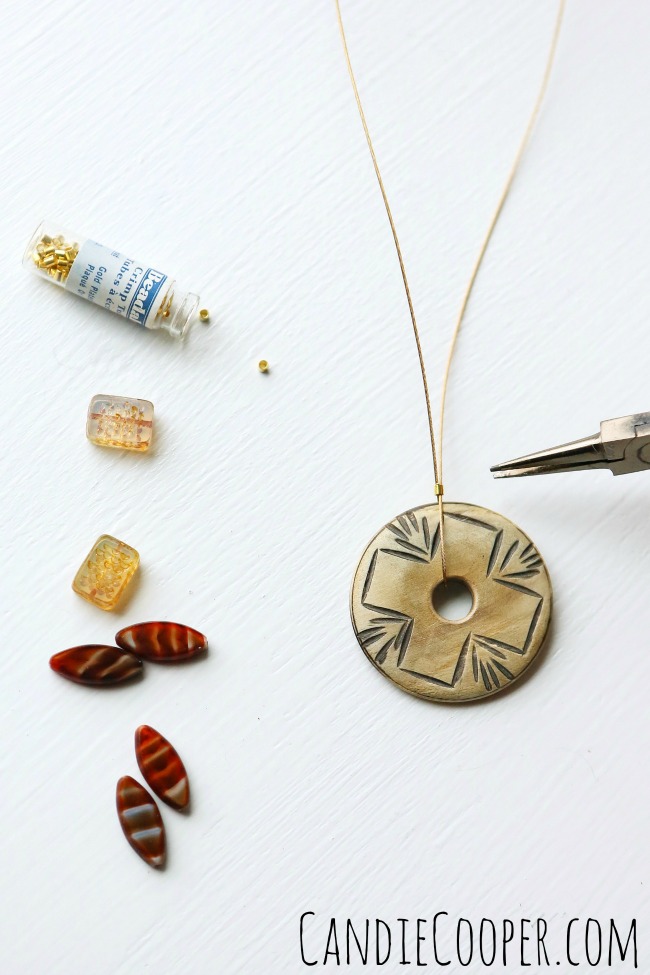
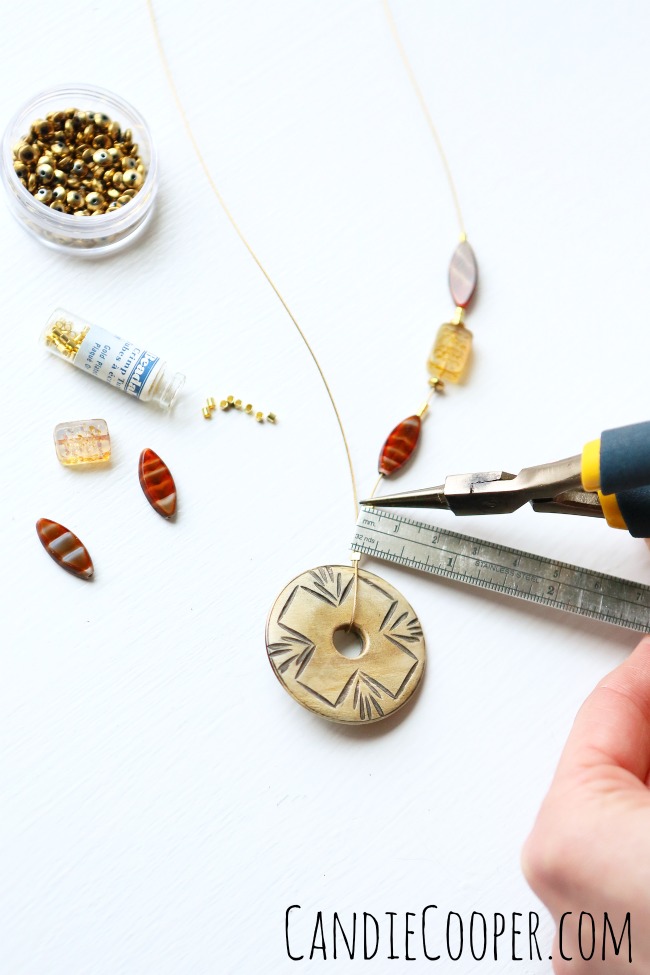
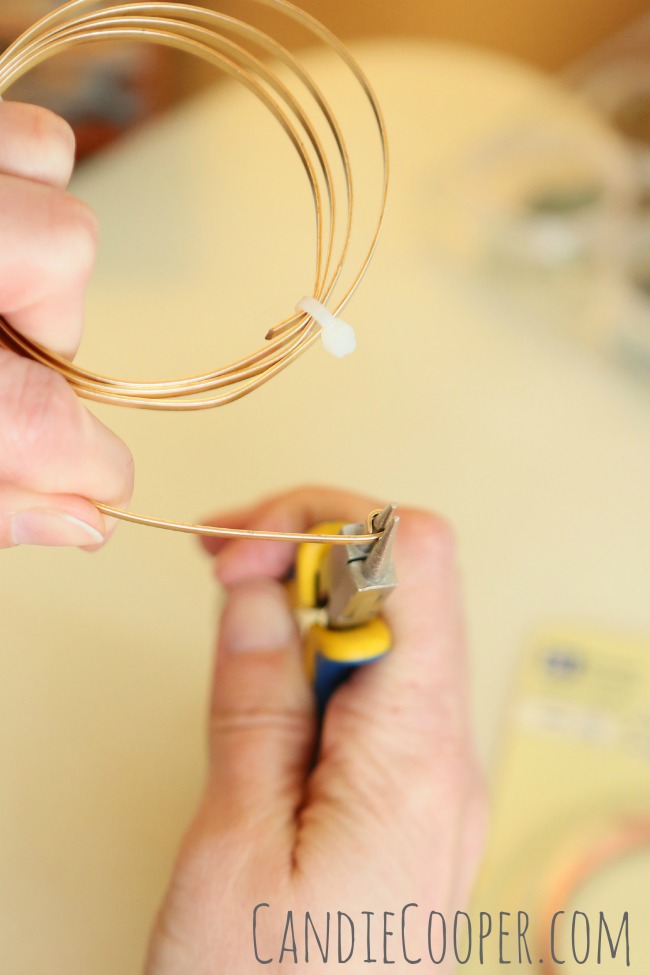
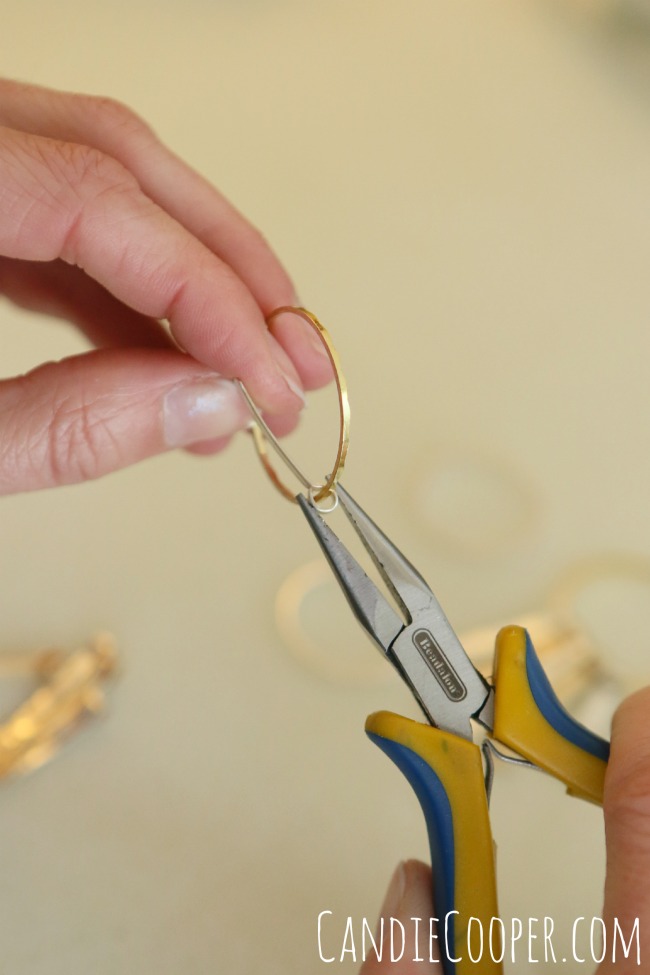
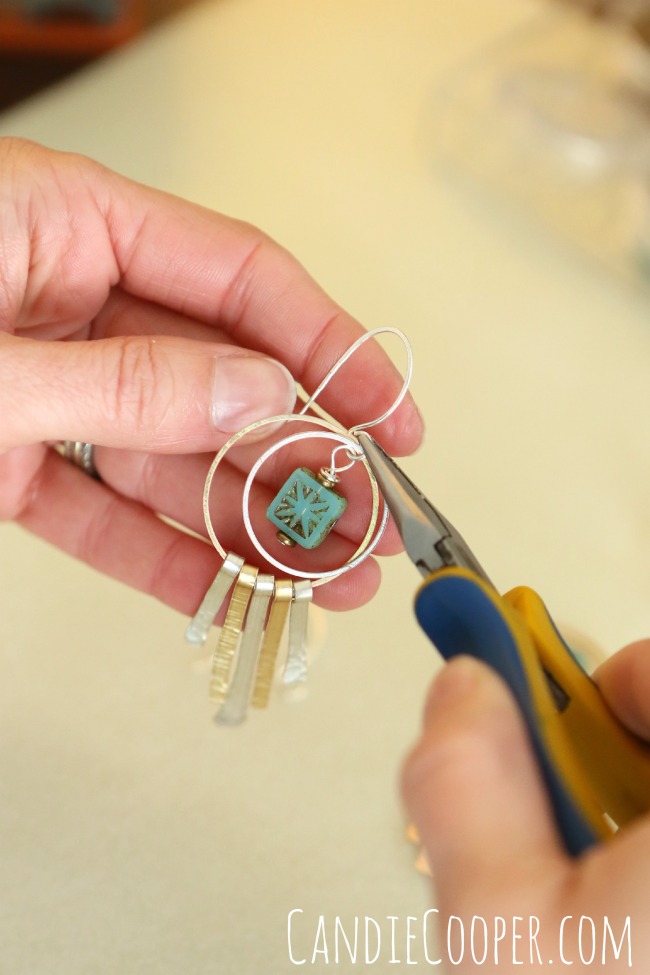
Check out the tutorial bove.  For the earrings, remove the clasp findings from the slide connectors.  Slide in chain and trim to desired length.  Open the ear wire and string the focal piece.

How to Make Tassels

This post brought to you by Beadalon!Beadalon Break 2015-a week full of DIY Jewelry Making  tutorialsI spent the last day of Spring Beadalon Break at Bead Fest in Oaks, PA!

Guess what?  Beadalon was there too!

Meredity Roddy of Beadalon with Candie CooperSo I got an up close look at their new Tassel Making Tool!  This thing is great for jewelry makers and crafters.

I put Madeline Roddy on the spot and asked her to walk me through tassel making basics with the tool.  It was super easy! Watch and see…Beadalon Tassel MakerSuction the tool to your work surface.  I think we all have a bead box (or 75 laying around) that we can stick this thing too like Meredith did.Tassel Maker from BeadalonWind the desired amount of cord (check out this twinkle thread from Beadalon) around the two mandrels.  You can change the distance to make shorter fringed tassels (or make them long and custom cut the length).  When you have enough cord wound, thread a short piece of cord through the wound threads and tie off next to the mandrel.

Cut the bottom cords open next to the mandrel.How to make tasselsNow you can hook the tied piece to an eye pin and thread it through a bead cone to give it a nice finished look.  This bead cone was made with the ConeTastic.Tassel Jewelry Idea with Beadalon's Tassel MakerCheck out this fancy pants tassel piece I spotted in the Beadalon booth.  So pretty with the metallic thread!

Here is a video of the Tassel Maker from Beadalon so you can see it fully in action!

Beadalon Bracelet Jig Idea

Beadalon Break 2015-a week full of DIY Jewelry Making  tutorialsDayyyyyyy FIVE of Spring Beadalon Break!

I have been helping with set up of the Jesse James Beads booth at Bead Fest Spring since 9AM today.  Where does the time go??  I will be teaching 10 classes at this Bead Fest.

No pressure.

(yeah right!)

It’s pouring right now–a good day for ducks, as my dad  says!

And to test drive the new Beadalon Bracelet Jig!

Beadalon Bracelet Jig Project from Candie CooperI’m doing this post in two parts.  For the first part, you’ll need the Beadalon Bracelet Jig, basic plier set plus some bead strands.Using Artistic Wire with the Bracelet JigString the beads onto 18g. Artistic Wire. Wire Working in Jewelry MakingNext, wrap your wire around the first peg on the jig, slide the bead(s) into place, put a peg in next to them and wrap the wire around it.

Beadalon Bracelet JigKeep going, adding a peg and wrapping after each flower for a total of 3 (but you could use more!).

Stay tuned to see how I use my Bracelet Jig focal piece.

In the meantime check out some of the bracelets below made by Meredith Roddy and Wyatt White at Beadalon!

Candie <3

P.S. In love with those rose beads?  Get your own from JesseJamesBeads.com!DIY Bangle Bracelet Making with Beadalon Bracelet Jig

DIY Bracelet Making

Bangle Bracelet made with Beadalon Bracelet Jig

Aluminum Fabric Earrings

This post brought to you by Beadalon!Beadalon Break 2015-a week full of DIY Jewelry Making  tutorialsDay 4, Party People!

And that calls for some earrings that are ready to party!  Or go to work.  I like them for both!Aluminum Fabric EarringsOh hey gold and silver.  It’s Candie calling.  Wanna hang?

Sorry,

for the pun.

This girl can’t help herself!
Earring making with Beadalon findings

These earrings are super simple (it is hump day after all) to make.  I used two pieces of Beadalon Aluminum Fabric, Swarovski crystal charms,  a few inches of chain and some cool ear wires from Beadalon.Artistic Wire Aluminum Fabric From BeadalonAluminum Fabric comes in 3 different metal colors as well as sizes.  I’m using the squares.  It is super flexible and really does drape and fold like fabric.

On another note, you’ve probably noticed gold is trending right now and I think you’ll love the warm tone of the gold Aluminum Fabric.  Aluminum Fabric by BeadalonI was looking at this Aluminum Fabric and noticed the back side (on right) is just as cool as the front.  It could be extra nice embedded in resin jewelry or with tiny flat back crystals .Attaching chains with a jump ringCut a couple pieces of chain so they are offset and attach to a tiny jump ring.Aluminum MeshRemove the corner piece of Aluminum Fabric, leaving only a ring where it will hang from.
Easy Earring idea with Beadalon Aluminum Fabric and Swarovski CrystalsHang the pieces of chain and aluminum fabric onto the ear wire.  I love these ear wires because the connection point is hidden. so it gives a really nice finished look.

Also, look how many things you could hang on the loop?!  The wheels are turning…  Stack em’ up!Easy and Sparkly Earring Idea on Candie Cooper's Blog

Aluminum Fabric EarringsI’m ready to hit the dance floor! Who’s with me??

Easy Necklace Making

This post brought to you by Beadalon!Beadalon Break 2015-a week full of DIY Jewelry Making  tutorialsDay 3 of Spring Beadalon Break and I wanna here a heck yeah if you love easy jewelry making!

Picture me “raising the roof”…from Candie Cooper's DIY Jewelry Making Blog
Or playing a tambourine?

Don’t ask.

But, I know you’re curious…


My mom and I share a creative space in which she has a small music studio and sometimes when she’s not there, I use her instruments as props.  That’s all.

Ok, let’s get to it!
Easy Necklace Making IdeaRecently Beadalon sent a spool of their .024 diameter 49 strand gold beading wire for me to try out and let me tell you—I’m in LOVE!  It’s so thick and glorious.  It looks amazing all by itself!Beadalon .024 Diameter Nylon Coated  Beading WireIt comes in different colors too!

Can I get another heck yeah?Beadalon tools and wireIt only takes a few ingredients to make this simple necklace.  Other than the .024 Beadalon wire, the key item is a donut pendant.  Do you have a pile laying around like me?  Let’s use em’ up!  You’ll also want some #3 crimp tubes for the thicker wire, your basic jewelry making tools set, some beads and a clasp.How to Make a modern illusion style necklaceString the donut bead onto the heavy wire and determine how long you want your necklace.  Trim the end from the spool and slide a crimp bead over both ends of the wire.

Flat crimp the crimp tube with chain nose pliers by smooshing the crimp bead.

Smoosh it.  Smoosh it good.DIY Jewelry Making flat crimping illusion necklaceString the beads onto one side of the wire and separate each bead with two crimp beads.  Use a tool of some sort to help create equal distance between each crimp bead–I’m using a tiny ruler.

Flat crimp again.DIY Jewelry Making Modern Illusion NecklaceThen slide your first bead against the crimp bead.  Crimp the next tube so it keeps the bead in place along the wire.DIY Jewelry Making Illusion style necklace Use your measuring tool again and flat crimp the next crimp tube.Easy Necklace Making Idea from Candie Cooper with Beadalon Wire

Repeat, completing  both sides of the wire.How to Crimp Part 1To finish the ends with a toggle clasp, we will use the traditional crimping method.  Slide a crimp tube onto the beading wire followed by one half of the clasp.  Thread the tail of the wire back through the crimp bead, snugging the tube up against the clasp, but not so much that your clasp cannot move freely.How to crimp Part 23Put the crimp tube in the “U” shape opening on the crimping pliers and crimp.How to crimp Part 33Turn the crimp tube 90 degrees and place in the outside opening to roll the crimp bead into a tight C or shut.DIY Jewelry Making with thick beading wire from BeadalonI created this necklace to match this unique chain.  49 strand .024 diameter gold Beadalon wireHere’s another version with a handmade glass donut bead.  With a focal piece like this, it’s nice to highlight the beauty of it with minimal stringing work around it. from Candie Cooper's DIY Jewelry Making Blog

How to Make Easy Ear Wires

This post brought to you by Beadalon!Beadalon Break 2015-a week full of DIY Jewelry Making  tutorialsAnd here we are on Day two of Spring Beadalon Break!

Let me cut to the chase:

My name is Candie Cooper….Candie Cooper, jewelry artist and authorand I am absolutely obsessed with fringe (and jean jackets, but that’s a story for another day).

Have been for awhile, but lately with the fashions it’s gotten extra bad.

So, in this post I’m going to get you to come on over to the dark side and show you how to make fringed metal earrings with Beadalon Artistic Wire as well as how to make easy ear wires with their new Artistic Wire Findings Forms.

Shake it if you got it!

Let’s go!Metal Fringed Earrings from Candie Cooper with Beadalon productsThese earrings go together so fast and you can make the metal fringe as loooong as you like because we are actually using a coil of flat Artistic Wire.How to Make Ear Wires with Beadalon productsMaterials list from Left to Right:  Beadalon Quick Links in gold and silver colors (25mm and 20mm diameter),  20g. silver plated Artistic Wire, Artistic Wire Ear Wire jig, Flat Artistic wire in gold and silver, steel bench block, file, chasing hammer, riveting hammer, Ergo jewelry making plier set, sand paper and a few beads and head pins.Artistic Wire earringsLet’s jump into making the fringe.  Make a loop at the end of the flat wire with round nose pliers.  Trim to the desired length. Flat Artistic Wire You’ll need five pieces per earring so you can decide what colors and lengths you like.  The wire cuts easily with regular wire cutters.Making metal jewelry with Beadalon's Artistic WireFile the corners on the bottom for obvious reasons.Texturing metal with a chasing hammerHammer time!  Hammer the wire pieces on a steel block with the chasing hammer to create dimples on the surface of the metal.  I like to hit the ends extra so it flares them a bit.DIY Metalworking with Beadalon's Artistic WireThis is traditionally used as a riveting hammer.  They make special hammers shaped like this for texturing too if you really get into this.

Now I want to show you how to make easy ear wires!How to Make Consistent Ear Wires with an Artistic Wire jig from BeadalonThis handy dandy Findings Forms jig from Beadalon makes DIY ear wires a breeze.  This one is especially cool because it makes long legged ear wires so you can change the ear wire to suit your design.  For this project, I just need some good ol’ fashioned French ear wires with a slightly larger loop than traditional ear wires have.DIY Jewelry Making How to make ear wiresOnce you’ve wrapped the 20g. wire around, trim the back and pull the ear wire from the jig.DIY Jewelry Making  Making Ear Wires with an Artistic Wire jigLike I mentioned earlier, because of this long leg, you could also add a bead or do an easy wrapped loop closure.  Trim the front…How to make ear wires with 20g. wireand roll it back to create a large loop.  To add some extra strength to the ear wire, hammer the top arched part on a steel block to harden the wire.Making Earrings with Metal Fringe and Quik Links from BeadalonNext open up all the fringe pieces and connect them to the large Quick Link.Making Coachella Inspired Fringed EarringsI created a little Czech bead dangle to hang with my layered hoops.  A little color never hurt anybody!

How to make earrings from Candie Cooper with Beadalon Artistic WireDone and done!

Candie Cooper JewelryTwo metal color jewelry makes me HAPPY!

DIY Coachella Inspired Earrings from Candie Cooper

CandieCooper.comNow go on with your bad self!

I’ll see you tomorrow with another tutorial!


How To Make Macrame’ Bracelets

This post brought to you by Beadalon.Beadalon Break 2015-a week full of DIY Jewelry Making  tutorialsThe Spring Beadalon Break 2015 parTAY has officially started, people!  All this week you’ll find fun tutorials on my blog with Beadalon products.  I’m really excited about it.  First up:  Macrame Bracelets!Jewlery Making DIY Macrame Bracelet TutorialMacrame’ hemp jewelry will always have a special place in my heart because I made a ton of it when I was in high school–very early in my jewelry making career.  Picture me thrifting for chunky glass beads, tying the cords to my toe and knotting my heart out.  Cue Dave Matthews band.

Those were the days. (snaps back into reality)

These days, I’m loving the texture that hemp adds to my bracelet stack.  Macrame tying station tool and beading supplies from BeadalonAnd thanks to Beadalon, my not-so-flexible self doesn’t have to secure the cords to my toe, because they made a cool Tying Station.

For this bracelet you will need:  the Tying Station, 19 strand beading wire .018 diameter, hemp cord, clasp, crimp beads and beads (I’m using Czech).  AND some wire cutters!Beadalon's tying station
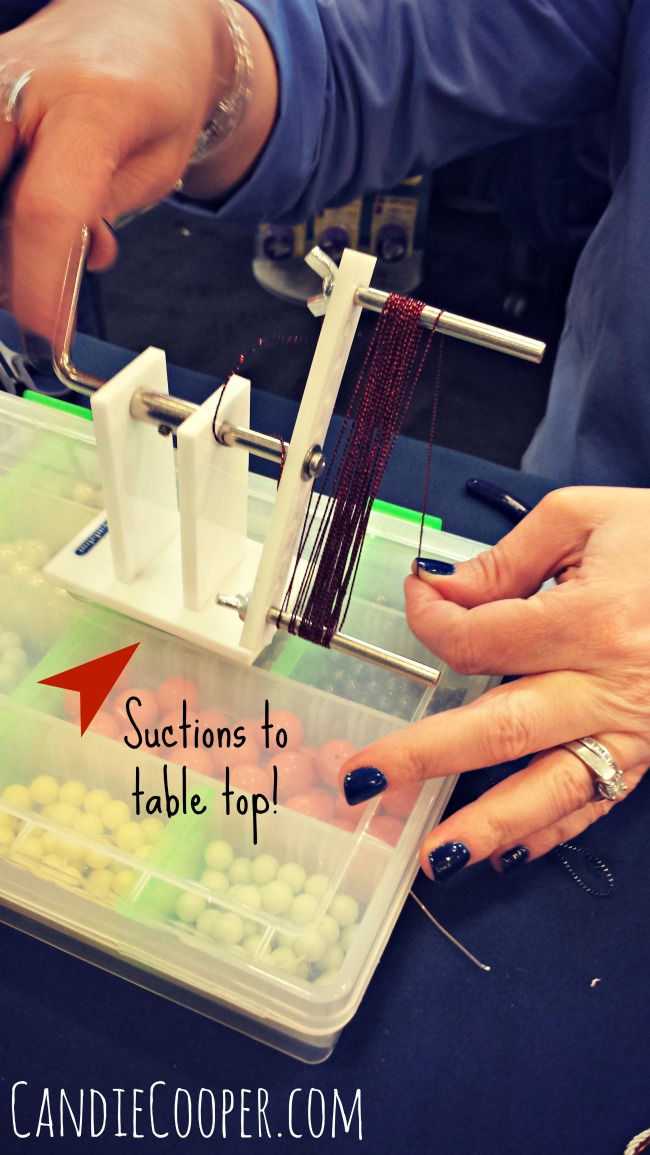
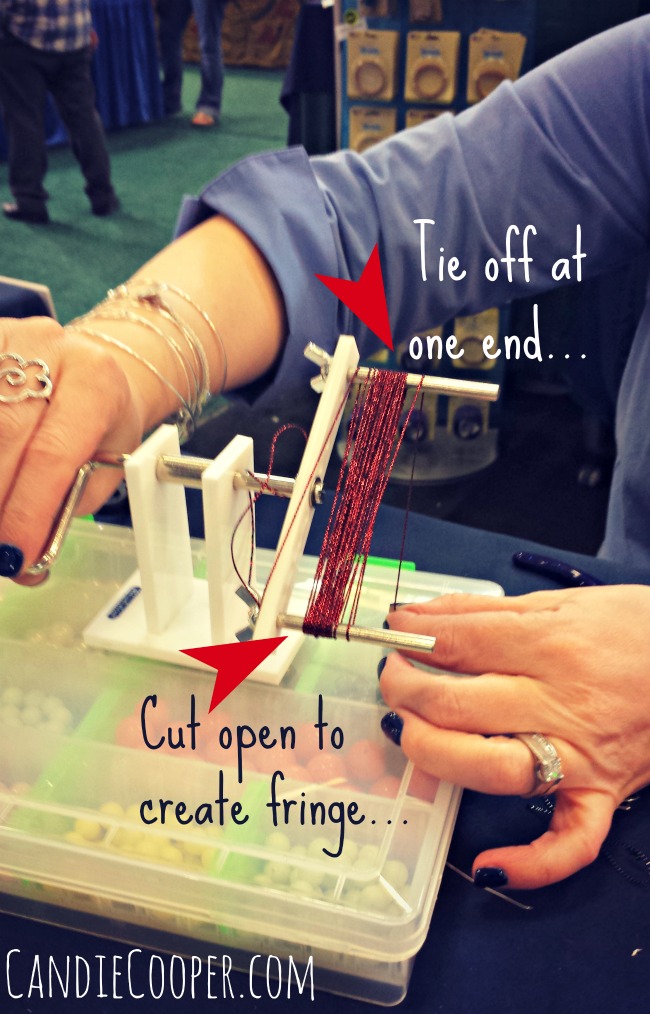
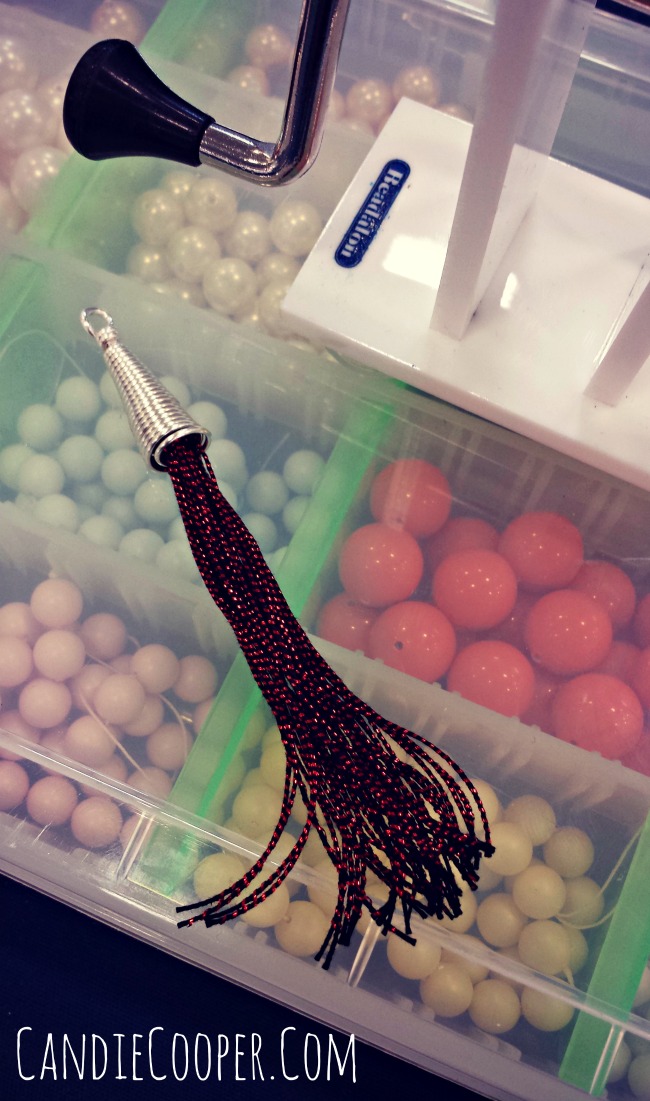
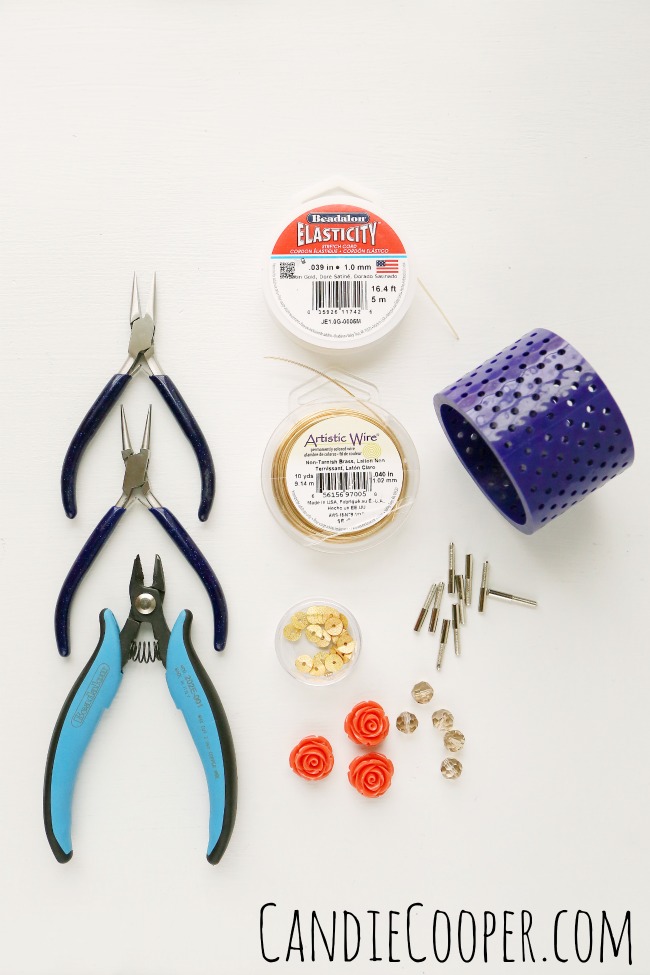
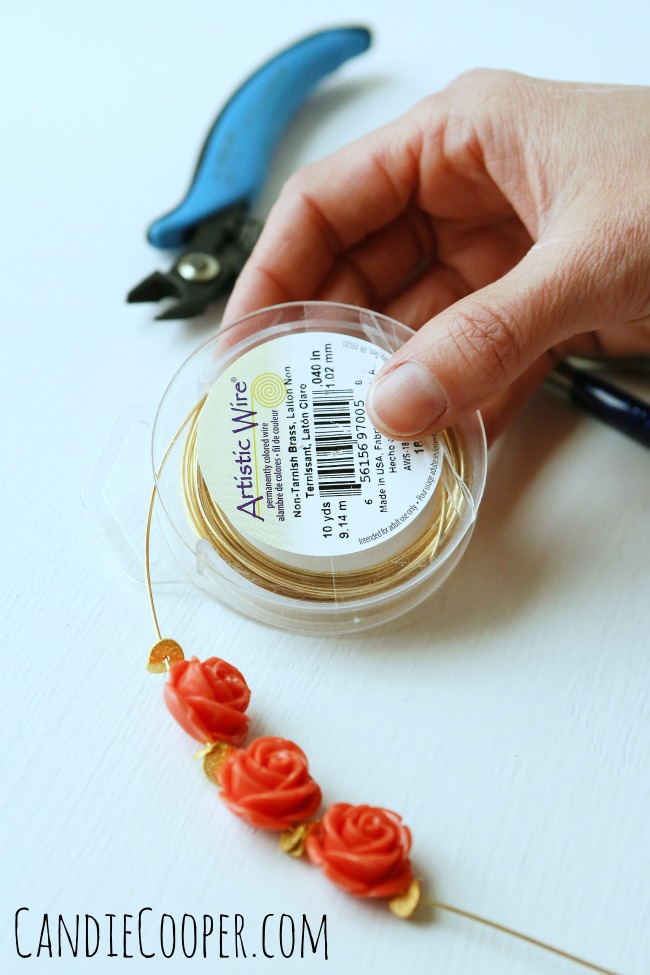
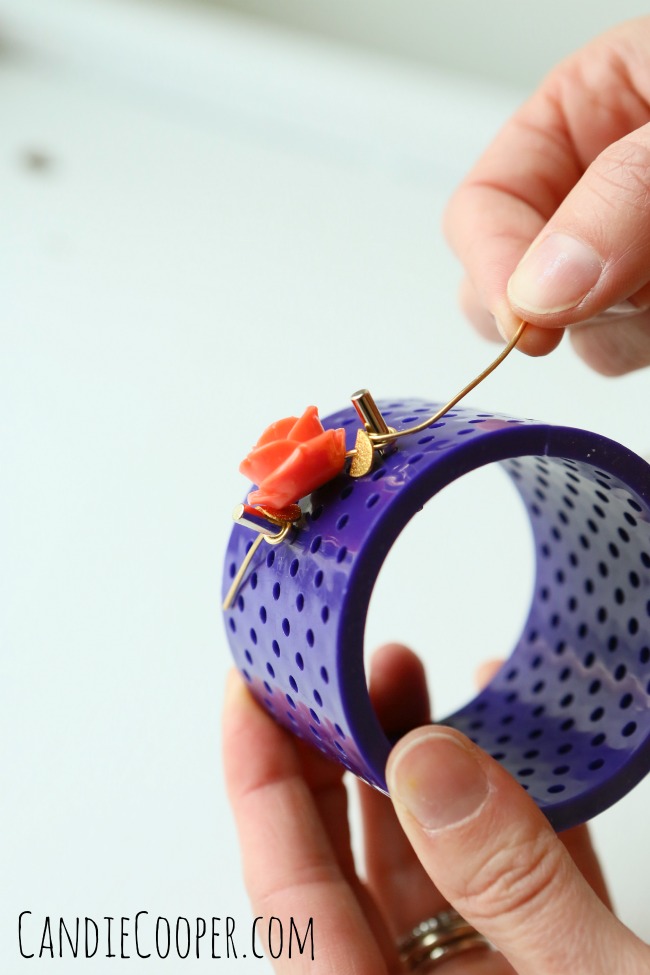
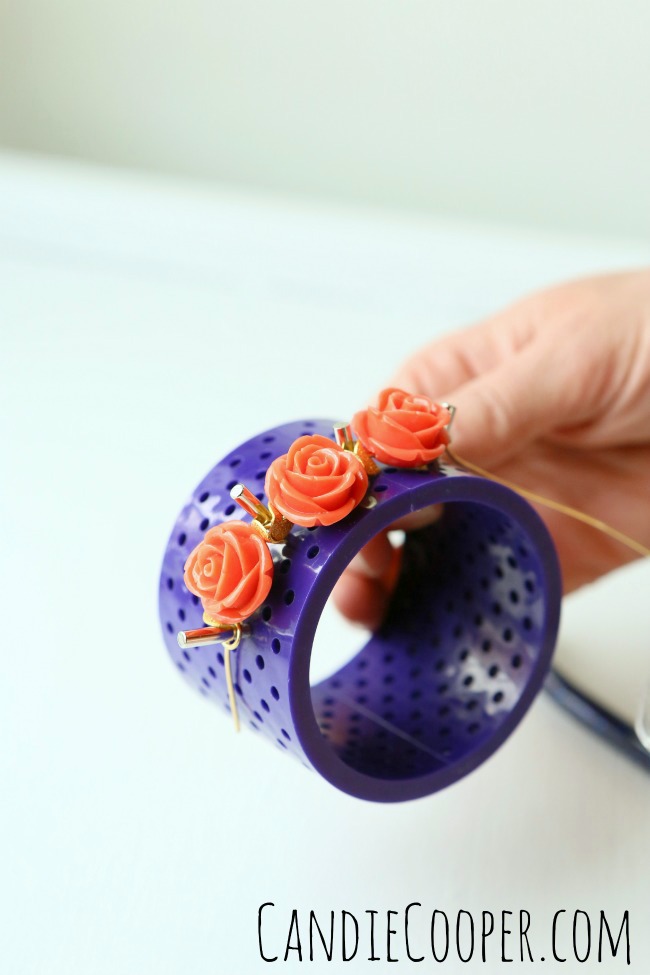
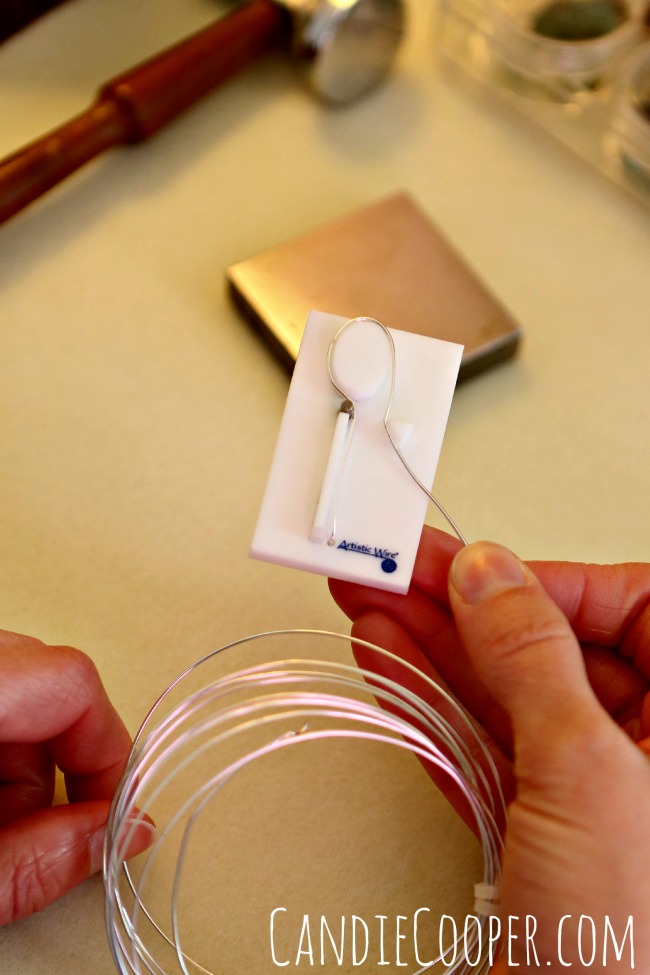
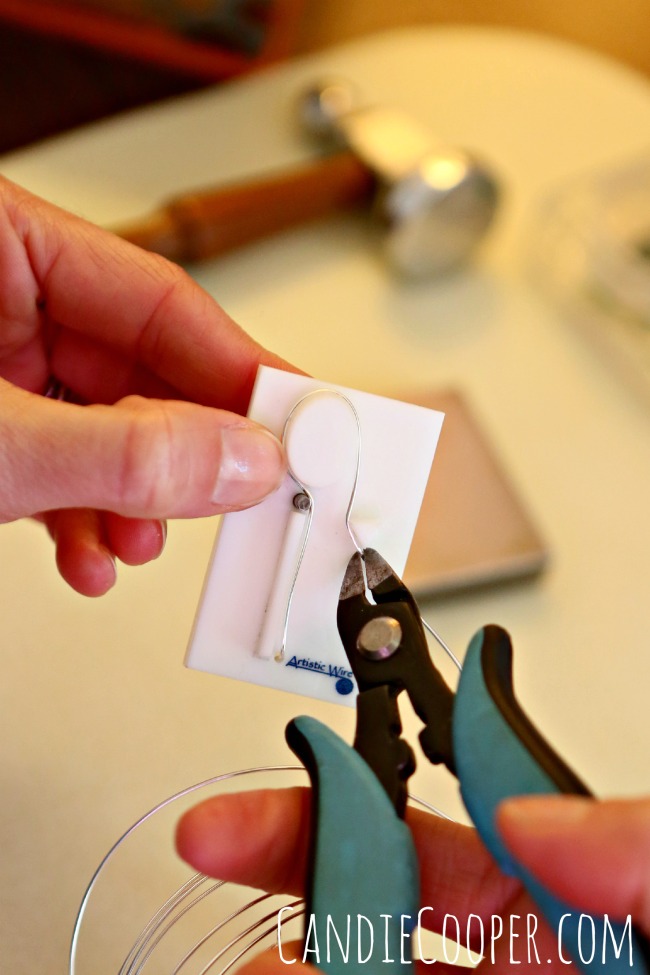
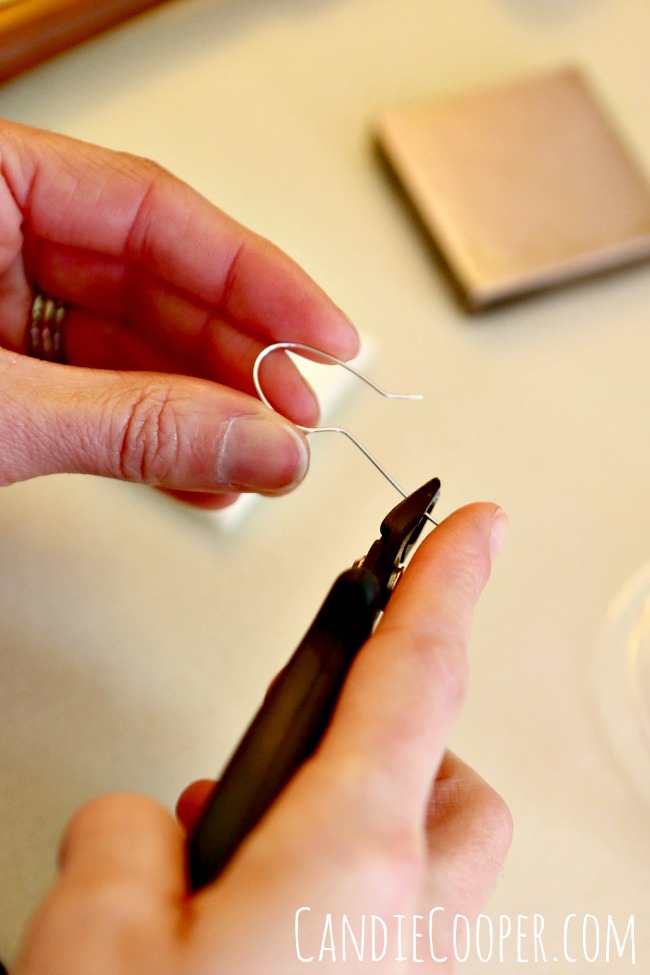
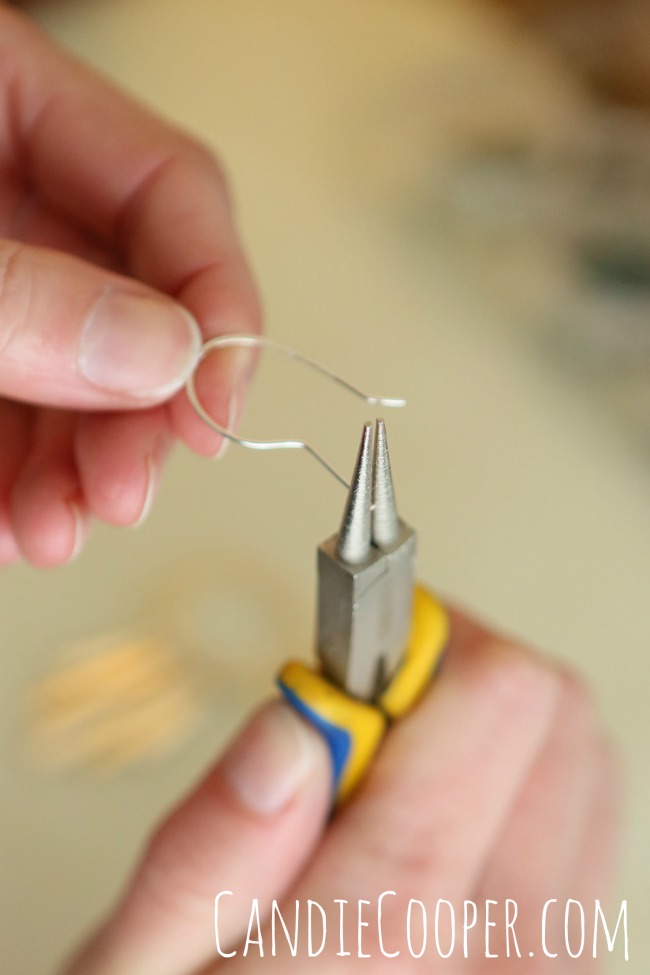
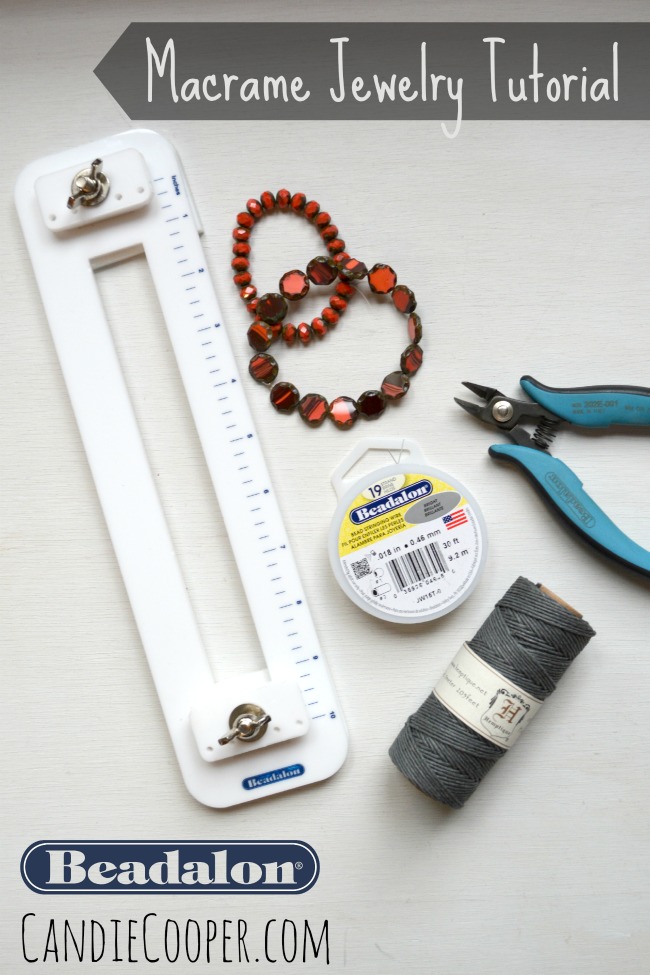
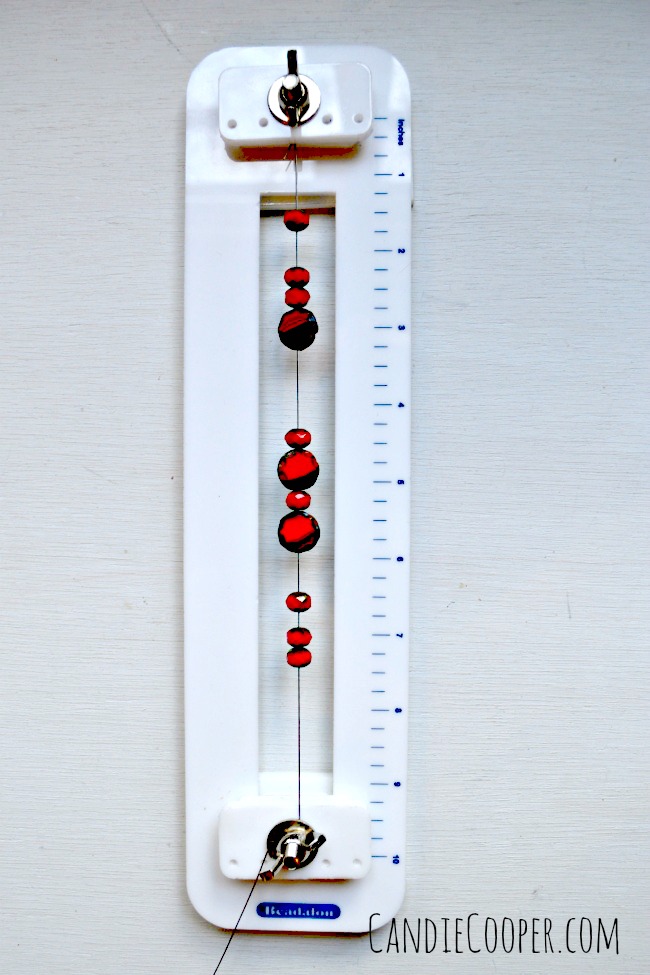
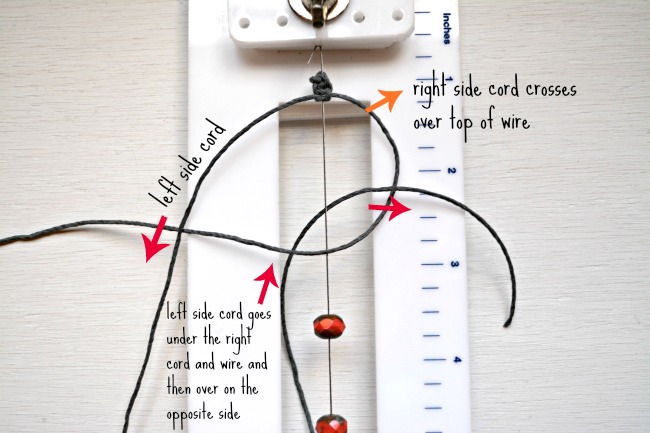
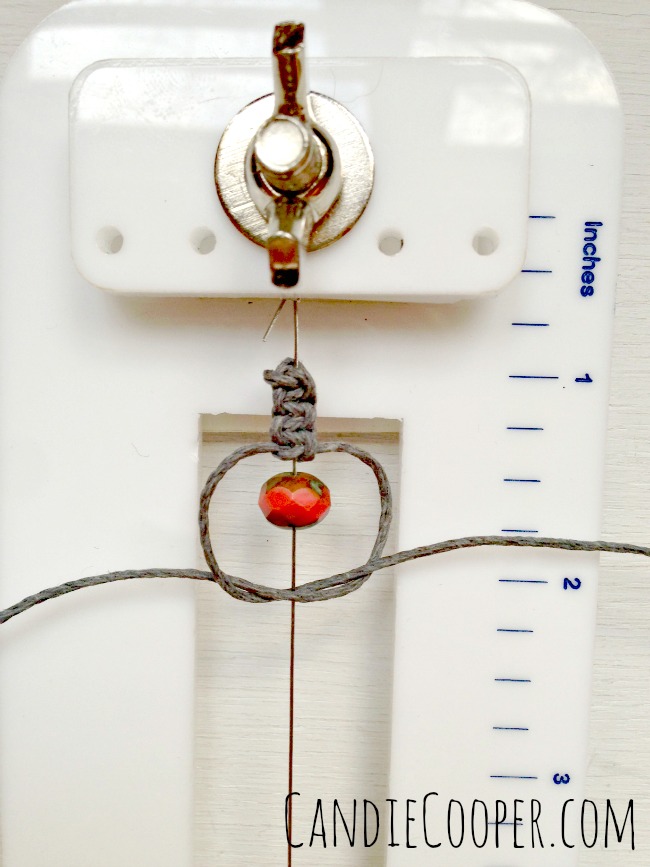
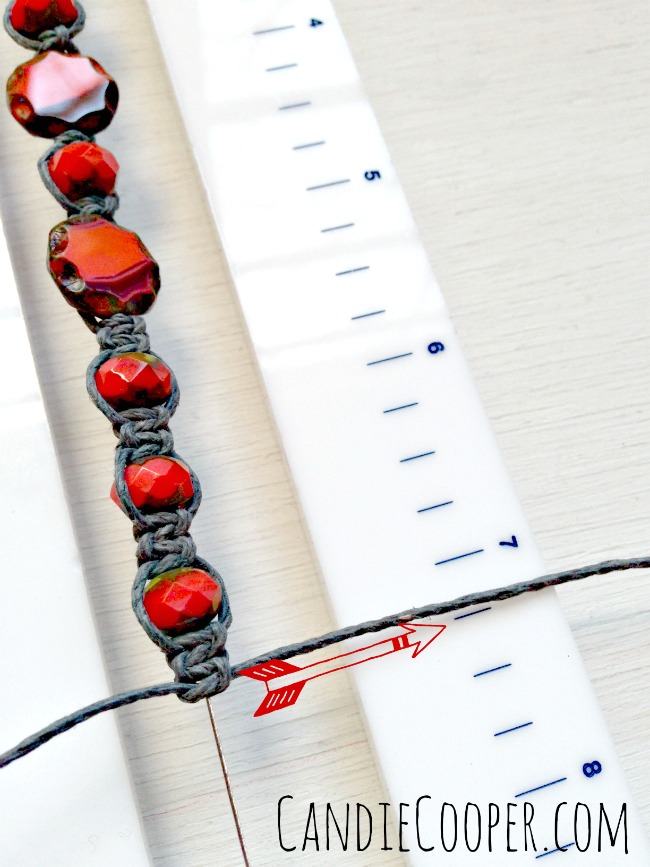
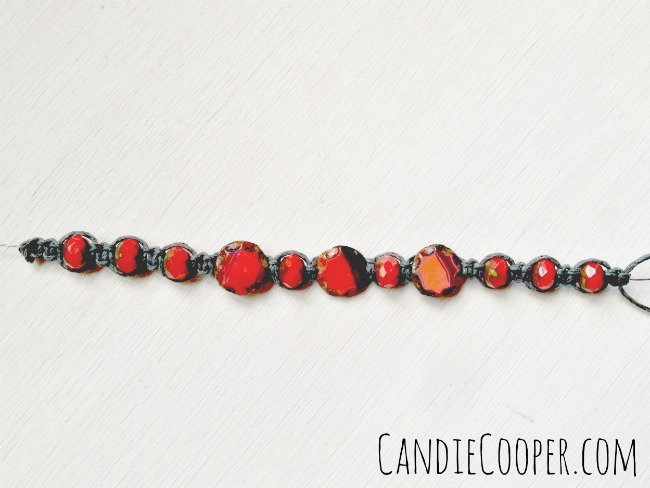
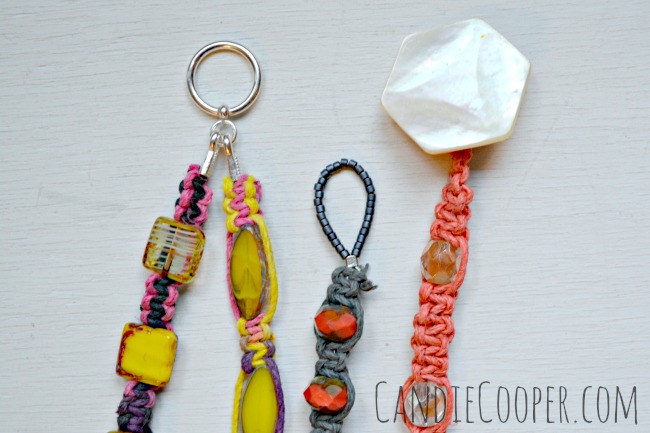
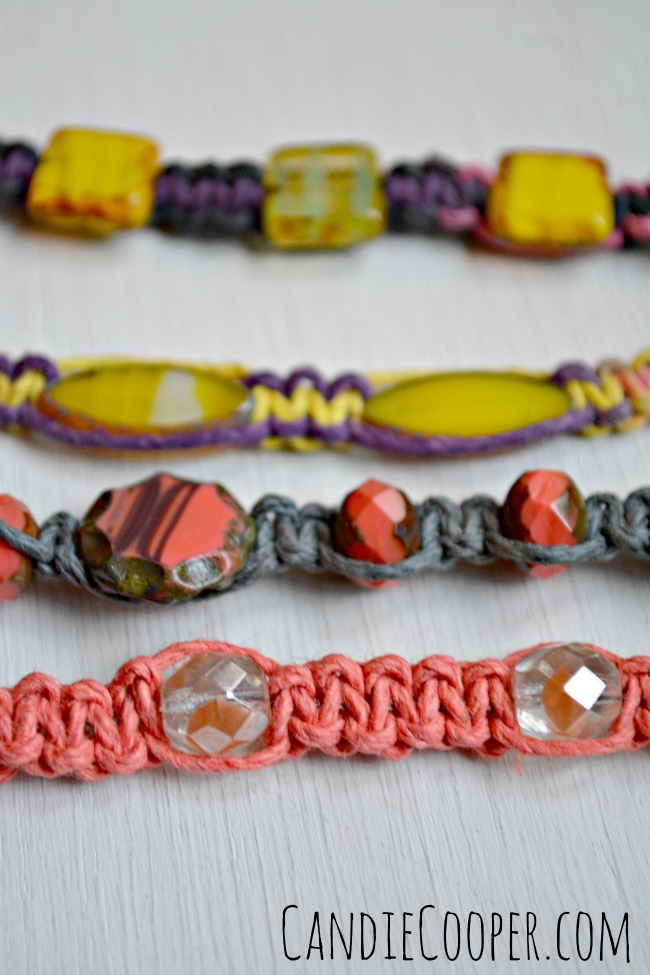
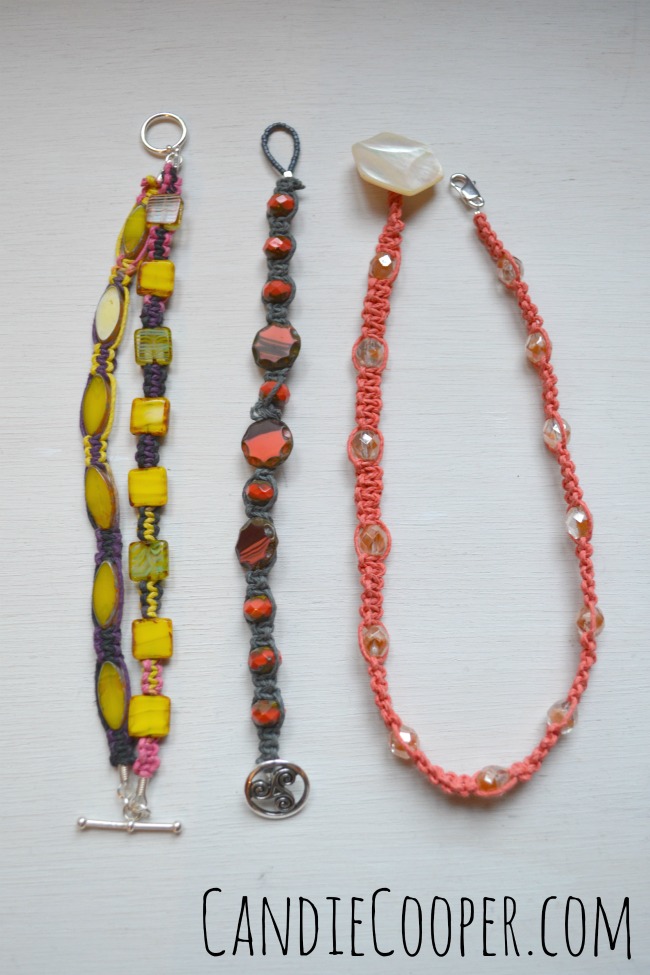
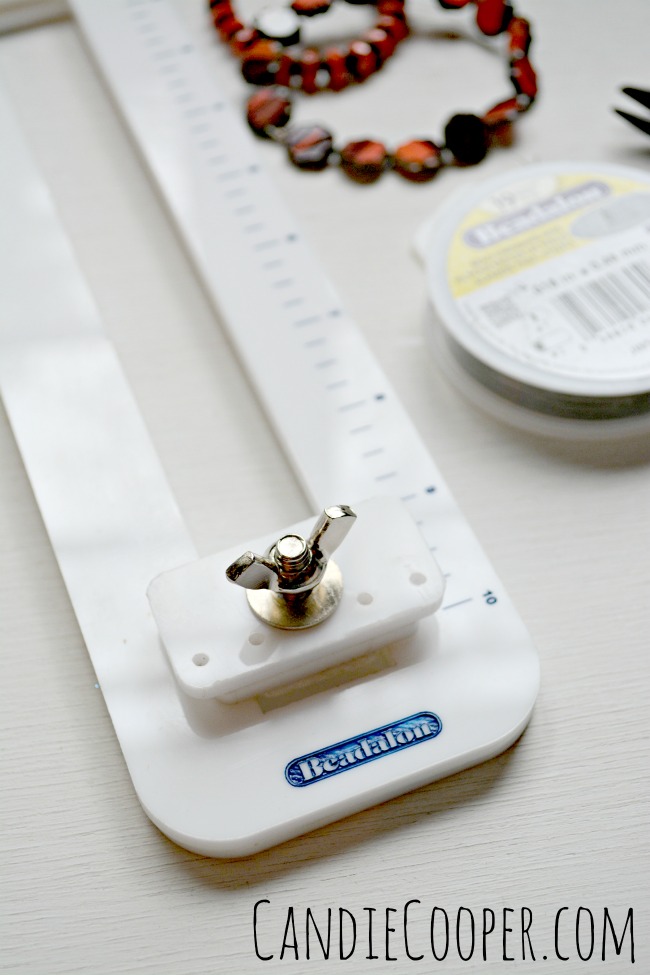
I really love the Tying Station because you can make hemp jewelry without having large holed beads (oh and that I don’t have to sit like a pretzel for hours while I knot).  Here’s how:
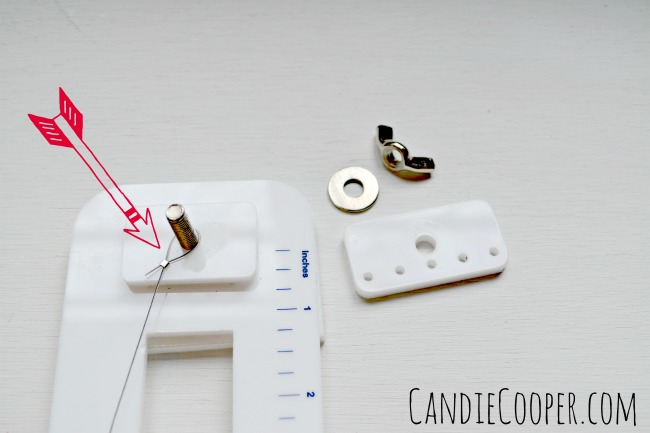
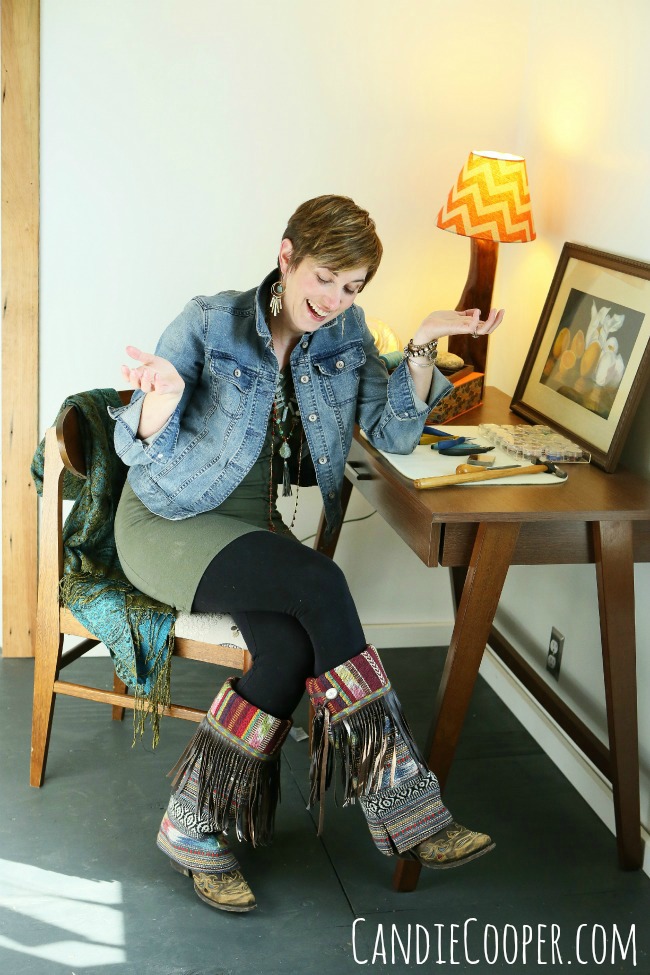
How to macrame a bracelet with Beadalon's tying stationString the beads for your bracelet onto the beading wire.

Secure the end of beading wire with a crimp bead onto the top peg of the Beadalon tying station.  The loop needs to be loose so you can slide it off easily.Beadalon Tying StationWrap the opposite end around the bottom, under the plate of the Tying Station and twist the nut down so the cord can’t slide.Step 1 It was when I looked at this with fresh eyes and thought to myself yeeeahhhhhhh.  No.

What is going on in this photo??

The Hokie Pokie?

Sorry.

For the hemp:  Cut a yard of cord and tie it to the central wire so that both tails are even length.

And now, I’m going to send you here, if you want to learn this basic square not.

Macrame Jewelry Tutorial with Beadalon Tying Station toolWhy I didn’t make all the knots like this photo?  I have no idea.  BUT!  You get the idea right?  Slide a bead into place and knot around it.

Making an easy bracelet on Beadalon's Tying Station toolThe second reason I love this tools is because of the measurements on the side so you know how long your bracelet will be.

Also, you can also use the tool to create really long wrap around bracelets thanks to the foam plates that hold everything down.

Right now, this bracelet is 7.25″ long which is good if your clasp in 1/2 inch to 3/4″.DIY Macrame JewelryWhen you are finished, slide the bracelet down on the core wire toward the bottom peg.  This gives you a little wire on the end so you can cut away the loop and attach your clasp with crimp beads like normal.  Tie the hemp in a knot and secure it with multi-purpose epoxy.Macrame jewelry finishing ideasHere are a couple clasp ideas  (from L to R): traditional toggle, seed bead loop/button, button/lobster clasp.Macrame JewelryI love all the colors hemp comes in now.  When I was in school we had brown, brown, or brown.How to make macrame jewelryThe peach bracelet on the right is actually a necklace or wrap around bracelet.

DIY Macrame Bracelet TutorialStack em’ up! and wear em’ proud!

I’ll see you tomorrow with a new tutorial, Beadalon Breakers!


More info on the Tying Station on the Beadalon site!