Easy Decorated Easter Eggs

Mod Melt Easter Eggs from Candie Cooper
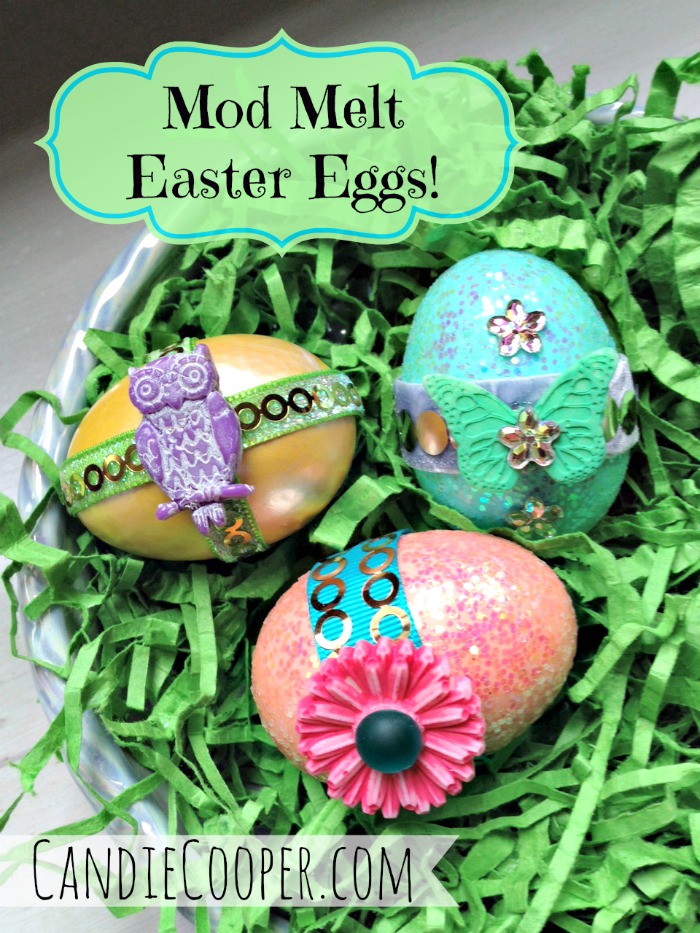
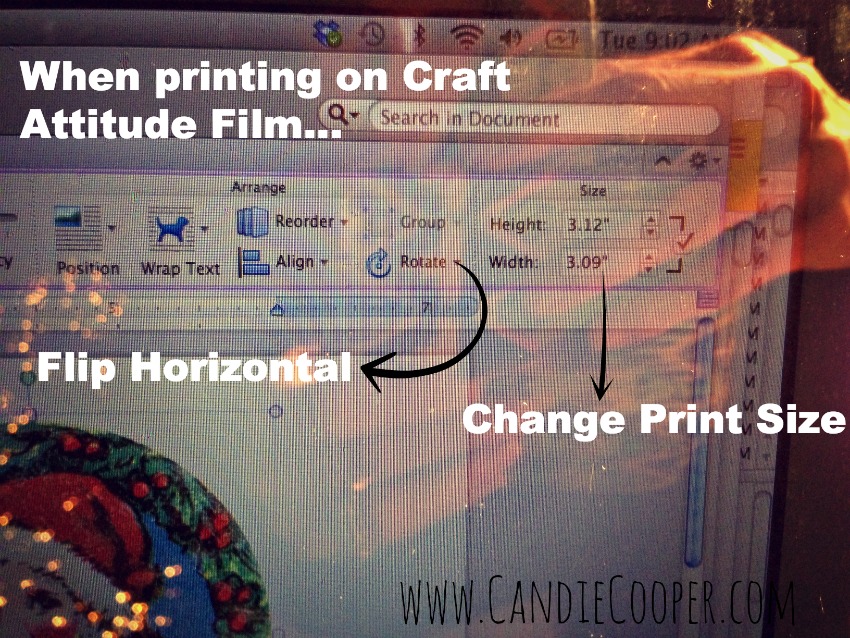
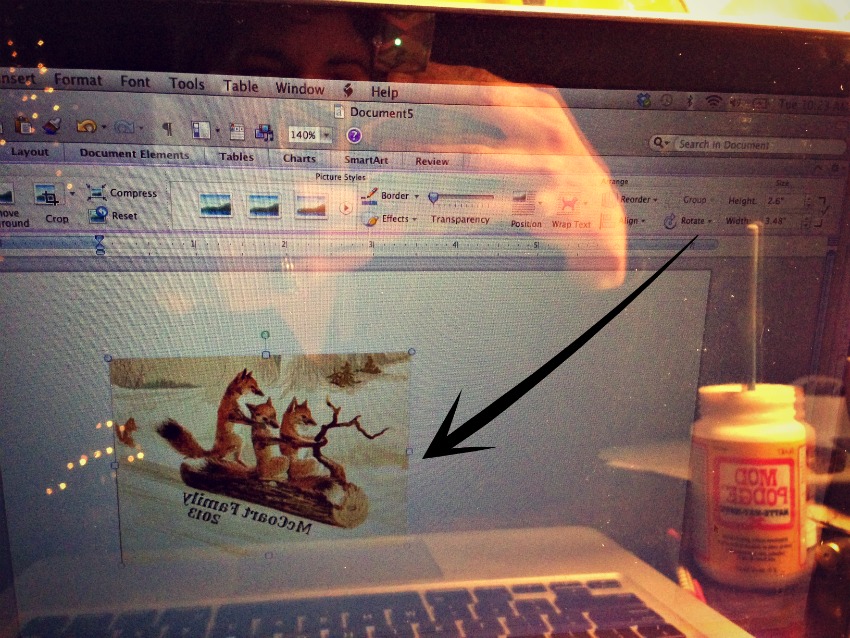
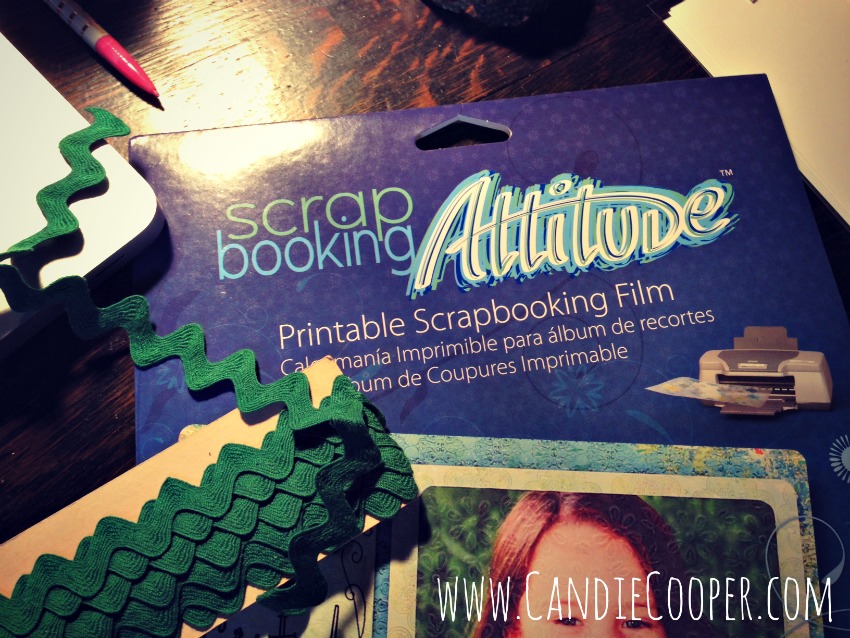
My mom always decorated for Easter so it’s a family tradition to craft up eggs and have Easter grass coming out our ears around this time.    This is an easy project that uses Cathie Filian and Steve Piacenza’s, Mod Melts (made by Plaid).  Mod Melts are DIY embellishments along with some ready to go Easter eggs from JoAnn Fabrics.  They have the glittery and satin finish eggs there in pretty pastels.  You can find the Mod Melt sticks and molds at Michaels Craft store.  You’ll also need a skinny stick, high temp glue gun (has to be high temp or else the sticks don’t get hot enough to flow into the molds).

Glue the ribbon to the egg
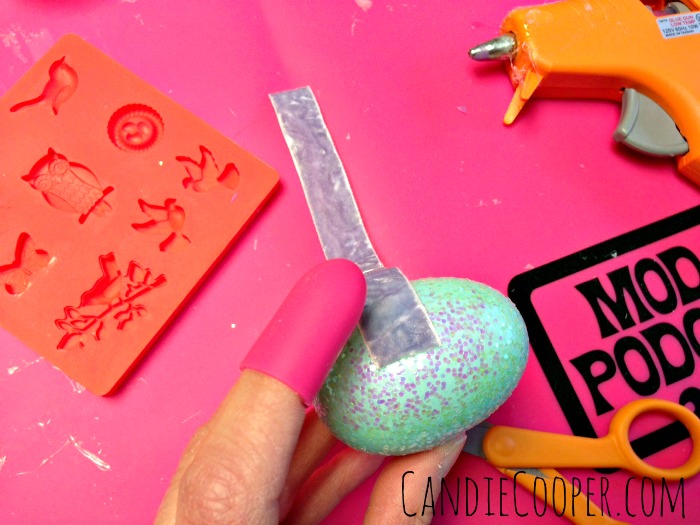
Wrap a bit of ribbon around the egg (I knew there was a reason I was saving this pile of pretty ribbon scraps.  Craft supply hoarders unite!).

Secure the ribbon to the egg with hot glue and push it down with your finger protected by a Hot Glue Gun Helper finger cap.

Glue end of ribbon down
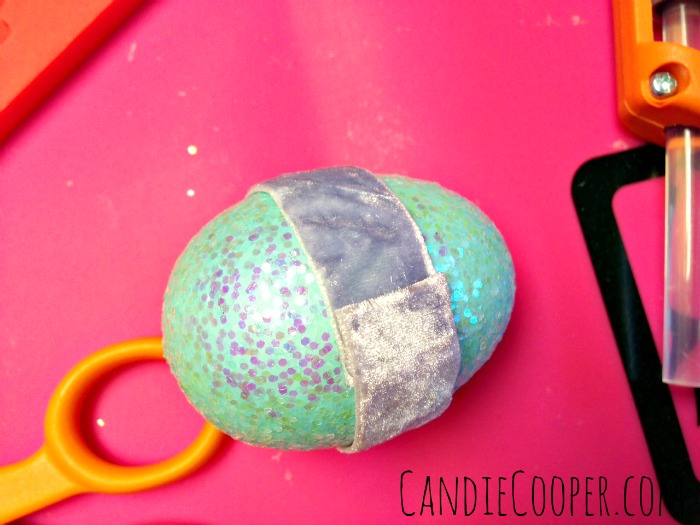
Then trim the ribbon to fit and glue the end of ribbon down.

Ribbon Wrapped Egg
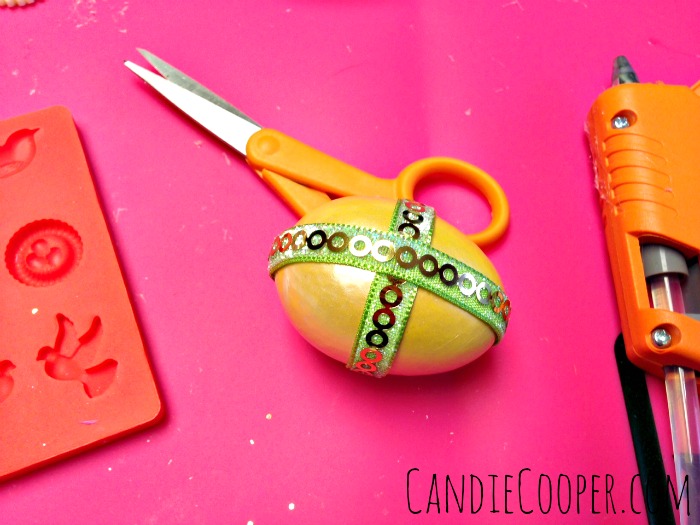
Add some metallic buzz with Martha Stewart metal ribbon–found in the decoupage/stencil section of the craft store at Michaels.  It comes in gold, gunmetal and rose gold.  I really like it.

Mod Melts
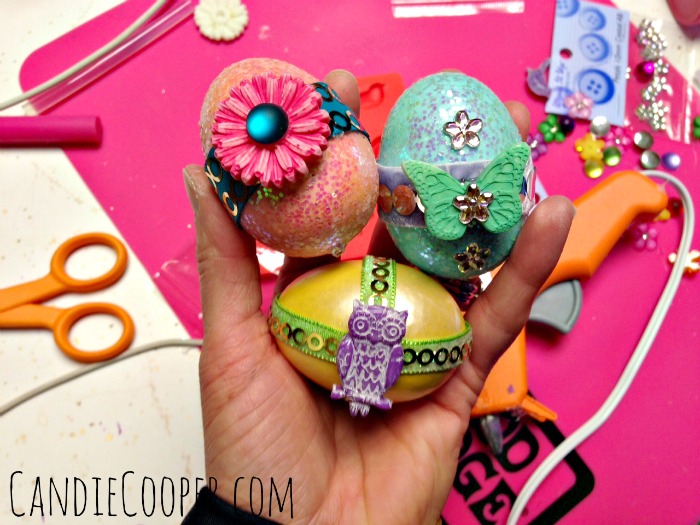
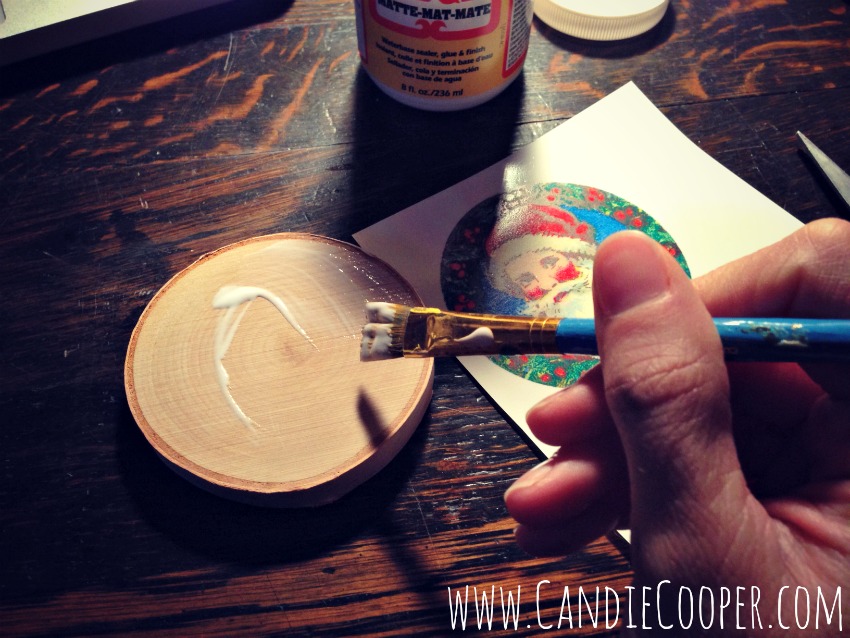
By now your hot glue gun and Mod Melt stick should be ready to fire!  Fill the mold and let set for 5 or ten minutes.  The hardest part in this project is waiting for these suckers to cool so you can see how awesome they are.  Tic toc… tic toc…


Paint the Mod MeltsSponge on some color by applying paint to a dobber and blotting it over the mod melt piece.

Dress It Up Buttons
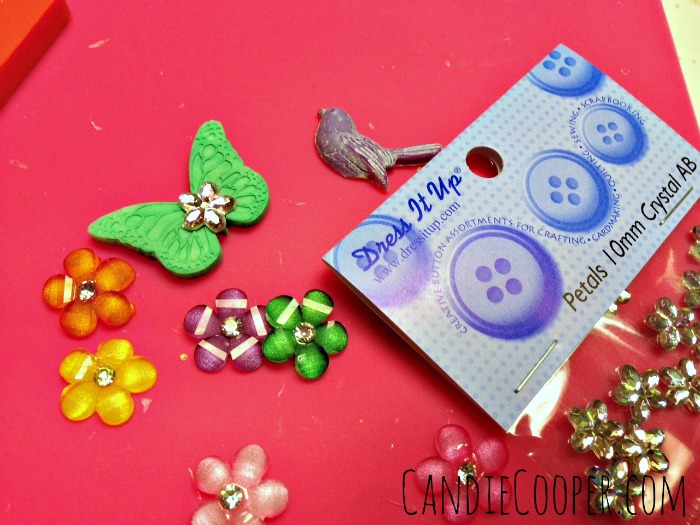
You can add further sparkle and layers with Dress It Up craft embellishments–usually found in the scrapbooking section of the craft store.  These things are like craft candy!  You can’t use just one.  Use a glue gun to glue the embellishments to the eggs.

Eggs with Mod MeltsTa da!  Never mind that craft explosion in the background!  That’s one of my other magic tricks.  I can take a clean table and trash it in 3.4 minutes flat.

Candie Cooper's Easter Eggs with Mod Melts
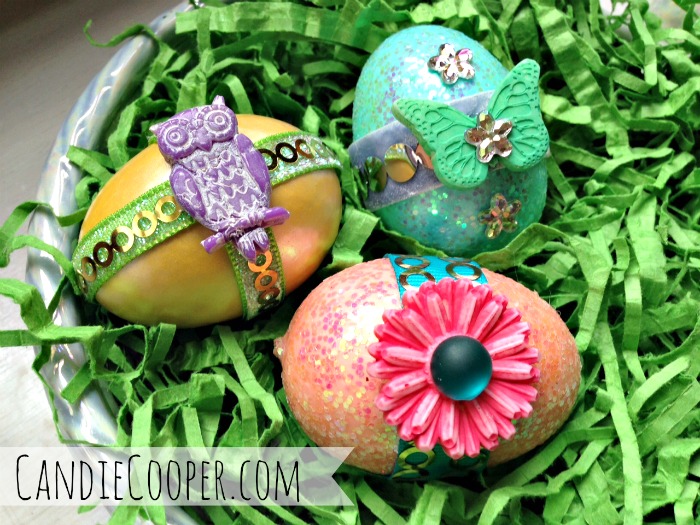
Here they are!  Such cuties!  I’m really loving paper Easter grass this year too.  It’s so soft and natural looking.  I don’t over think these things or anything.  Can you tell?

Mod Melt Class collageLast week, our local Crafty Book Club met and I taught them how to use the Mod Melts with Hot Glue Gun Helpers.  The ladies liked them a lot and had fun experimenting.  This is our 4th year for making Easter eggs together.  It’s another great tradition!

XOXO.

Candie

Embroidery & Sewing Scissors on Etsy

Black decorative Scissors

Brass Butterfly Scissors

Decorative Brass Scissors 2

Stork ScissorFresh snippets from my Etsy shop!  I use these babies for snipping ribbon, thread, precise paper cutting (I’m sure I’m not supposed to do that, but…) and more.  The vintage nature of them is so lovely.  I think they liked being photographed too.  Shiny and bright!  A little treat for your stash, perhaps?

Love,

Candie

How To Make Magnets for a Cause or Fundraiser

Make Magnets for a fundraiserLast fall, the opportunity to contribute to a swag bag for dinner attendees supporting Relay for Life fell into my lap.  Cancer has affected our family more than once so this is something I wanted to do.  If you’ve read my blog before, you know that I’m really really tired of the “C” word.  I wasn’t sure what to make.  Not everyone wants jewelry, right?  My solution was the ever popular bottle cap magnet.

Candie Cooper Relay for life magnetsFirst I found a collage sheet of 1″ Relay for Life images on Etsy.  Downloaded.  Printed.  Punched the circles out with a perfect 1″ whole punch.  Second, I ordered 100 bottle caps to match the purple Relay theme, patterns, solids, I wanted variety!

Candie Cooper bottle cap relay for life magnetsNext, I attached the paper circles to the front and sealed with the epoxy sticker.  I used Beacon Adhesive’s Dazzle Tac to attach the magnets to the back.  The bottle caps lived on a tray as I worked through the assembly line.

Canson Digital Paper printingSo  wanted these survivors to know I was thinking about them, I added some little cards that said “Made with Love for You!” with my new logo.  The cards were printed on Canson’s Digital Satin Ultra paper because it’s heavy and would stay rigid in the organza bags.

Candie Cooper cardsAnd now it’s time to cut…and cut some more!

Relay for life magnets
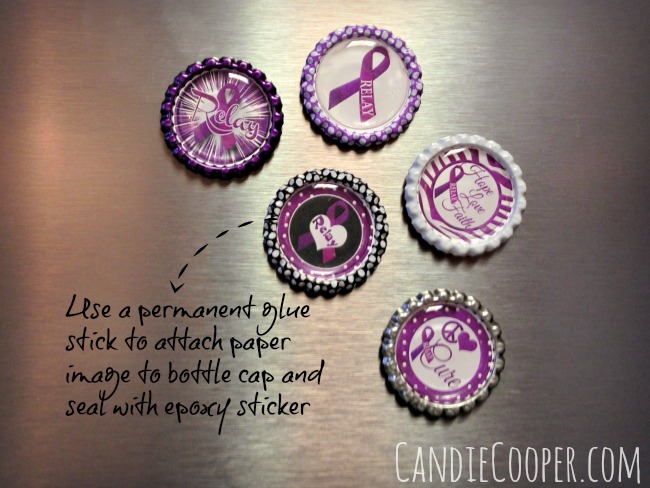
The tray is key–so you can move them to the comfy chair, the kitchen table (admittedly, I think at one point I was sitting up in bed gluing circles in caps—my husband gets the good sport award for sure) etc….
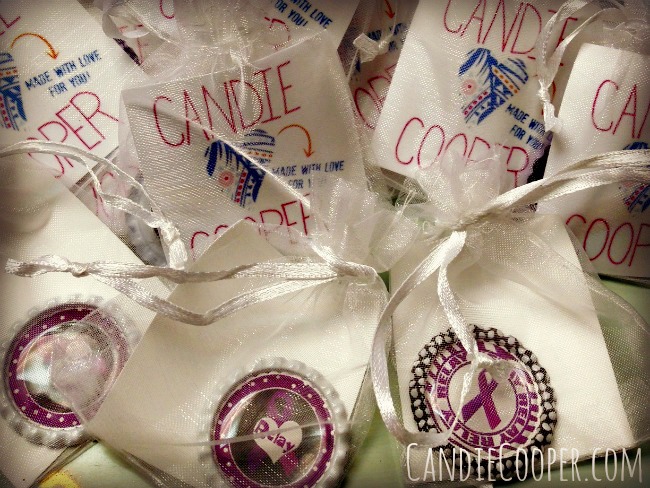
Relay for life magnet bagsThe very last step is to drop them into little 2″ square organza bags, tie them up and send them on their way with a prayer and lots of love.

XO.

Candie

How to Make Personalized Ornaments

First off, special thanks to Craft Attitude for sponsoring this postCandie Cooper Birchwood Christmas Ornament  1AbNo doubt about it, Christmas ornaments are my favorite holiday craft.  Throughout the years, my mom and I have made them and given them.   They are sweet little treasures that add an enormous amount of character to a family tree.  Paint.  Glitter.  Mod Podge.  Needle felted.  Photographs.  Yarn.  Cross Stitch.  Hand prints.  Ornaments can be made from anything!  Ain’t life grand?  Here is a little tutorial I made for these birch wood ornaments using that incredible crafty film, Craft Attitude and images from the most lovely Graphics Fairy.  Candie Cooper Christmas Birchwood Ornamnet 6The first thing to do is find your images.  Turn on the Christmas tree lights, make yourself a hot beverage and head to the Graphics Fairy site to surf for images.  There are so many fantastic images to choose from (might want to check those ink levels now).   I used a red bird, Santa, and these hilarious sledding foxes.  Thanks Graphics Fairy!  By the way, if there’s one gal that’s going to Heaven, I’m positive it will be Karen of the Graphics Fairy.  Save your selected images and open up a word processing program.  Insert your images into the document.Measure Birch wood ornamentMichael’s Craft store is selling birch wood surfaces.  These were marked as coasters.  They are on an end cap in the floral area.  Grab a rough diameter measurement of the birch wood coaster-soon-to-be-ornament.How to resize a photoTwo key things to do when printing on Craft Attitude film:

  1. Change the size of the image to match your wood disc
  2. Hit the arrow next to the “rotate” tab and select “flip horizontally.”  This is key when images have words on them.Rotate image horizontally

Did I mention how important it is that you flip the images horizontally before printing?  Oh! I did?  Ok, let’s move on.Scrapbooking AttitudeCrack open a package of Craft Attitude film.  Insert a sheet into your printer so it prints on the SHINY side.  For some reason, every time I explain that with Craft Attitude you have to print on the shiny side, this song pops into my head (and will stick for the rest of the day).  Those Carter gals were so fierce.  I want to play the guitar.Print your imageNice, right?  Happy.  Moving right along….blissfully….until you see that you’ve put the year is 2014!!!!  (breaks screech to a halt)  WHAT was I thinking?!  I’m too cheap to re-print so we’re moving on, people.  One step ahead for next year’s ornament.  That’s how I roll.Mod Podge the ornamentTrim around your image leaving a little border.  Bust open the Mod Podge Matte and get ready to podge!  If you’re hanging out around here, you were probably born ready to podge, right?  Yeah.Paint a coat of Mod PodgePaint a coat of Mod Podge Matte onto the wood disc.  Put your image ink side down onto the Mod Podge and smooth out.Lay the Craft Attitude film on woodUse sharp scissors to trim away the excess film.  Do not use the kitchen scissors that you use to cut the duck jerky treats in half for your dogs because you couldn’t find your crafty scissors like I did.Seal with Mod PodgeSeal the entire ornament with Mod Podge Matte to make it nice and smooth.Ornament RibbonAttach a ribbon with an upholstery tack.  I’d love to tell you that birch wood is soft as butter, but I found out it’s just the opposite.  I thought I was going to tap the tack in with a hammer, but this wood is tough.  Try a bigger hammer.  Real tough.  One bent-to-pieces tack later, I drilled a tiny hole and then hot glued the ribbon/tack in.  Candie Cooper Birchwood Christmas 5AAnd here they are!  I could have fiddled around and made a dozen more, but I have bills that need paid.Candie Cooper Birchwood Christmas Ornament 2AThe edge of the birch wood frames the vintage images beautifully.  I like woodland crafts.  And the idea of playing the guitar.Candie Cooper Birchwood Christmas Ornament 4AWhat does the Fox Family say?  Sorry, couldn’t resist.Candie Cooper Birchwood Christmas 5AThe McCoarts 2014!  New Year’s ornament anyone?Candie Cooper Birchwood Christmas Ornament  1AbCheck out more Craft Attitude Holiday projects on their site as well as Craft Attitude on Facebook and Pinterest.  Fellow Craft Attitude designers, Trudi Sissons and Jonathan Fong also have some fun projects up on their blogs.  Here’s to a happy holiday season!

CHA Winter 2013

Craft-Attitude-CHA

Come see Jonathan Fong and myself January 12-15th in the Craft Attitude booth at the Craft and Hobby show to see how you can add images easily and fast to a ton of different craft projects.  There will also be a giant elephant in the booth that you can have your picture taken with!  Curious?  It's going to be so fun!  See you there!

Paper Mache CelluClay Bird

TAEAActiva
Last month I worked at the Texas Art Education Show with ACTIVA.  I designed the Talavera bird lesson plan below using CelluClay and then taught workshops to teachers and demonstrated in the booth.  WE HAD FUN!  If you haven't tried it, CelluClay is an instant paper mache material that is super light weight and sturdy. 

CelluClay Bird

Talavera Bird with ACTÍVA CelluClay

Talavera is a special style of pottery created in Mexico.  Specifically, it is a type of majolica earthenware that was introduced to the people living in what is now Mexico by the Spaniards.   The style was used in functional and decorative ceramic pieces.  This bird is created with ACTÍVA CELLUCLAY and decorated in the Talavera style–bright colors, nature designs, and patterns. 

Materials:

ACTÍVA CelluClay (white or gray formula)

Newspaper

Masking tape

Tan colored acrylic paint (Plaid's Folk Art brand)

Chalk

Permanent markers (Sakura Permopaques

Spray varnish 

ARMATURE:  Crumple newspaper and secure with masking tape to create the body of the bird.  Repeat with a smaller ball of newspaper to make the head.  Tape the two pieces together.

MIX:  Mix ACTÍVA CelluClay pulp according to instructions.  Optionally, you can tint the white ACTÍVA CelluClay with tan acrylic paint while mixing to give it the look of natural clay.

PAT: Take a handful of clay and pat onto the bird armature.  Continue to cover the bird form.  Dip your fingers in water to smooth out certain areas of the bird. 

FORM:  Add small amounts of ACTÍVA CelluClay to build up the wings and tail areas.  It's worth mentioning taking care not to build up the walls  too thick–no more than 1/4 of an inch.

DRY: Leave the bird to dry so there is maximum air exposure.

PAINT:  Paint the bird with tan colored acrylic paint if you didn't pre-tint the ACTÍVA CelluClay.  Use chalk to draw your design–flowers, leaves, feathers are some ideas.  Color in the design with permanent markers or paint.  Outline the design with  a permanent marker.  Seal with acrylic spray varnish.

Quick Clip

Clip
I was cleaning up my studio and came across some odds and ends.  A red clip, a purple acrylic flower and a sparkle stone.  Put it all together with some Quick Grip glue and this is what you get.  It was instant-craftification in all it's glory.

*The acryclic flowers can be found at JoAnn Fabrics (Laliberi line), Plaid made the sparkle stone and Quick Grip is by Beacon Adhesives.