Beadalon Tent Sale Post Party

This post brought to you by BEADALON!Beadalon Tent Sale Post PartyWith so many trips, it seems I mention it over here and then said trip happens and that’s it…on to the next!  Put one bag down, pick another one up.

That’s not going to be the case with the Beadalon Tent sale because tonight I’m kicking off a post party here on the blog.  All this week I will share photos from the event held in West Chester, PA as well as tutorials from the Beadalon design team.  Check back each day to see what’s new and enter to win Beadalon swag.Beadalon Tent sale shoppers
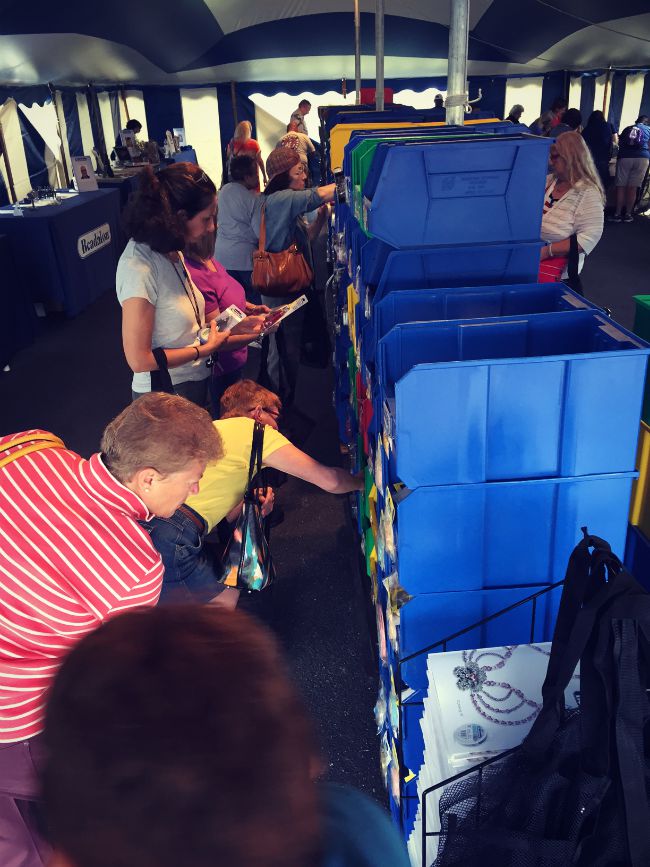
The sale started at 9 sharp on Saturday morning.  Us designers were setting up our demo tables and when I looked up at 8:30 there was already a line starting to form.

Man oh man, there were some crazy good deals!  Especially the product manager $5 grab bags. A huge bin of bags SOLD OUT by 9:22 AM.  Those ladies bead happy!Beadalon Tent sale Yvette, Kelli and Madeline
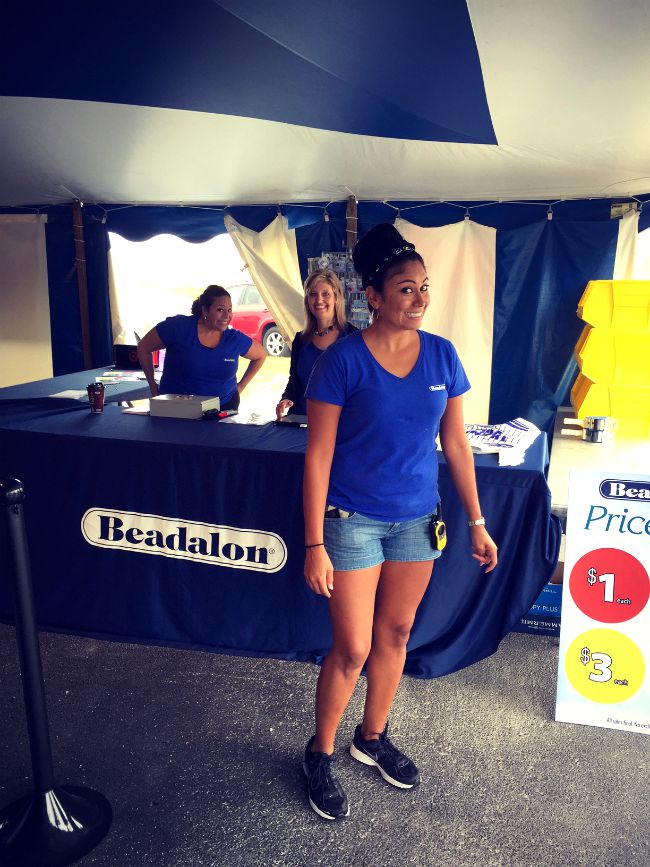
Here’s a little picture of some of my faves behind the Beadalon brand.  Yvette, Kelli, and Madeline worked their booties off getting this sale ready and checking customers out.  Beadalon tent sale Pretzels
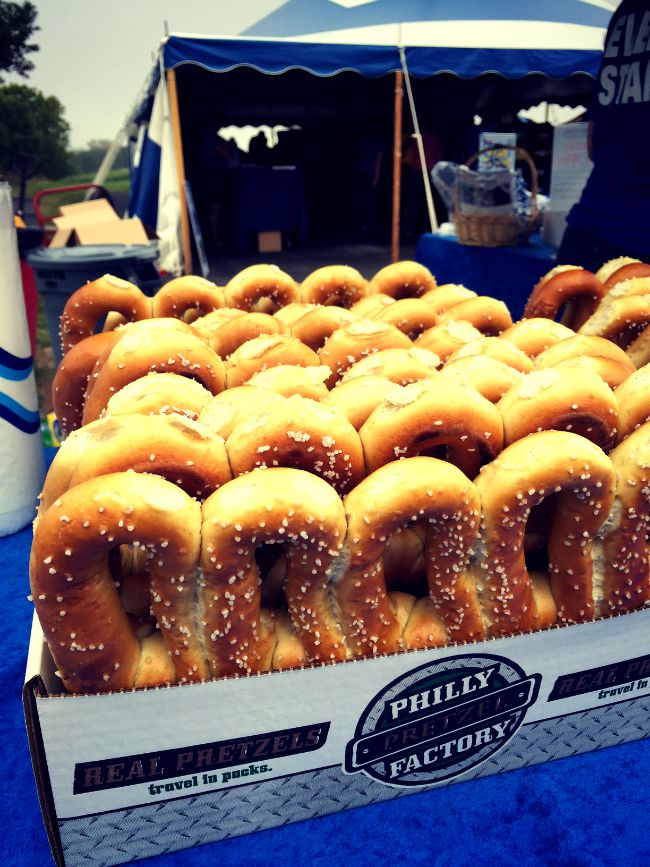
Pretzels:  a Philly tradition alive and well at the sale.  I was in awe. Hello!  I also got to have my very first Philly cheesesteak sandwich.  I’ll save that photo for another day.  Holy smokes.  Cue Barry White.Team BeadalonTeam Beadalon at your service!  From left to right that’s, Katie, Madeline, Wyatt, Sarah, Kelli, Yvette, and Sandra.  We like to work hard and play hard!

So starting tomorrow, I’m going to post a new tutorial or product on the blog, featuring one of the Beadalon design team members.  You don’t have to wait to enter the giveaway, though!  See below for different ways to enter.  I’ll be picking 4 winners.  Post party is officially on all you party people!
a Rafflecopter giveaway

DIY Printed Leather Jewelry Idea

This post brought to you by LeatherCord USA.DIY Jewelry Making Printed Leather Bracelet from Candie Cooper and LeatherCordUSA.comThe other day I was walking out to the car and I heard a new, but old familiar sound—leaves crunching under my feet.  Persimmons are also dropping all over the yard.  They are a really pretty orange color (not so pretty when mashed under your favorite cowboy boots, but….).  The crisp mornings just make that coffee taste better and better and I find myself gearing up for pumpkin decorating and trips to the orchard.  Are you finding yourself inspired by the colors and feelings that fall brings?LeatherCord USA Beautiful printed leather for jewelry makingHere are some printed stitched leather pieces I brought home from my LeatherCord USA visit.  The texture in this stuff.  I LOVE IT!  It also comes in a beautiful palette of colors.  Click the link above to see all of them.Large Clasp from JesseJamesBeads.com for printed leather from LeatherCordUSA.comI’m using an extra wide magnetic clasp so I can fit a whopping seven cords in it.  Play around with the order of your cords so you get it just right.Cutting printed leather from LeatherCordUSA.comDetermine the fit and then cut the cords with wire cutters or a razor blade.  Glue the leather in the magnetic clasp finding like usual using the Loctite Gel adhesive.  Can you tell I really love this technique?!  It’s new to me and I’m ready to take on the world.  For reals.  What else can we glue leather onto?Making Leather Jewelry with printed leather from LeatherCordUSA.comIt’s perfectly beautiful like this, I think.  But, just for fun, I wanted to play with some of these large holed beads I found at Michaels.Large holed beads from @MichaelsStoresI love the metal finishes with the center beads, but felt like it conflicted with all the leather colors.Printed leather from Leather Cord USAInstead, I opted to slide the bead/bail pieces on, one or two per leather strand.Printed Leather from LeatherCord USA with Swarovski charmsI then connected a leaf charm and Swarovski dangle to the bail piece with a jump ring.  This was nice because it added some movement (and sparkle!).DIY Leather Jewelry idea from @candiecooper using printed leatherJust a really beautiful addition to your fall wardrobe and easy to create.

*Leather and adhesive from LeatherCordUSA.com

*Beads and charms from Michaels craft store

*Magnetic Clasp from JesseJamesBeads.com

DIY Fringe Earrings

This post brought to you by BEADALON.DIY Fringe Earrings Make them in less than 30 minutes with Beadalon slide connector findingsJ-Lo called….she wants her earrings back.

Ah, fringe.

You guys know I’m addicted right?Beadalon Slide Connector findings for cup chain and ball chainHere’s the “gateway” finding:  Beadalon slide connectors.  I think it started with the Statement bracelets I made awhile back.  These earrings have been on my brain since March and I finally finished them.How to attach a cup chain findingI’m using cup chain and ball chain for the fringe and to spice it up, I’ve added an arrow charm to the center.  You’ll need some cup chain connectors in the appropriate size.DIY Jewelry Making Closing prongs on cup chain connectorSet the last link of cup chain down in the finding and roll the prongs over with Beadalon’s sparkly chain nose pliers.  The tapered end of the plier is awesome for working with tiny parts.DIY Jewelry Making Opening and closing a jump ringsNow you can connect your arrow charm.DIY Jewelry Making Arrow charm earringsI found several art pieces with this arrow quote on the internet with no source but really loved the message.

From my experiences, it’s true.  For me, the hard part is remembering to focus and aim when you’re in the thick of it.  It’s something I really have to practice and be mindful about.

Moving on…DIY Jewelry Making Beadalon connector findingsNow, you can start sliding in your random bits of chain, trimming as you go with wire cutters.DIY Jewelry Making Adding cup chainBefore I forget, these slide connectors come in 3 different widths so you can simplify these if you like.DIY Jewelry Making Closing slide connector findingRoll the cap on the slide connector closed, pushing it against the table top to make sure it’s secure.DIY Jewelry Making Fringe Earrings with Beadalon Findings How to open an ear wireNow, we are to the finish line.  Open the loop on your ear wire from side to side and connect the loop on the slide connector. 
DIY Jewelry Making Fringe Earrings with Beadalon Findings Connecting an ear wiireClose the loop with the chain nose pliers.Fringe Earrings with Beadalon findings and toolsDIY Jewelry Making Fringe EarringsDIY fringe earrings from @CandieCooperEarringology by Candie CooperCheck out my book, Earringology, for more fun ideas!

Bead Crochet GIVEAWAY!

Candie Cooper bead crochet kit giveawayYou know what I’m excited about?!

MY NEW VIDEOS WITH INTERWEAVE!!!  I did four of them, but the one that I’m celebrating today is “Bead Crochet!”  This is one of my most very favorite techniques that I just happened upon doodling around one day in the studio (and Universe, it would be great if these moments could come a little more often).EP12670In this video I show you how to make a necklace and earrings with super stretchy beading elastic, Elasticity.Bead Crochet Giveaway KitJewelry Making DIY Bead CrochetThe cool thing about it is the necklace can convert easily into a bracelet like this.  I’ve taught this class multiple times at Bead Fest and each time it sells out.  Now you can enjoy it in your lazy-girl chair and pjs right at home. Giveaway from Clover Needlecrafts, JesseJamesBeads.com, Candie Cooper & Interweave

To celebrate this video release, my friends at Clover Needlecrafts, JesseJamesBeads.com, and Interweave are kicking in everything you need to create your own bead crochet necklace.  Thanks guys!  See below for how to enter and lots of luck to you!

a Rafflecopter giveaway
Clover LogoJJB_Logo-1Interweave-Home-Logo

CONGRATS TO KAREN G-R!!  Happy crocheting!!

How To Make Macrame’ Bracelets

This post brought to you by Beadalon.Beadalon Break 2015-a week full of DIY Jewelry Making  tutorialsThe Spring Beadalon Break 2015 parTAY has officially started, people!  All this week you’ll find fun tutorials on my blog with Beadalon products.  I’m really excited about it.  First up:  Macrame Bracelets!Jewlery Making DIY Macrame Bracelet TutorialMacrame’ hemp jewelry will always have a special place in my heart because I made a ton of it when I was in high school–very early in my jewelry making career.  Picture me thrifting for chunky glass beads, tying the cords to my toe and knotting my heart out.  Cue Dave Matthews band.

Those were the days. (snaps back into reality)

These days, I’m loving the texture that hemp adds to my bracelet stack.  Macrame tying station tool and beading supplies from BeadalonAnd thanks to Beadalon, my not-so-flexible self doesn’t have to secure the cords to my toe, because they made a cool Tying Station.

For this bracelet you will need:  the Tying Station, 19 strand beading wire .018 diameter, hemp cord, clasp, crimp beads and beads (I’m using Czech).  AND some wire cutters!Beadalon's tying station
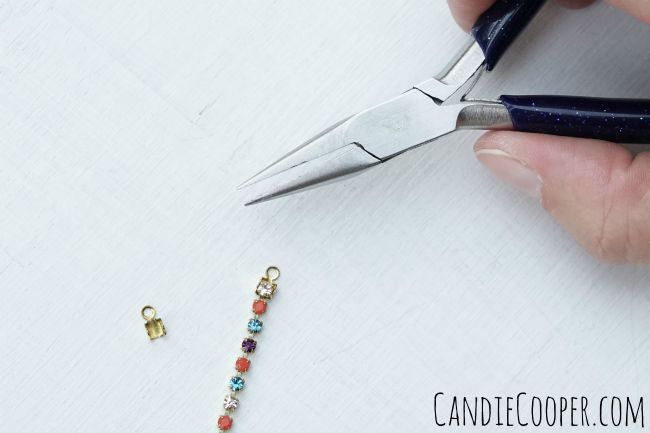
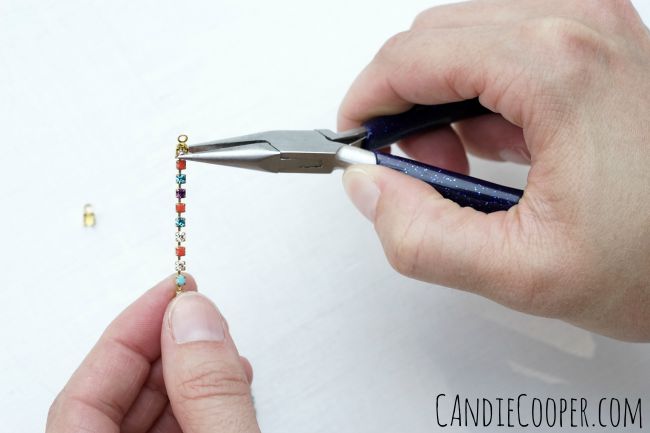
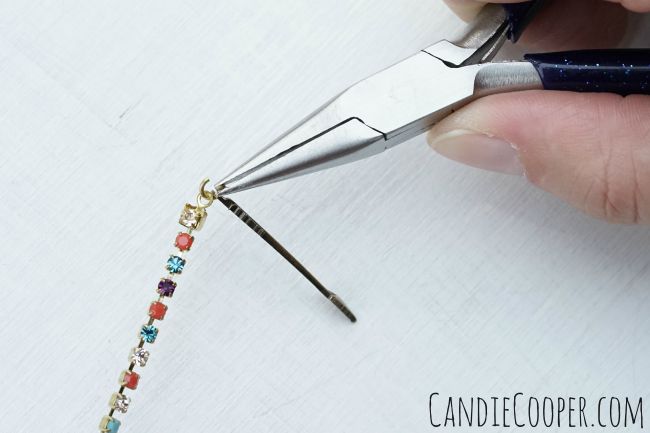
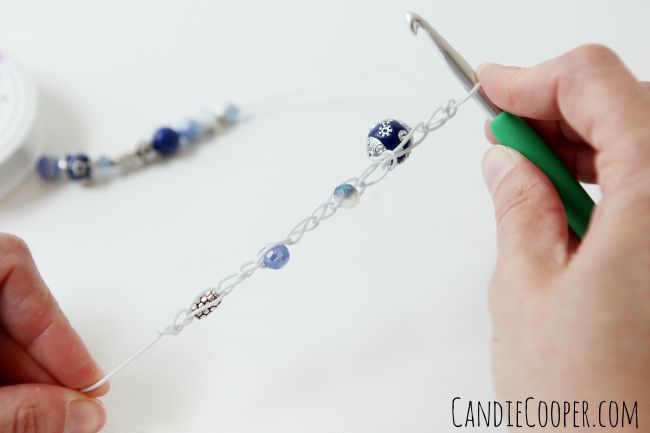
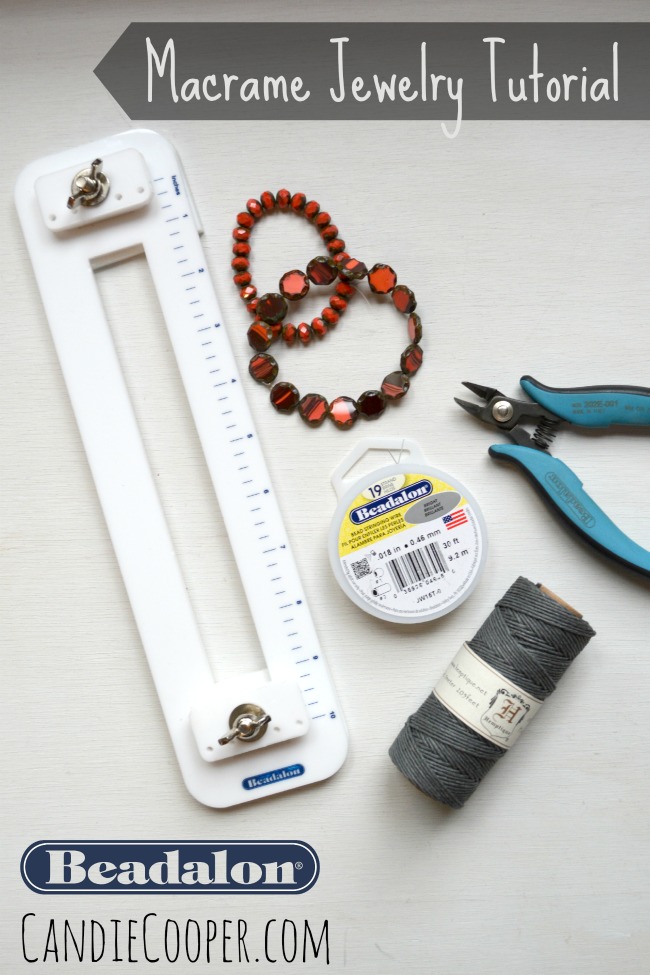
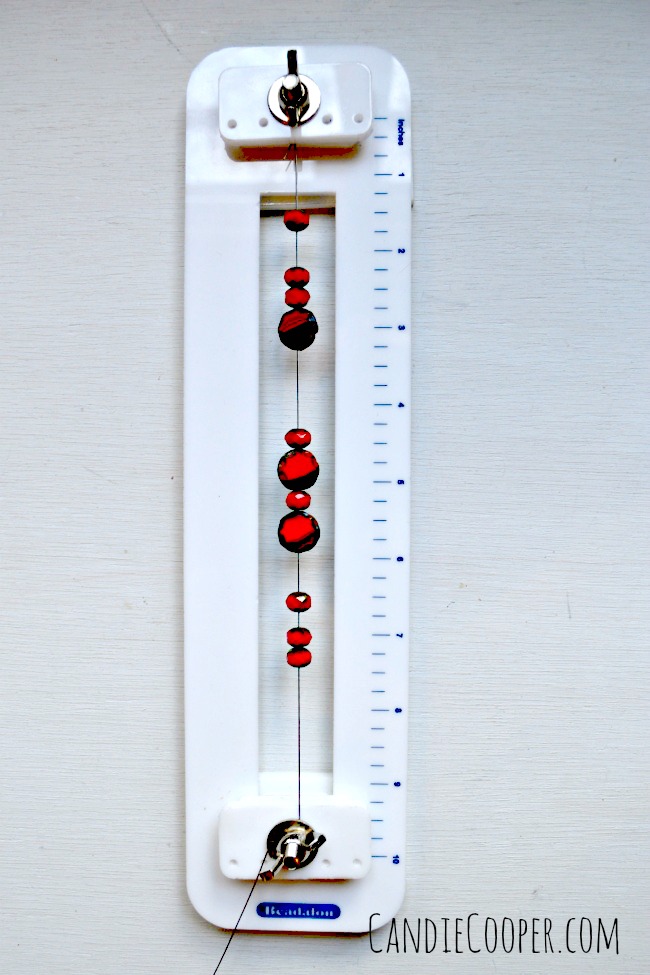
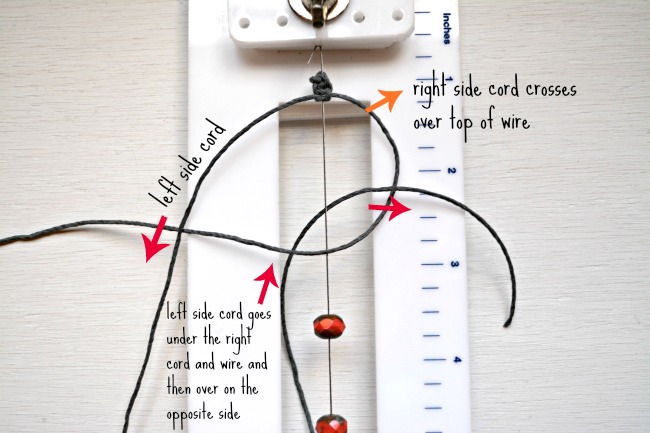
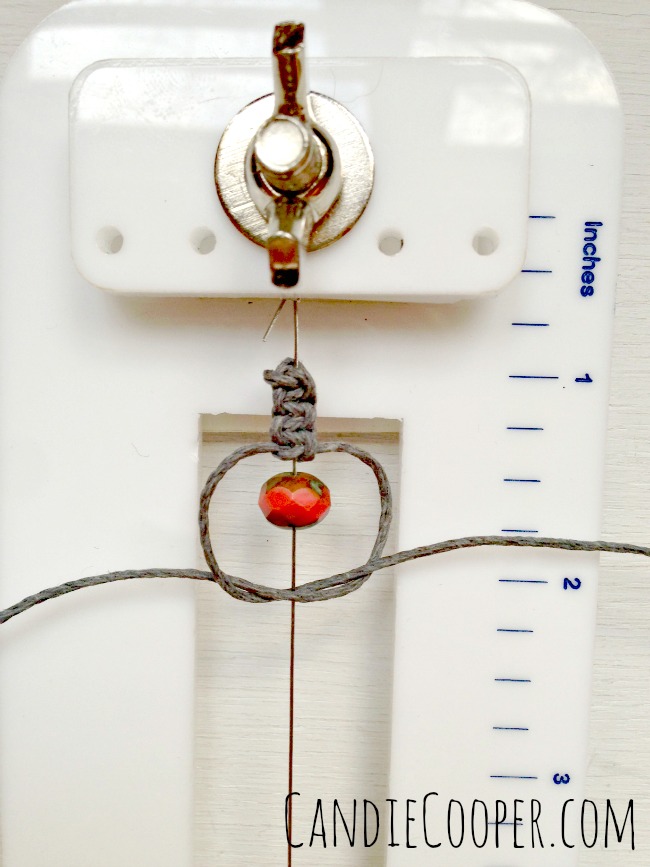
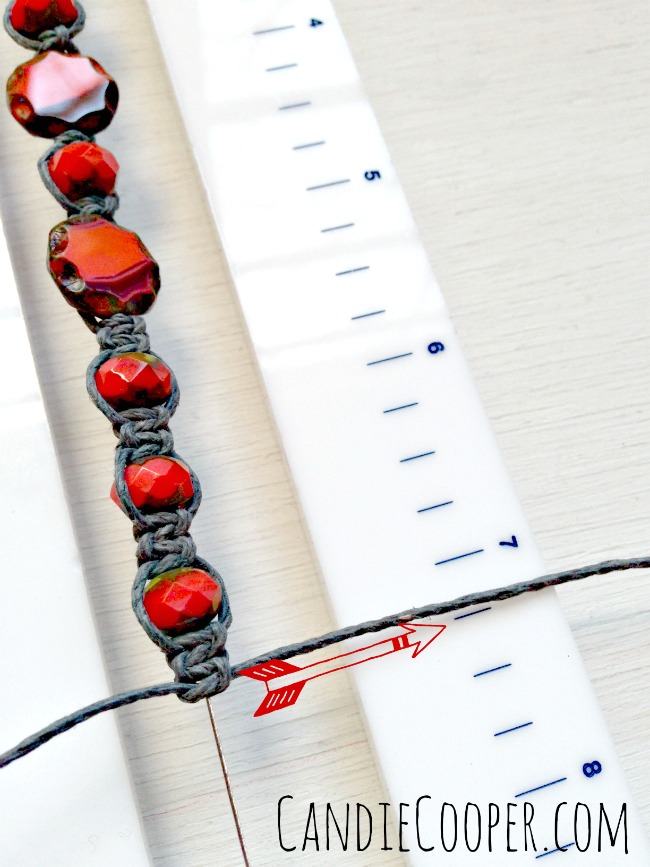
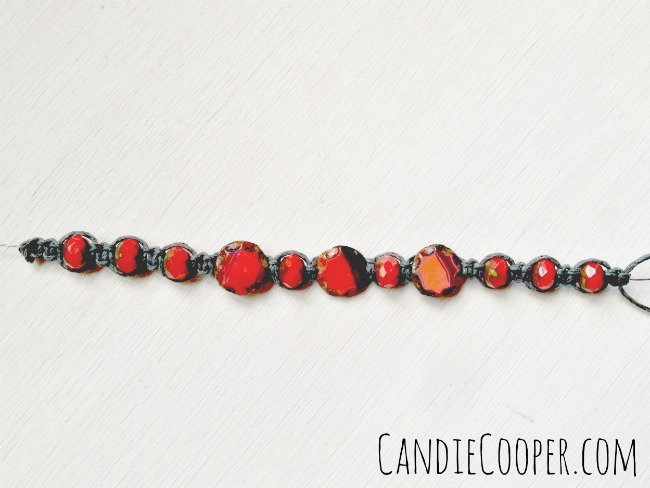
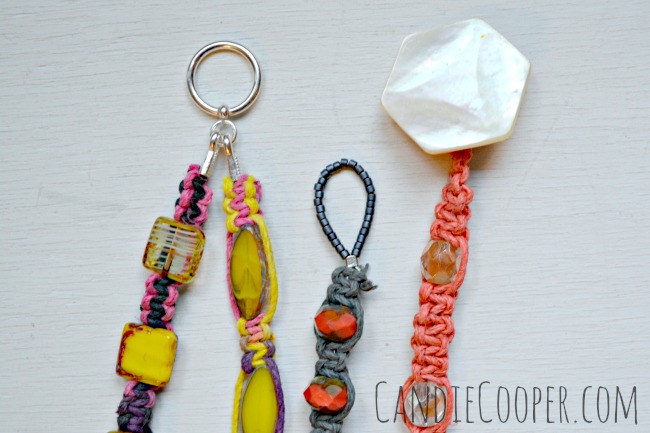
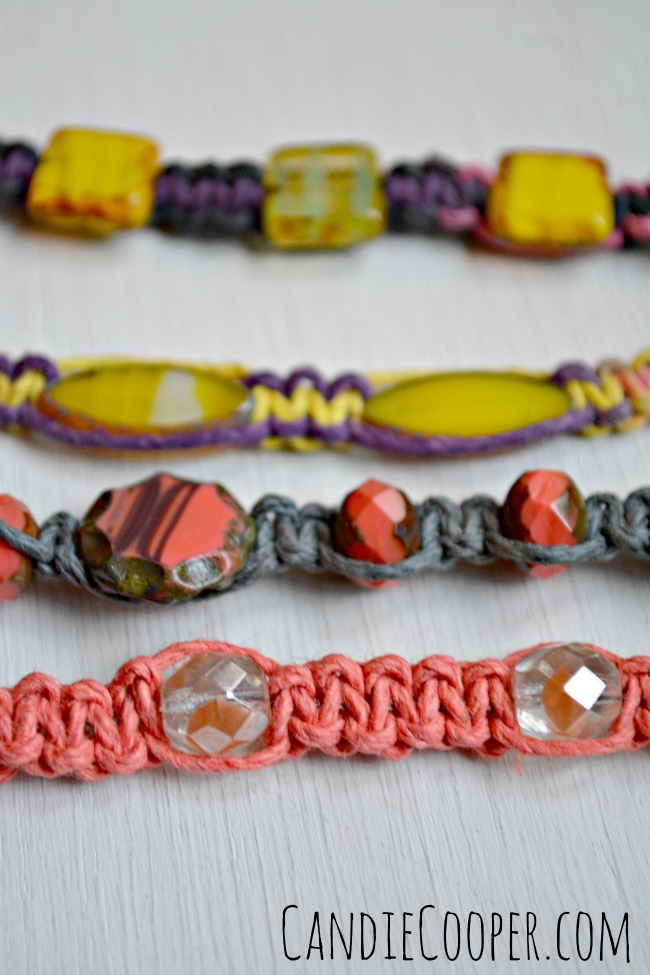
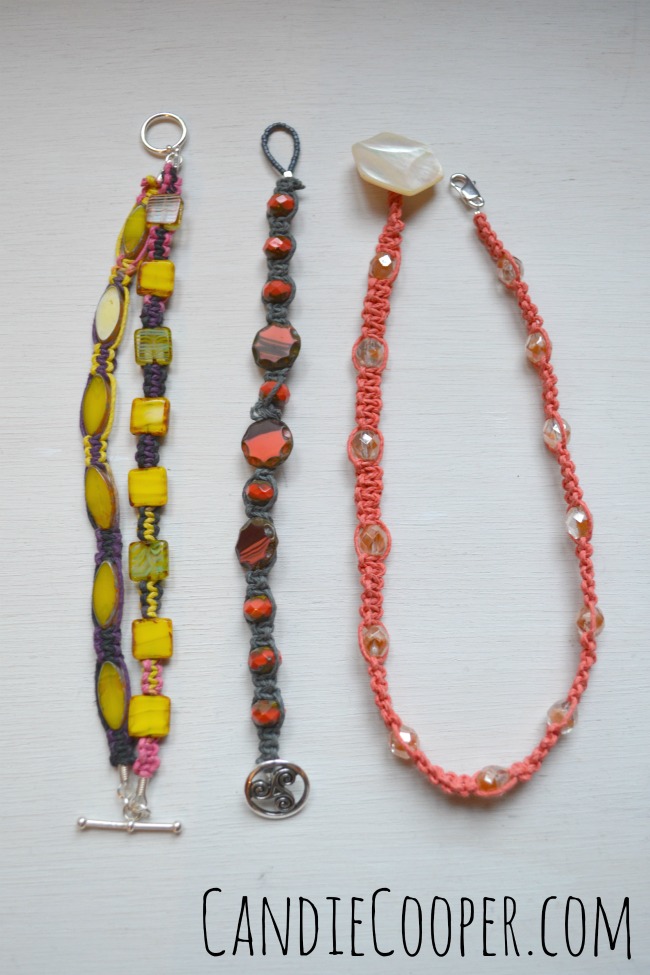
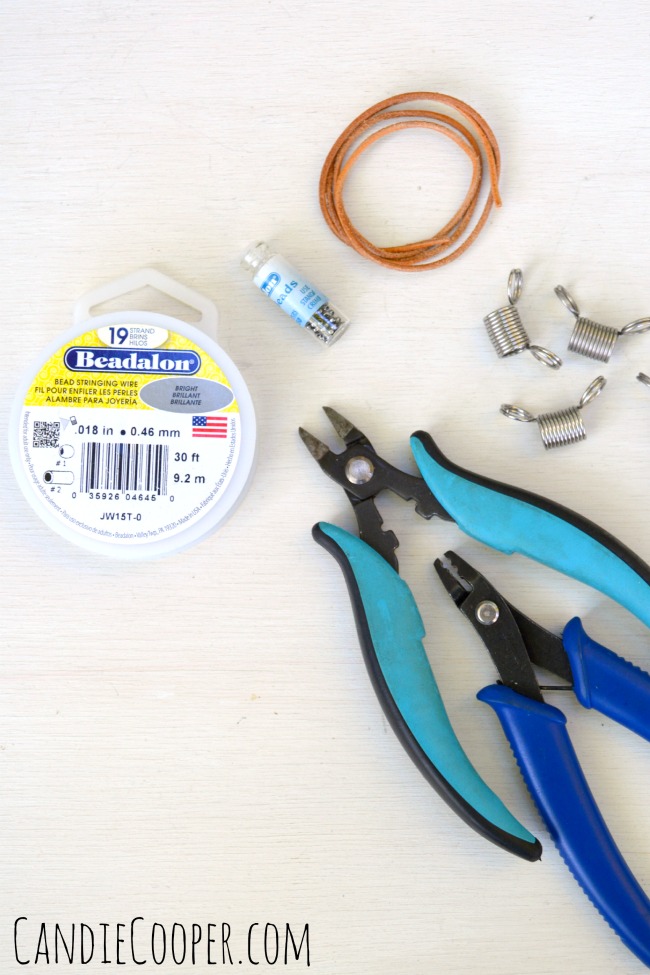
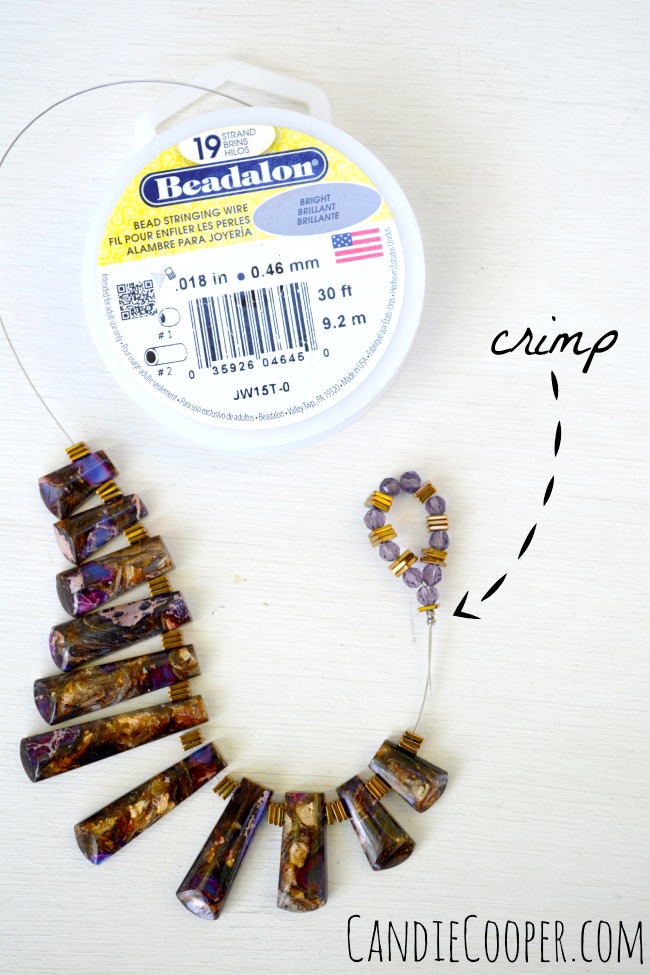
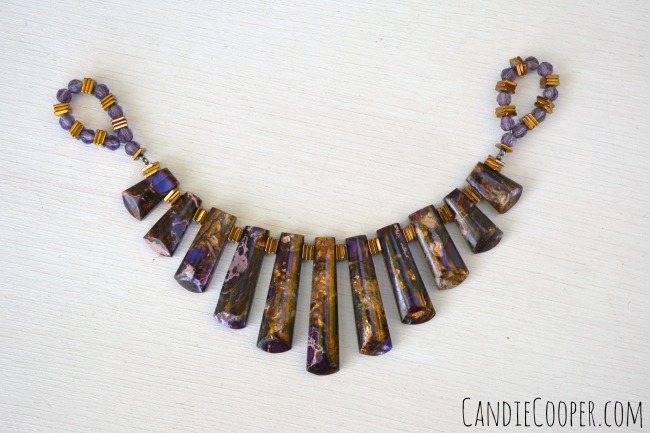
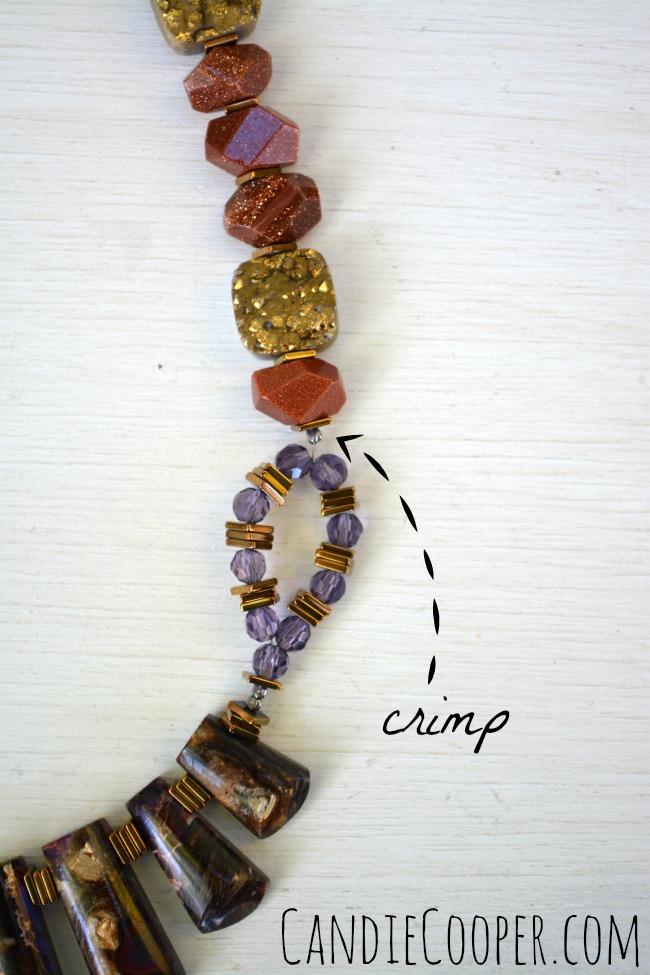
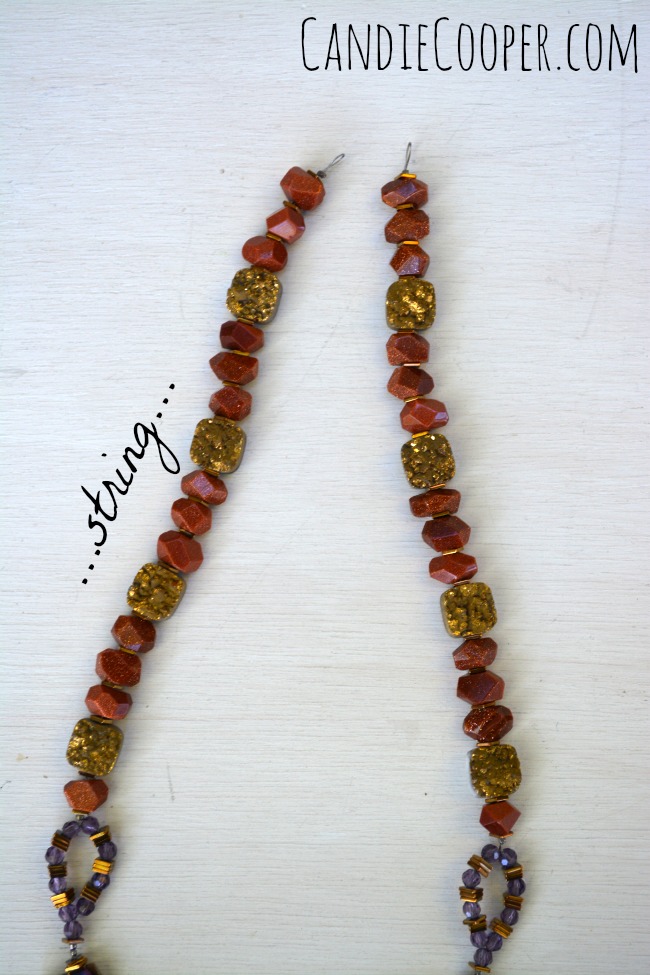
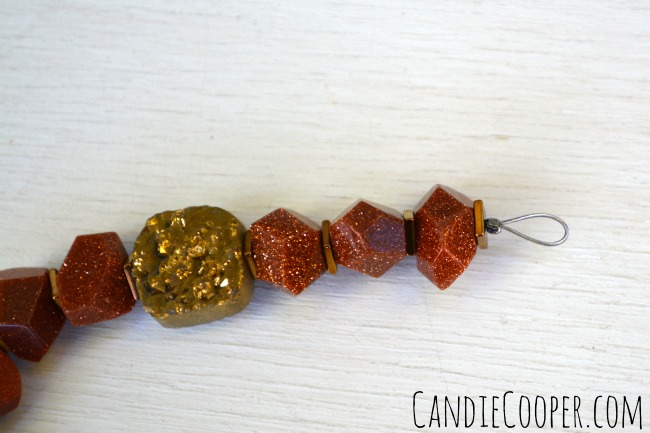
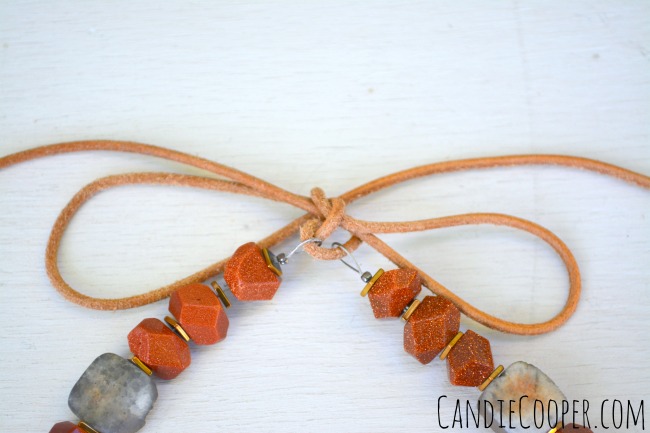
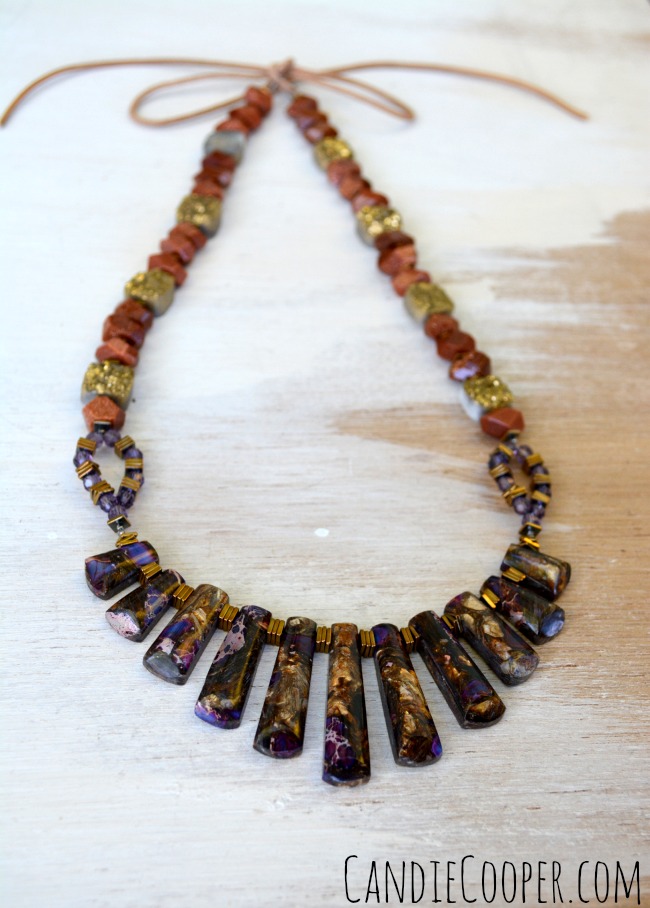
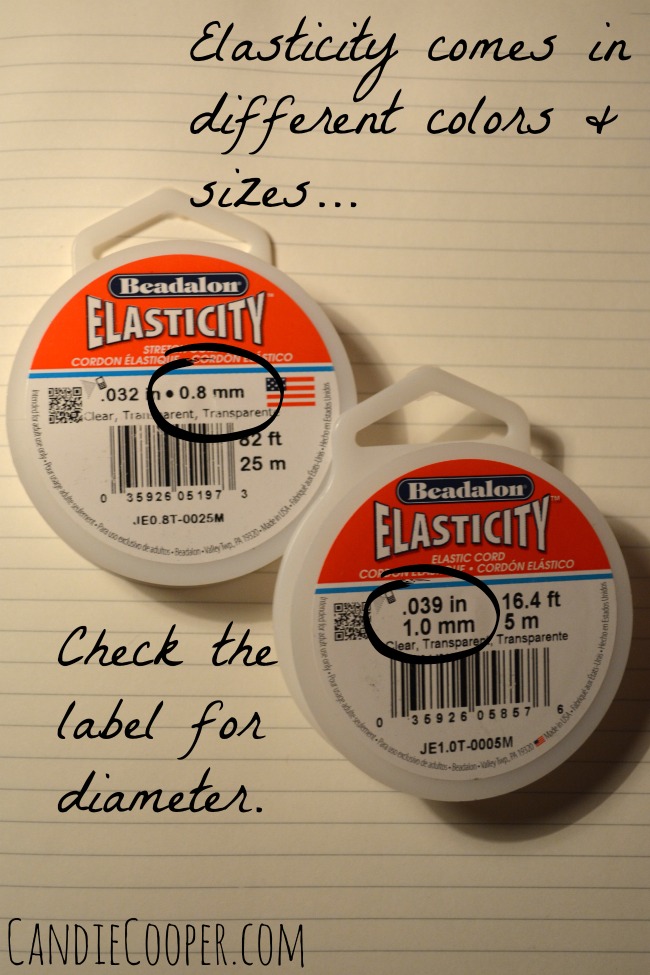
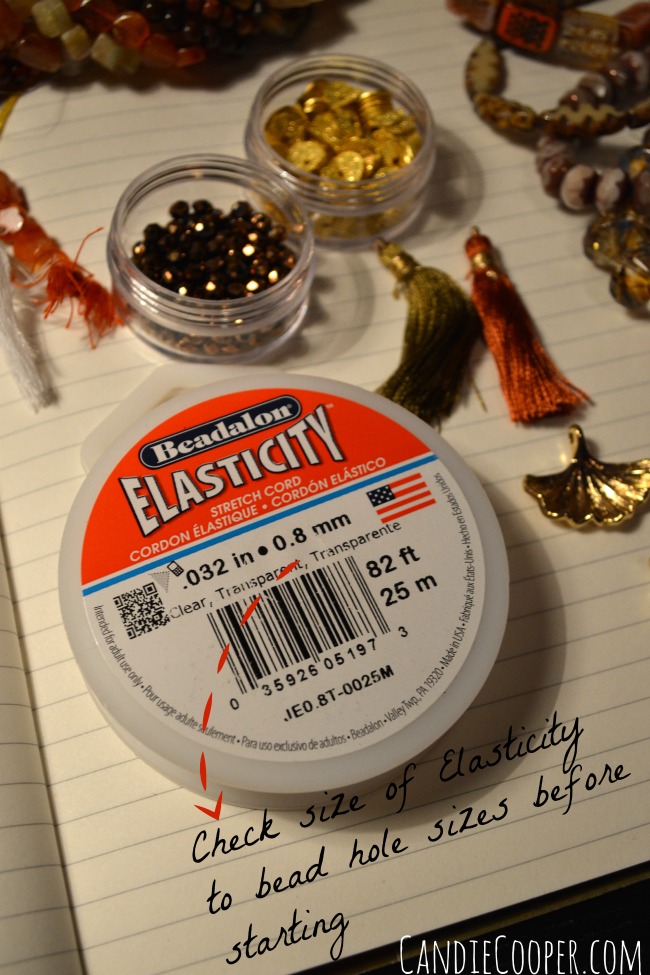
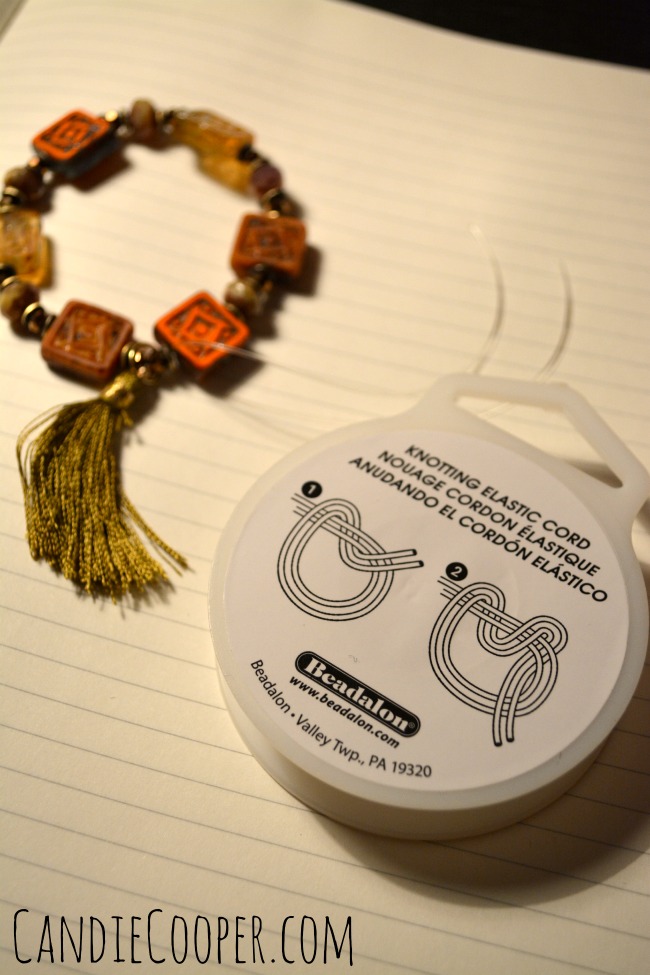
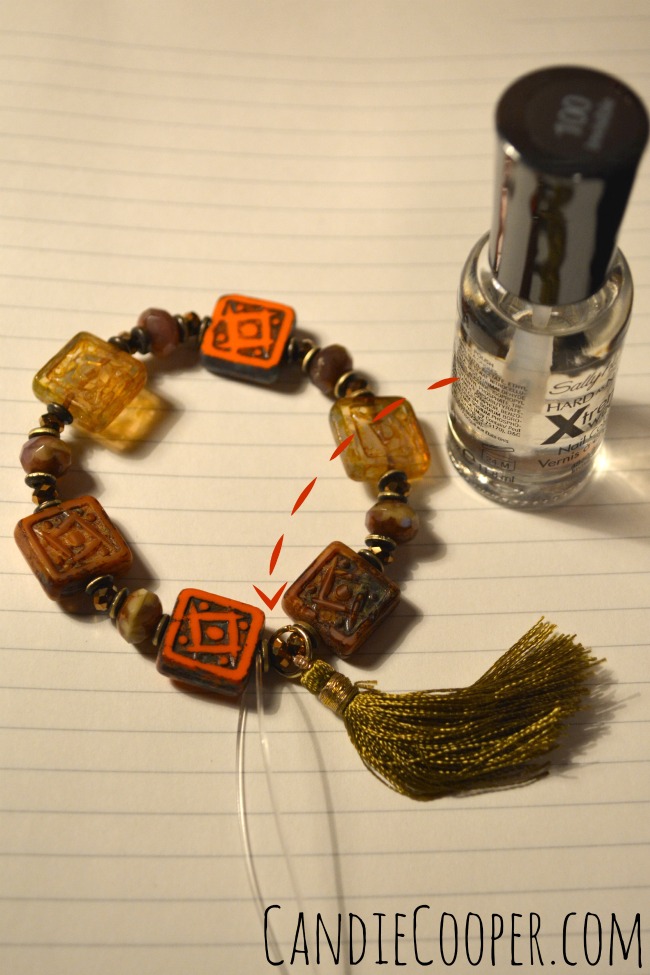
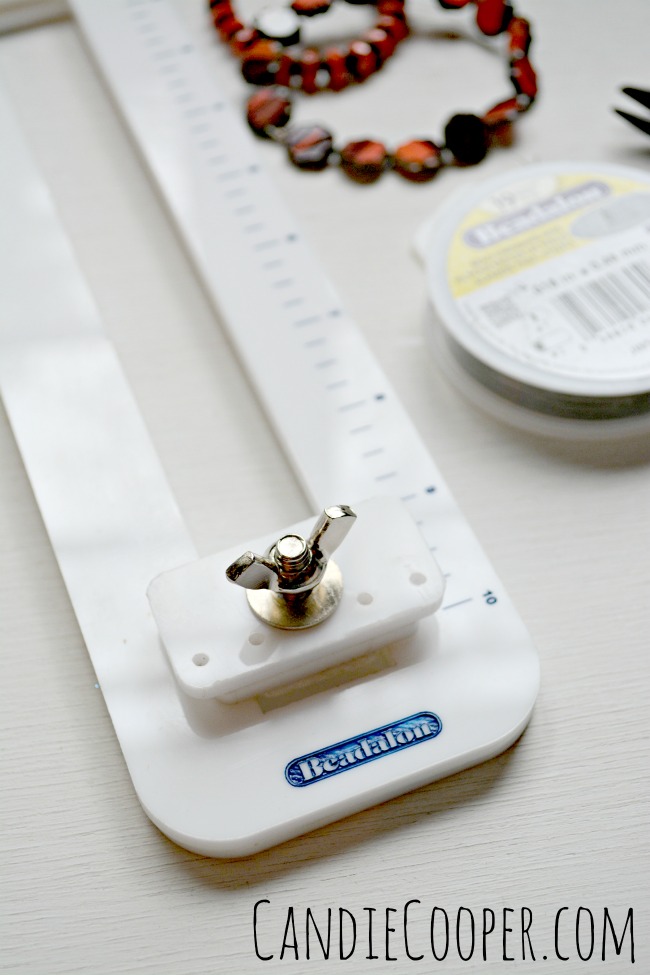
I really love the Tying Station because you can make hemp jewelry without having large holed beads (oh and that I don’t have to sit like a pretzel for hours while I knot).  Here’s how:
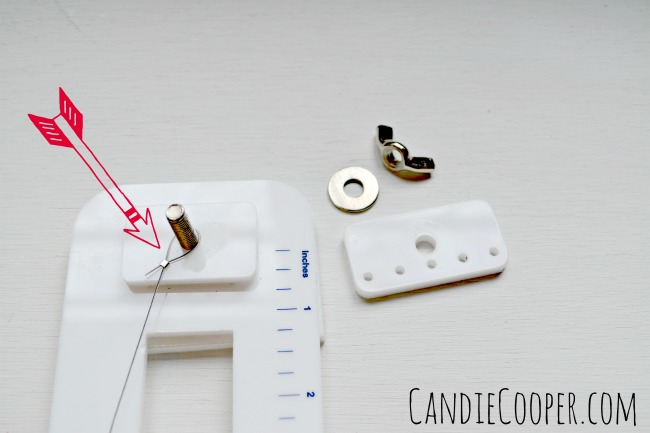
How to macrame a bracelet with Beadalon's tying stationString the beads for your bracelet onto the beading wire.

Secure the end of beading wire with a crimp bead onto the top peg of the Beadalon tying station.  The loop needs to be loose so you can slide it off easily.Beadalon Tying StationWrap the opposite end around the bottom, under the plate of the Tying Station and twist the nut down so the cord can’t slide.Step 1 It was when I looked at this with fresh eyes and thought to myself yeeeahhhhhhh.  No.

What is going on in this photo??

The Hokie Pokie?

Sorry.

For the hemp:  Cut a yard of cord and tie it to the central wire so that both tails are even length.

And now, I’m going to send you here, if you want to learn this basic square not.

Macrame Jewelry Tutorial with Beadalon Tying Station toolWhy I didn’t make all the knots like this photo?  I have no idea.  BUT!  You get the idea right?  Slide a bead into place and knot around it.

Making an easy bracelet on Beadalon's Tying Station toolThe second reason I love this tools is because of the measurements on the side so you know how long your bracelet will be.

Also, you can also use the tool to create really long wrap around bracelets thanks to the foam plates that hold everything down.

Right now, this bracelet is 7.25″ long which is good if your clasp in 1/2 inch to 3/4″.DIY Macrame JewelryWhen you are finished, slide the bracelet down on the core wire toward the bottom peg.  This gives you a little wire on the end so you can cut away the loop and attach your clasp with crimp beads like normal.  Tie the hemp in a knot and secure it with multi-purpose epoxy.Macrame jewelry finishing ideasHere are a couple clasp ideas  (from L to R): traditional toggle, seed bead loop/button, button/lobster clasp.Macrame JewelryI love all the colors hemp comes in now.  When I was in school we had brown, brown, or brown.How to make macrame jewelryThe peach bracelet on the right is actually a necklace or wrap around bracelet.

DIY Macrame Bracelet TutorialStack em’ up! and wear em’ proud!

I’ll see you tomorrow with a new tutorial, Beadalon Breakers!


More info on the Tying Station on the Beadalon site!

Stone Fringe Necklace

This post brought to you by Jesse James Beads.DIY Stone and Leather Statement Necklace from @CandieCooper #JewelryMakingPurple Rain….sing it with me, people!

No doubt, I am hooked on these fringe focal bead pieces from Jesse James Beads.  They come in a variety of colors and stone types, ready to string into statement necklaces and I’m going to show you an idea for how to use them in your jewelry making.Autumn leavesBut before we get going, I have to show you this leaf blizzard happening in our front yard.  I’m not complaining because I love wading through leaves.  Hopefully the mailman feels the same.

Really, the colors of fall are so inspiring, aren’t they?  That’s where I found the inspiration for the color pallet in this necklace.  Ambers, plum, sparkly orange and rust, it all works together.  Take a peek.Stone beads from JesseJamesBeads.comYou can find all of these magical beads in a kit ready to make right here from JesseJamesBeads.com!Beading materialsYou will also need: crimping pliers, wire cutters, Beadalon beading wire (19 strand, .018 diameter), perhaps some bead stoppers, #1 crimp beads, a piece of leather (8″) and that should do it.  You can find these fine tools and supplies also on JJB.com.How to make a beaded loopString your focal beads separated by hematite beads (I used 3).

String 2 crimp beads, 1 hematite bead,  2 small round beads, 3 hematite beads, round bead, 3 hematite beads, round bead, hematite beads, 2 round beads, hematite beads, round bead, hematite beads, round bead, hematite beads, and round bead onto the wire.  Thread the wire through the first round bead, hematite bead and crimp beads.  Cinch up the loop and  crimp.How to make a statement necklace wtih @JesseJamesBeadsSlide the beads to the finished end and repeat, making a second beaded loop.Jewelry Making tutorial with @jessejamesbeadsSecure a new wire to the middle of the beaded loop by crimping and string the sides in desired order.@JesseJamesBeads necklace tutorial from @candiecooper

Make a loop at the end of the beading wireFinish the ends with small loops, just big enough for the leather to fit through.Leather clasp idea for jewelry makingThis is a nifty closure that I’m also hooked on.  I don’t know why I don’t get the leaves raked?  Thread the leather through both loops and tie in a bow.  How about that easy and unique clasp solution!Jewelry Making Necklace tutorial from Candie Cooper

DIY Stone statement necklace

Stone necklace from Candie Cooper and Jesse James Beads #jewelrymaking

#jewelrymaking tutorial via @candiecooperDon’t stop here–You can attach leather, chain or ribbon to the sides of this focal front piece too!

We’re watching The Voice tonight so if there are typos or errors in this post, please direct complaints to Pharell and Blake Shelton.  Ok?  Ok.

How to Make a Bracelet

This post is brought to you by Beadalon.How to Make Easy Bracelets on Candie Cooper's blogLooking to add a little spice to your fall wardrobe?  These DIY statement bracelets will do the trick and they only take about ten minutes each to make.
Candie Cooper Jewelry Work BenchWelcome back to my work table up here in my studio nest.  Admittedly,  it’s gotten a little more cluttered because I moved more stuff up from the back porch.  It takes me awhile to figure out where I want things, plus I’d rather be making than cleaning.  Anyone with me?
Jewelry Making Easy Tassel Bracelet Tutorial with Beadalon Elasticity via Candie CooperSo the other day I rode along with my husband to a fun little town where he had to meet some clients.  I worked at a coffee shop for the first couple hours, then we explored during lunch time.  Guess what we stumbled upon?  A bead shop, closing, everything 50% off.  It was bittersweet.  I hate seeing a cute shop closing like this, but the lady was happily retiring so I guess it was bittersweet for her too.  She had a great collection of Czech glass that I loaded up on and that’s what I used to make these bracelets.

You will also need some Beadalon Elasticity, perhaps some sweet charms and tassels, and metal spacer beads.
Chain nose pliers for attaching charms to braceletsFirst things first, grab your chain nose pliers and add a jump ring to each charm so they are ready to string.
How to attach a charm to a braceletOpen your jump ring from side to side (not like a “C”) and attach a charm.  Close the ring how you opened it.  This keeps it perfectly circular.  Beadalon makes findings like these jump rings in a ton of metal finishes and thicknesses.
Beadalon clear beading elastic, ElasticityLet’s talk a little bit about beading elastic.  Elasticity comes in different diameters–.8 and 1mm seen above are the two I use the most.  I use as thick of elastic as I can that will fit through the bead holes so my bracelet is strong.
Beadalon Elasticity in size .8mm for smaller holed beadsWe all know no two beads are alike so check all your beads to the diameter of Elasticity before stringing.
How to make an elastic braceletThank the Lord for bead boards.  I use Beadalon’s version with the case so it stays nice and clean plus it travels well (from my studio to my lazy girl chair or even in a suitcase).  Lay out your beads and charms on the outer row.  This one is in inches so you can see how long your bracelet will be.  Start stringing…How to tie beading elasticWhen you’re happy with the bracelet, check the back of the Elasticity package for how to tie a secure knot.  It’s helpful to slide the knot towards the beads and then pull the tails apart to cinch the knot even more.
How to make an elastic bracelet, seal the knot with nail polish so it stays tightSecure the knot with a touch of clear nail polish.  Leave to dry, give it one last tug and then trim the ends leaving little tails.
Charm Bracelet tutorial on Candie Cooper's Blog
Charm Bracelets on Candie Cooper's blog with Beadalon jewelry making findingsI’ve been wearing these one at a time and all together with some metal bangles, comfy sweaters, brown boots, and my favorite orange scarf.  Cozy.