Accessory Ideas

Time for another Beadalon Pinterest fashion board round up!  Last month’s was all about geometry.  This month we’re all about the leopard print!

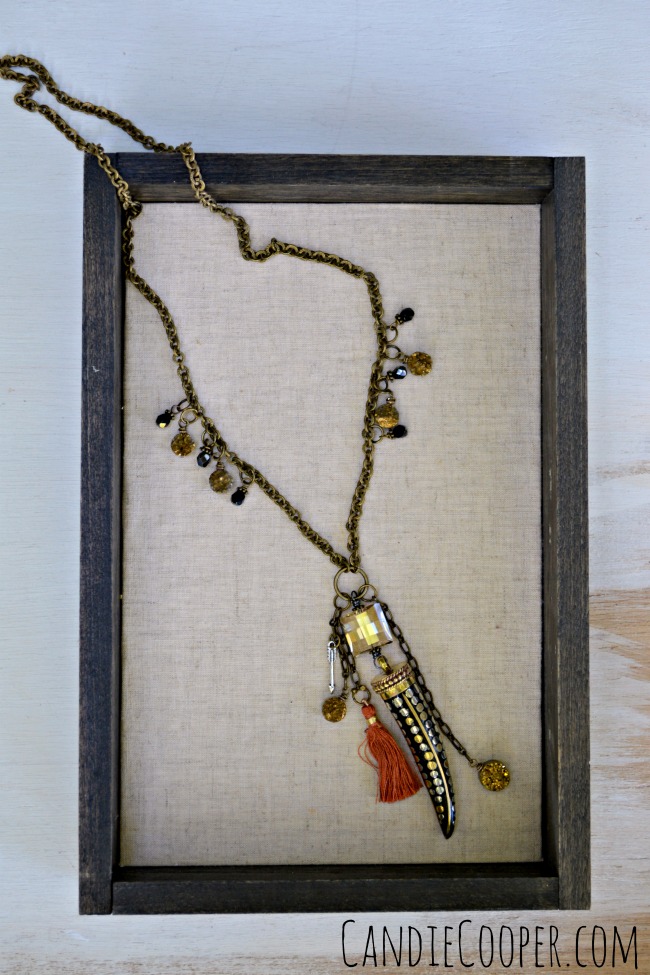
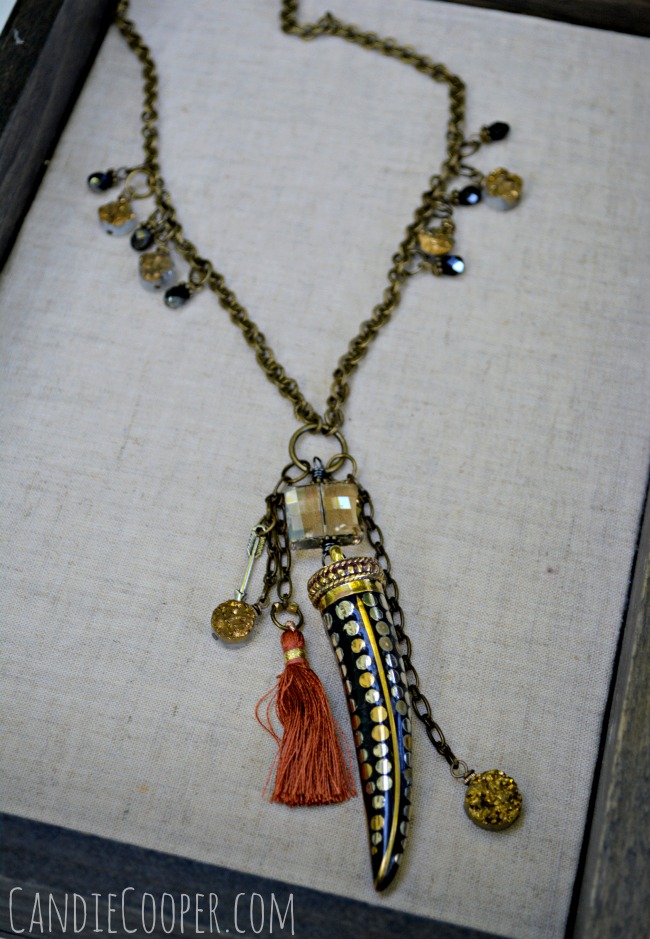
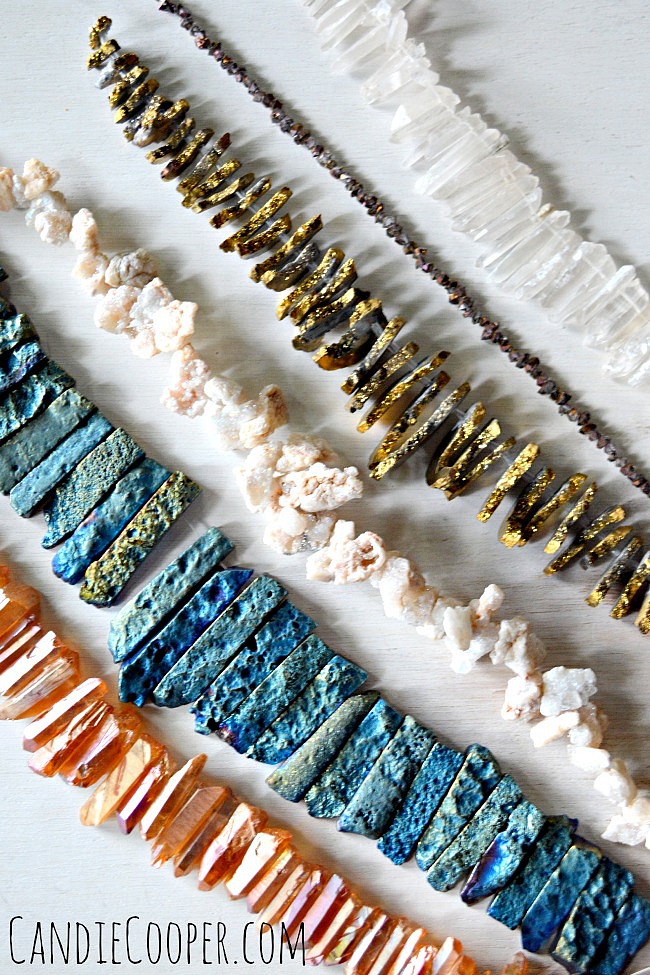
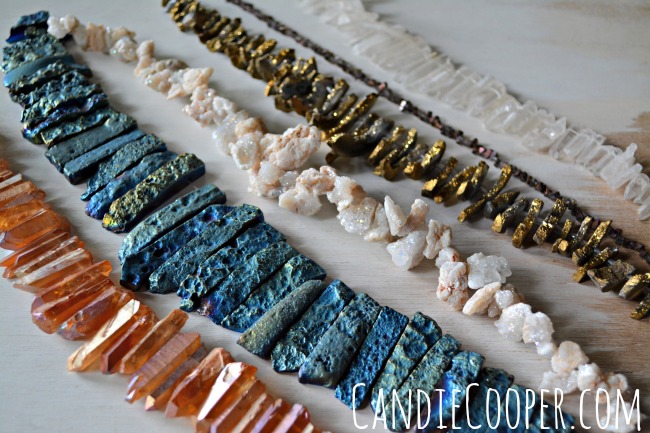
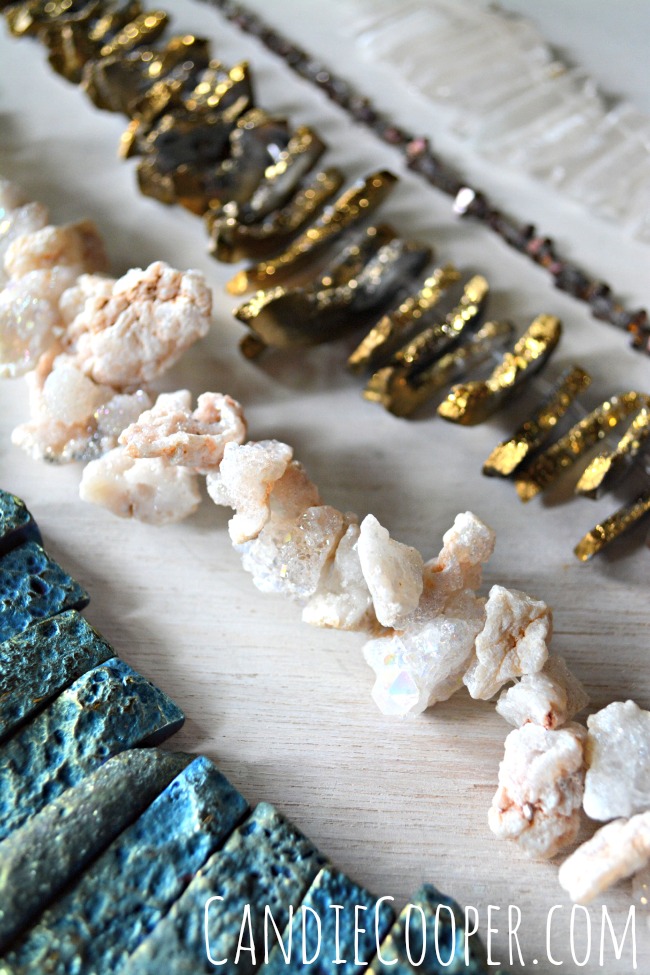
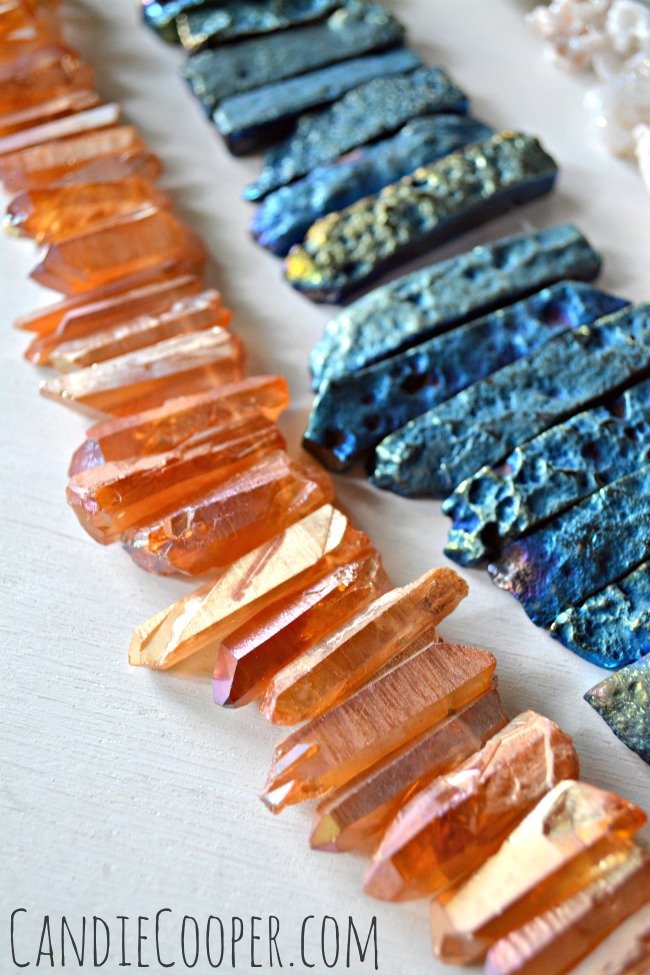
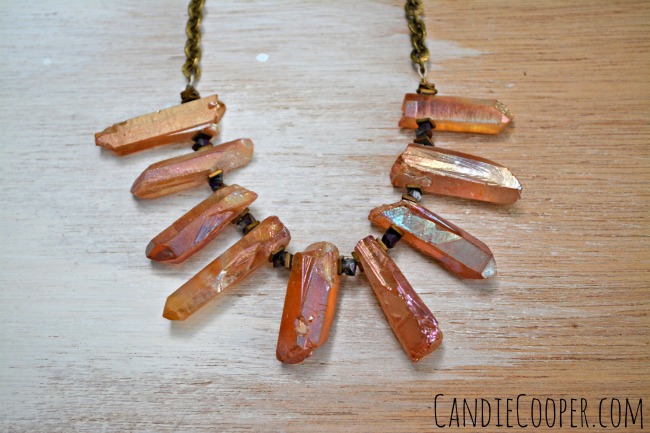
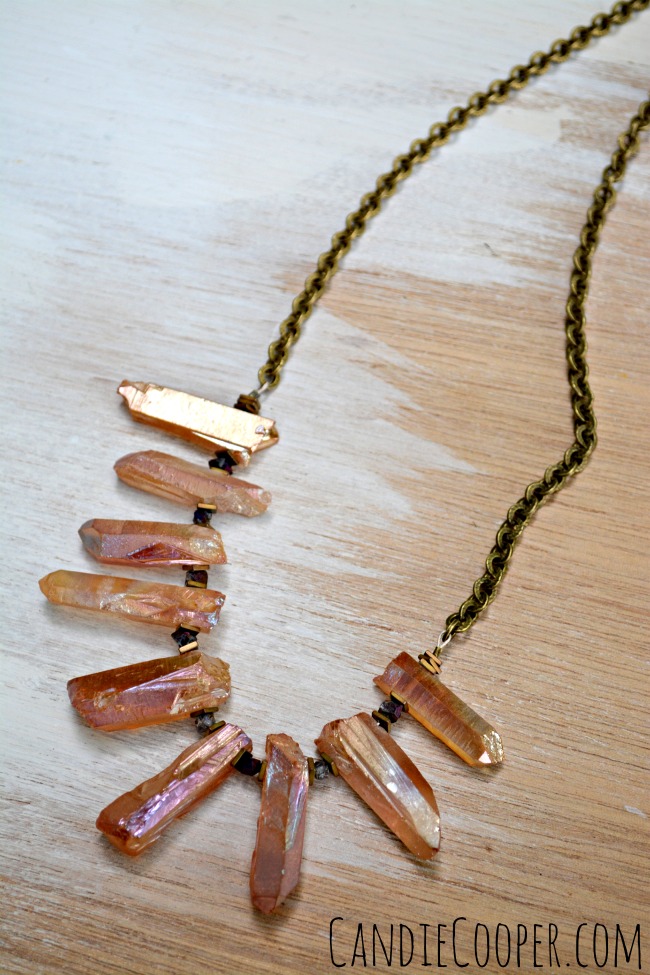
I’m still hooked on those druzy beads.  Big time.  I’ve been wearing this faux tiger tooth piece a lot lately–see all the gold druzy beads peppered through out?  Just can’t get enough!  I hung the tooth and dangles from Beadalon’s stamped antique brass colored chain.  Also cannot get enough of that colored chain!

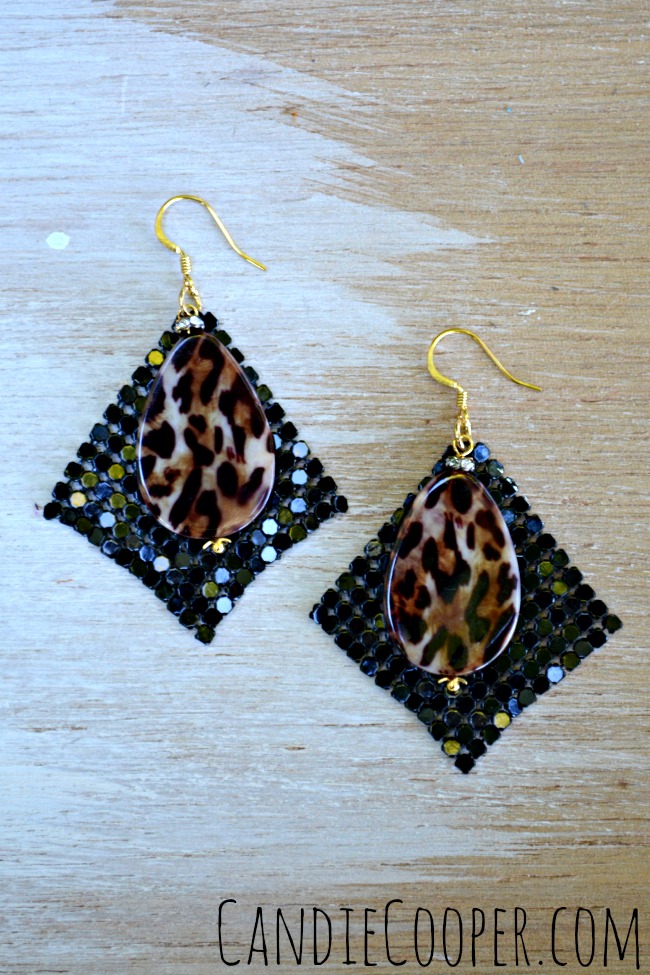
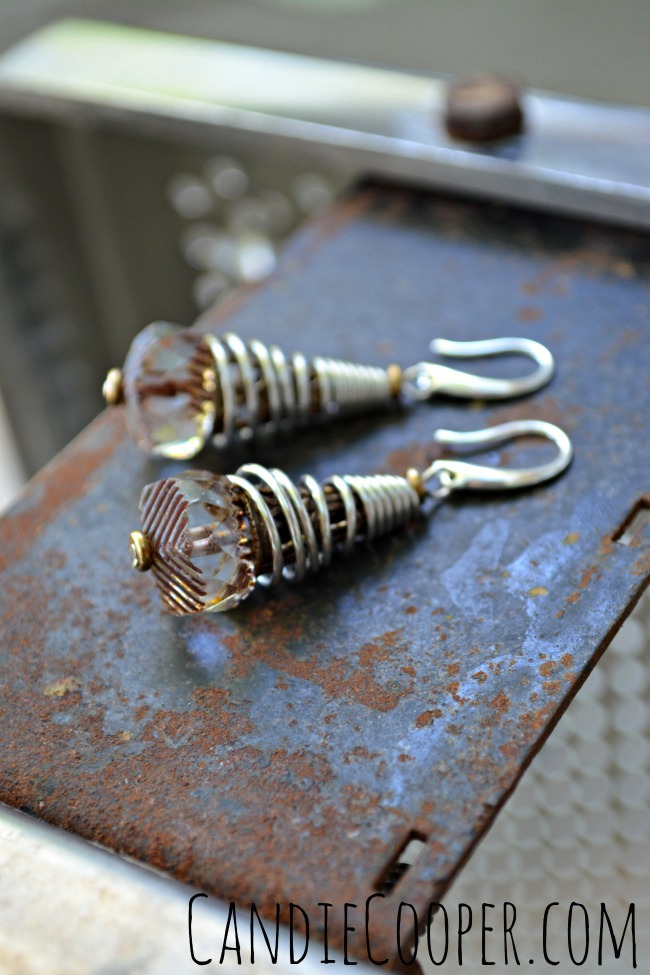
Then I made some earrings with some of Beadalon’s sassy Aluminum Fabric. See you on the dance floor!

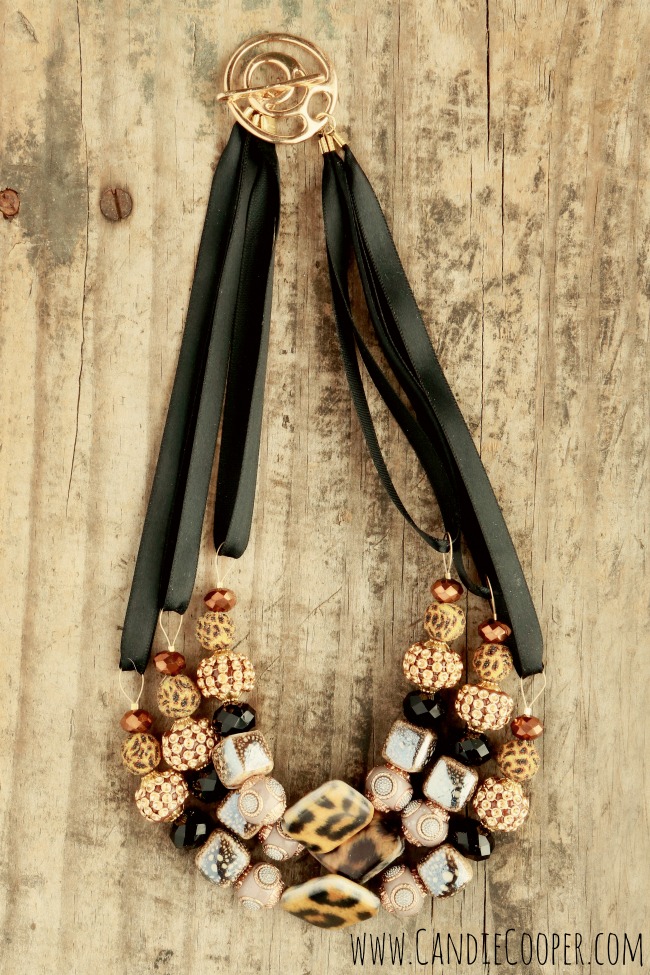
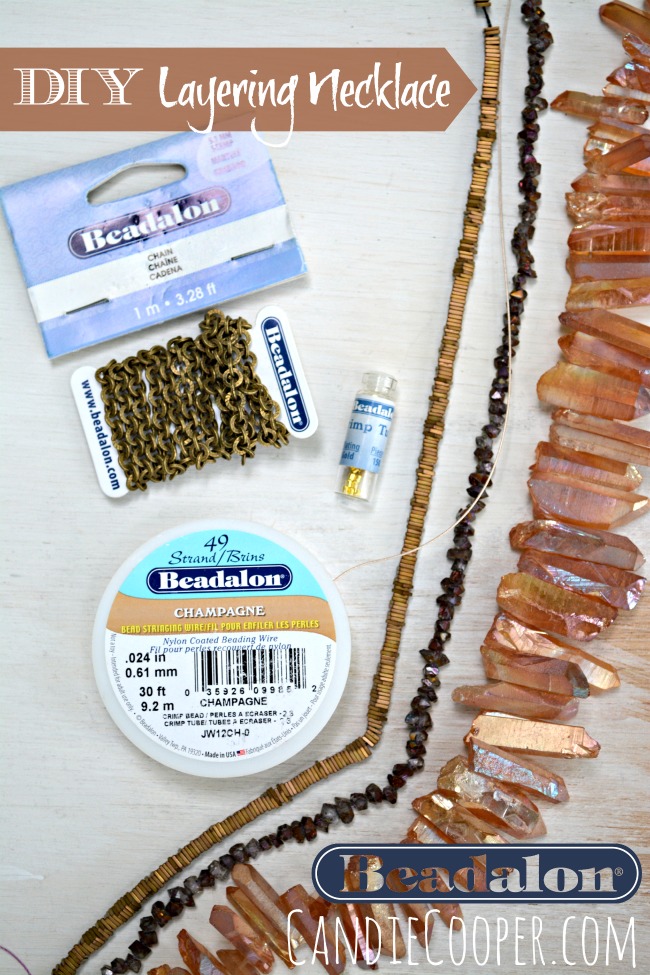
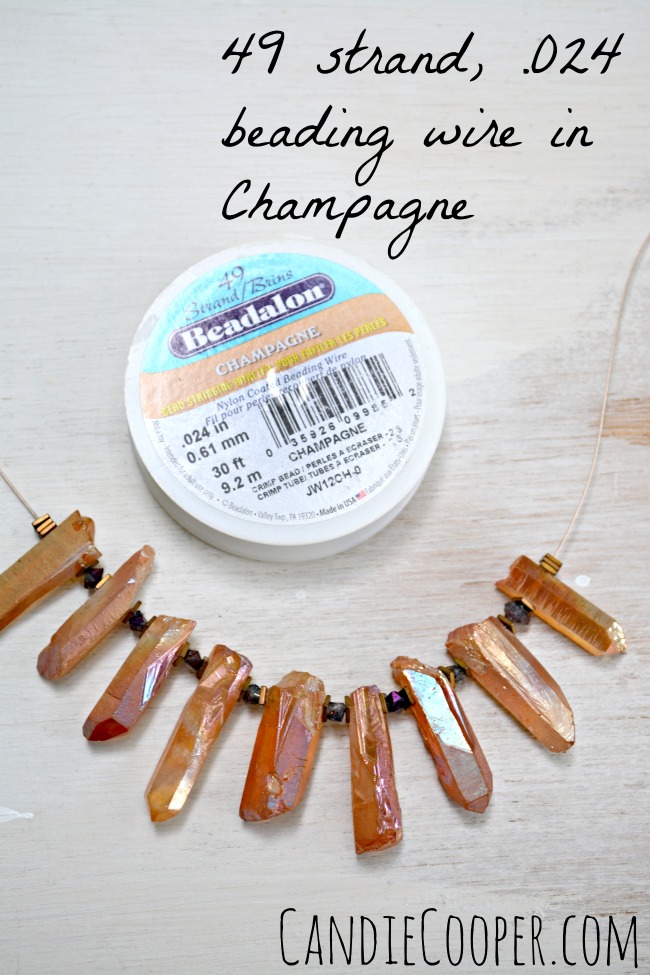
The last is a piece I made earlier that uses Jesse James leopard print bead strands strung on Beadalon champagne colored beading wire.  Rawr.  Suspended from satin ribbon…double RAWR!

Visit the Pinterest link above for more leopard love!

Tassel Necklace

Tiger Tassel Necklace with Beadalon Chain and FindingsLeopard Print Earrings with Beadalon Black Aluminum FabricCandie Cooper Leopard print statement necklace.jpg

How To Make Steampunk Jewelry

This post brought to you by Beadalon. How to Make Steampunk Jewelry  Earring tutorial with Beadalon's Conetastic ToolHere we are with October knocking on the door!  Already!  This post is going to show you the basics of using Beadalon’s new Artistic Wire Conetastic tool designed by the lovely, Sandra Lupo.  This is my first tutorial from my new home office.
Candie Cooper studio work table
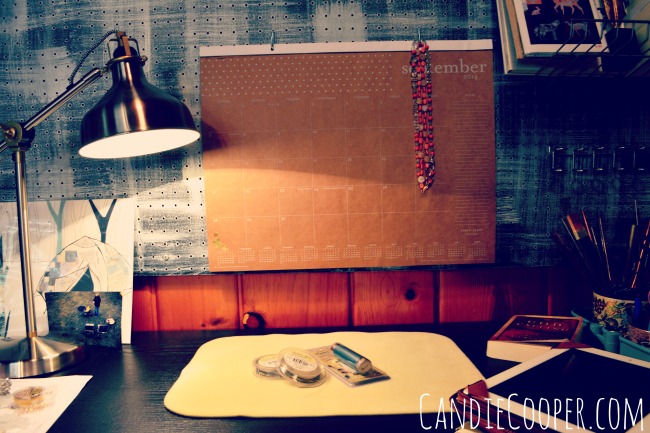
So welcome!  I had my work table downstairs for the summer because we don’t have air conditioning.  Now that it’s cooling off, I’m back up in my nest and LOVIN’ IT!!!  Do you like my Ikea task lamp?  I’m still in the stage of trying to keep my desk really clean.  Day 3: so far so good.  By Christmas it will look like a tornado went through the craft store.
How to Make Bead cones with wire and Beadalon's Conetastic Tool on Candie Cooper's BlogBack to the Conetastic!  This jewelry making tool is designed to work with Artistic Wire so you can make your own coiled bead cones.  It’s a really nifty little tool!  This is my first time taking it for a test drive and after sleeping on it, I have some more ideas to try.
Artistic Wire and Conetastic tool from BeadalonThe first thing I really liked is how compact it is.  For this tutorial, I’m using it with Artistic Wire 18g. in Tinned Copper (my fave).
Conetastic wire working tool from BeadalonWhen you open the packaging, you’ll find awesome instructions.  To get rolling, you twist open the end cap and all the parts come out.  Also, I liked how heavy the pieces are–definitely a tool made to last.
How to use the Conetastic tool
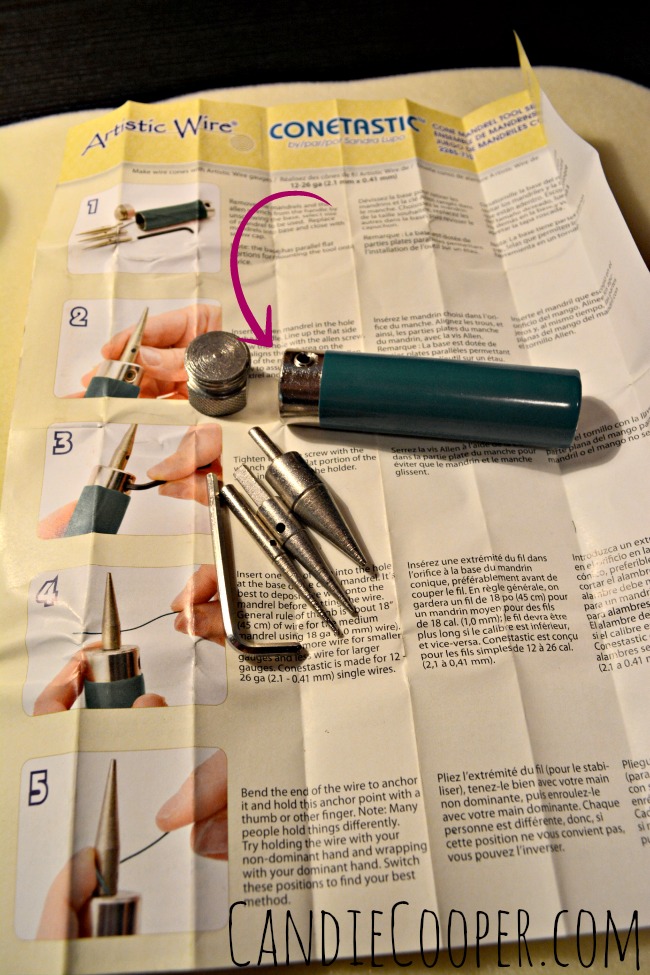
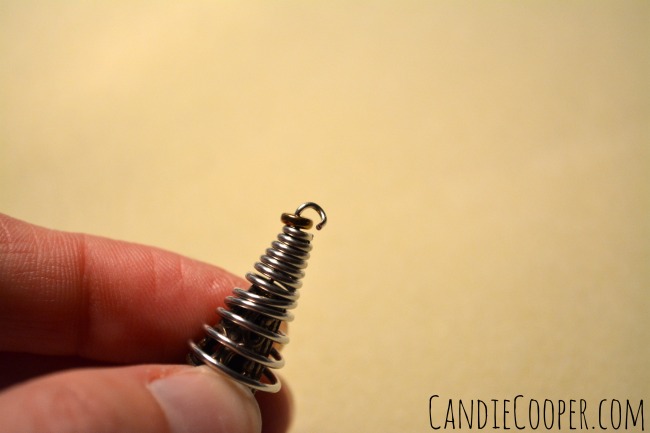
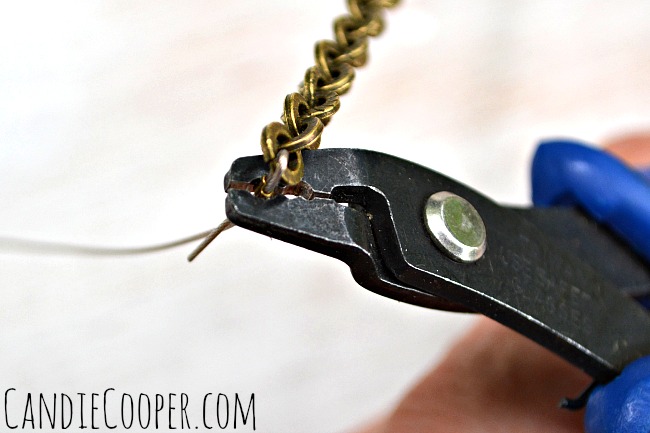
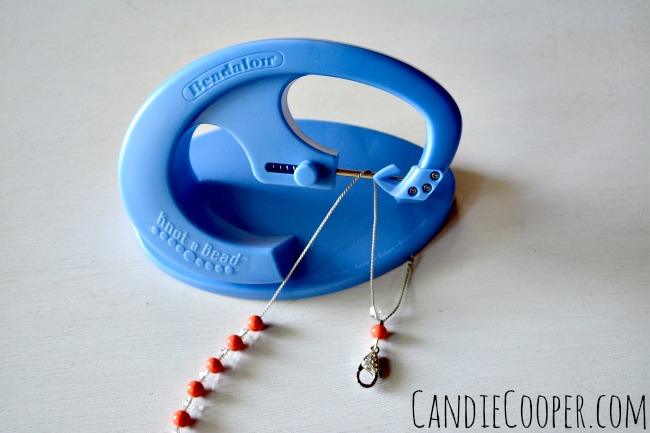
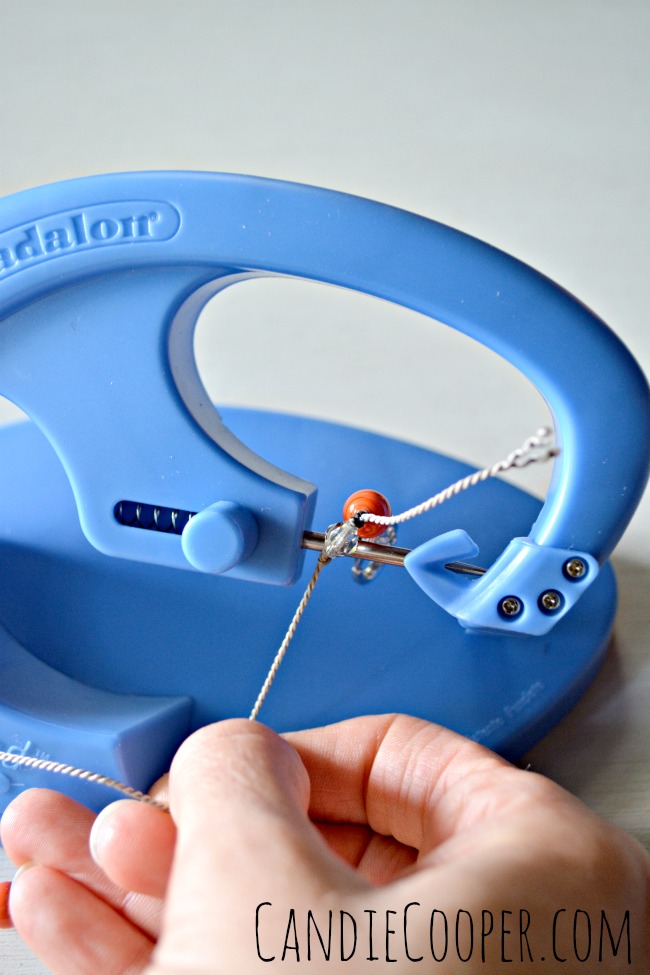
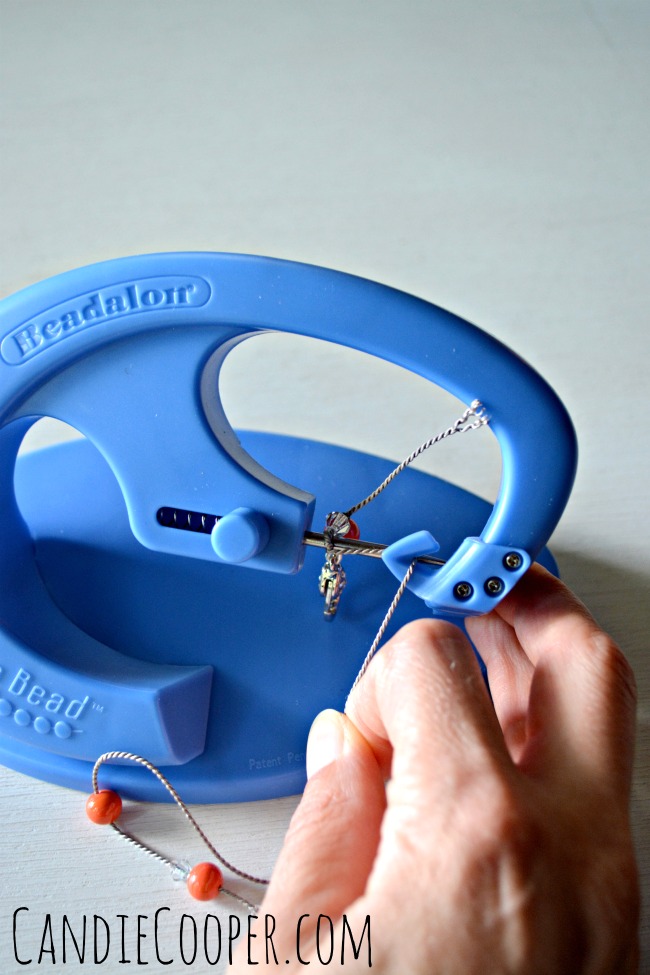
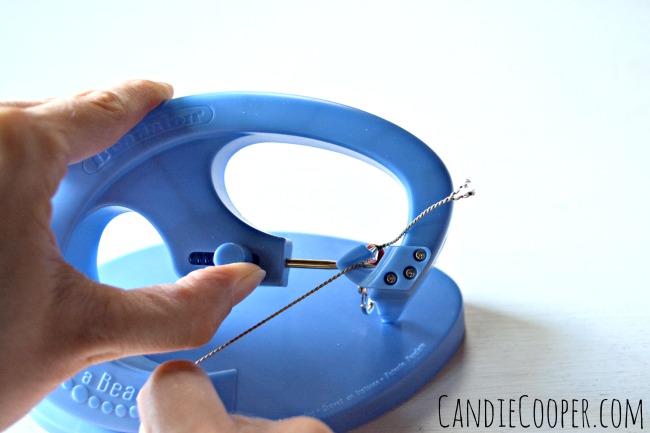
There are three different cone sizes and a little wrench.  The wrench loosens the pin so you can set the desired cone size in the tool and then tighten it in place.  Super easy!  I practiced with the tiny cone first.
How to coil wire for jewelry makingIt took me about 30 seconds to make one coiled bead cone.  Already I’m thinking I need some silver plated Artistic Wire so I can oxidize it with liver of sulphur and then distress it to highlight all those coils.  I love the liver of sulphur patina.
Artistic Wire 18g. along with Conetastic toolWrapping the 18g. wire really made for a heavy look.  Depending on your project, you might want to play with wire gauges and cone sizes to get just what you want.

When you are finished coiling, all you have to do is snip the ends of wire away from the tool and spool.
Making earrings with coiled bead conesFor my next experiment, I used the largest cone to make some more playful and loose coiled bead cones.  That’s when DIY steampunk jewelry popped into my head.  Playing with layers in jewelry making is a love of mine so these Conetastic bead cones fit right in.  Here’s my first attempt with brass bead cones under the coiled pieces with glass pearls.  Fail.  The glass pearls just weren’t cuttin’ it.
How to make earrings with coiled bead cones on Candie Cooper's blogWhen you are settled with the bead stack, string everything onto a regular head pin and then finish the end with a simple loop using round nose pliers.
Making coiled cones for jewelry making with Conetastic toolGrab some chain nose pliers and open the loop from side to side.
Attaching the ear wire to earringConnect the Modern ear wire and close the loop.  I accidentally squashed one of the coils down too much, making it look a little wiggly, but I’m ok with it.
How to make coiled bead cones on Candie Cooper's blog

Earring Tutorial with DIY Wrapped Bead Cones on Candie Cooper's BlogWire Wrapped Bead Cone Tutorial

Wire wrapped bead cone tutorial from Candie Cooper using Beadalon's Conetastic tool

Here’s a link to shopping for the Conetastic tool in case you want to add it to your Christmas list. 😉

How to Make a Crystal Layering Necklace

This post is brought to you by Beadalon.com.  All opinions are yours truly.DIY Jewelry Making  Crystal Quartz Layering Necklace from Candie CooperHave you been to a bead show lately?  I have and I can tell you there are so many stunning strands of quartz crystals and druzy beads.  It’s not good for the pocket book.  Take a peek at some of the ones I brought home from Bead Fest Philly Summer.Quartz and Geode Necklace Beads

Quartz and Geode Necklace Beads

Geode Crystal Beads

Orange Crystal Necklace BeadsI am especially smitten with, well all of them.  Well.  Except maybe the blue ones.  I don’t know what happens to me when I’ve been around beads too long (it also happens when I’m in Walmart too long), but I inevitably end up with something that I just. don’t. know. why. I. bought.  Sigh.  It’s cool, but is it jewelry worthy?  The verdict is still out and may be for a very very long time.  It’s over indulging I think.  Eating dessert when you’ve already had a slice of pumpkin pie at Thanksgiving.  Just too much of a good thing!Jewelry Making Quartz Layering Necklace Tutorial from Candie Cooper with Beadalon Champagne colored beading wireThe main materials are Beadalon‘s Champagne colored beading wire in 49 strand, .024″, brass stamped chain, #2 or 3 crimp tubes will work and some crimping pliers and wire cutters.

I also worked in some added strands from Dakota Stones–more purplish quartz chips and gold hematite squares.

These colors are all over the Fall look books so I know this necklace is going to get a workout in the next couple of months.String the quartz onto Champagne colored Beadalon WireI was so happy to find I still had 10″ of my very favorite colored Beadalon wire to use for this.  I love champagne anything!  However, Beadalon makes beading wire in pretty much every color in the rainbow!

Note! These stones are heavy and have rough edges that can potentially saw through thinner beading wires.  That happened to me once (love learning those lessons the hard way!) so take it from me, get the good stuff!  Beadalon, .024″ 49 strand is the way to go because it’s super embarrassing to say you “make jewelry” and then have gems and beads scattering all over the floor.  Even more humiliating to be on your hands and knees picking them up at a party.  None the less, when using stones like this, it’s always a good idea to take a peek at how the wire is doing and holding up.How to use crimp beadsString the tail of your wire through a crimp bead, the last link of chain and back through the crimp bead.  Grab your crimping pliers!How to Crimp wire to chain in jewelry makingPlace the crimp bead in the opening closest to the handles and smoosh down like so.How to Crimp beads to wire step 2Turn the crimp bead 90 degrees, place in the next opening away from the handles and fold it on over like this:Crimping wire to chain layering necklace tutorialSee how it folds the crimp bead over?How to open a link of chain
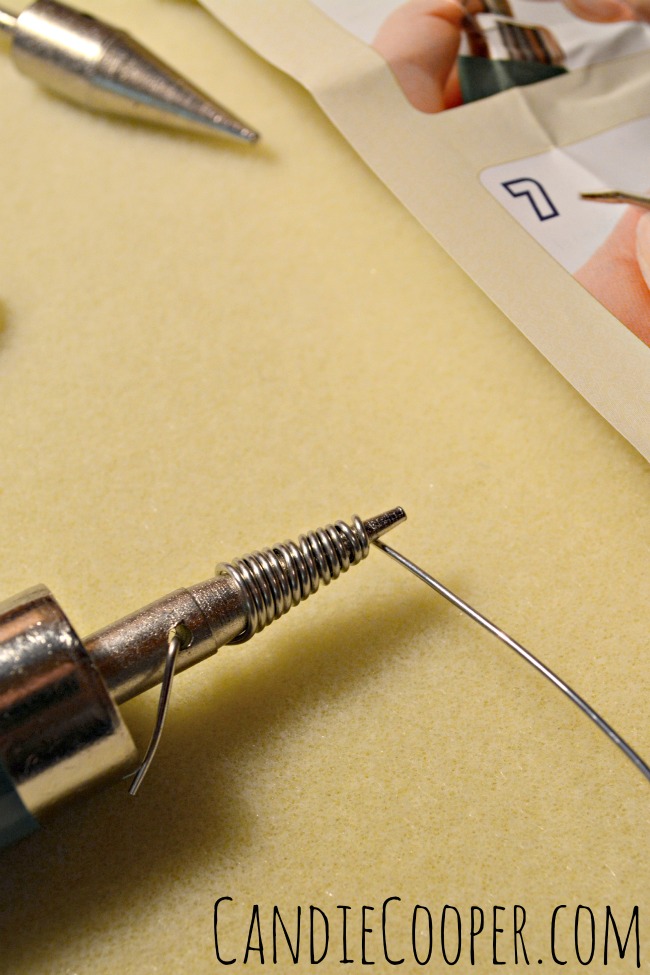
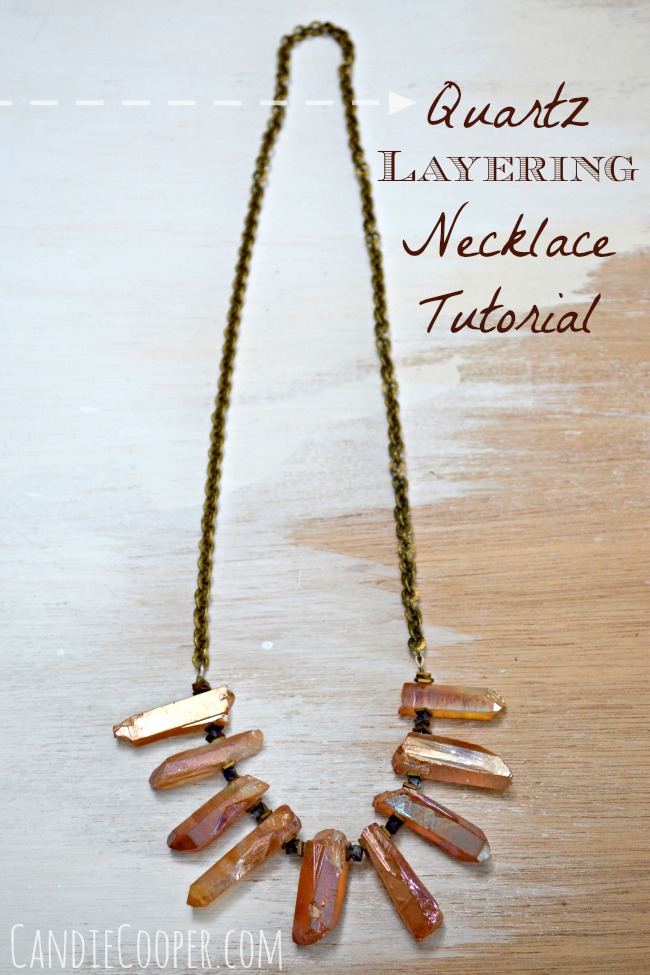
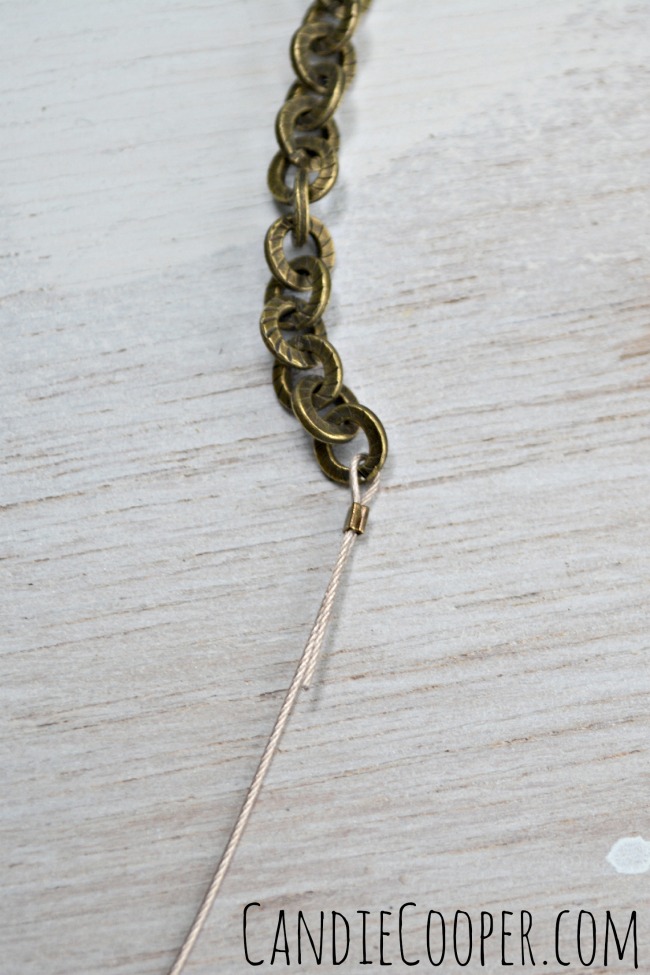
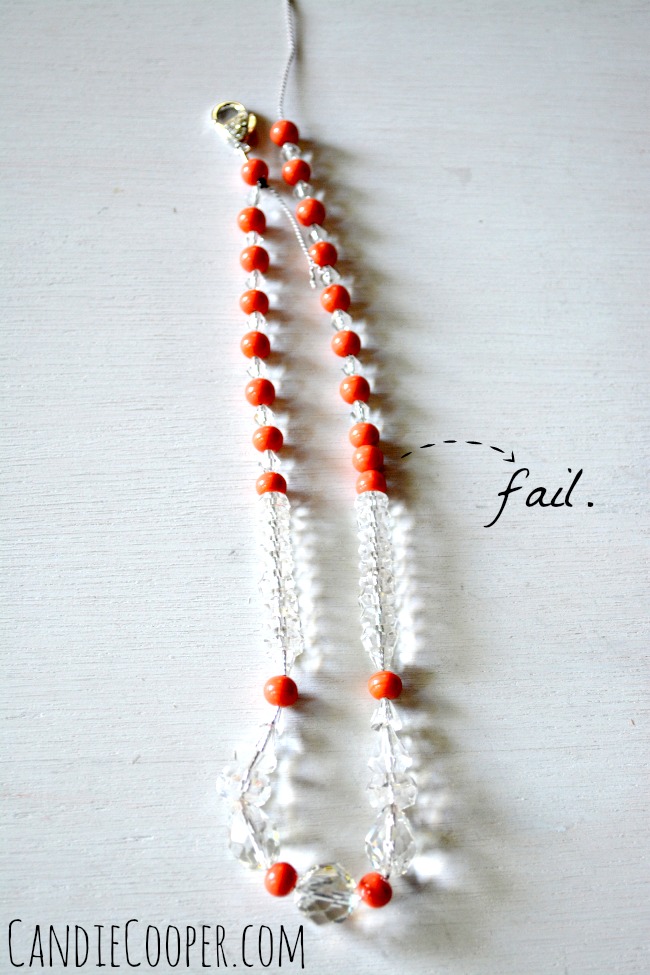
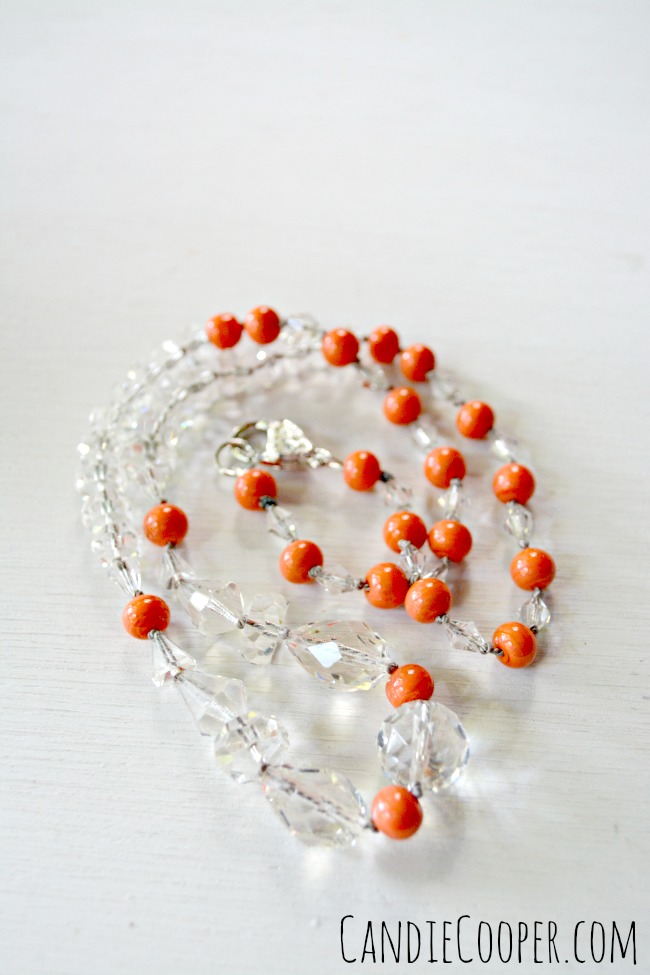
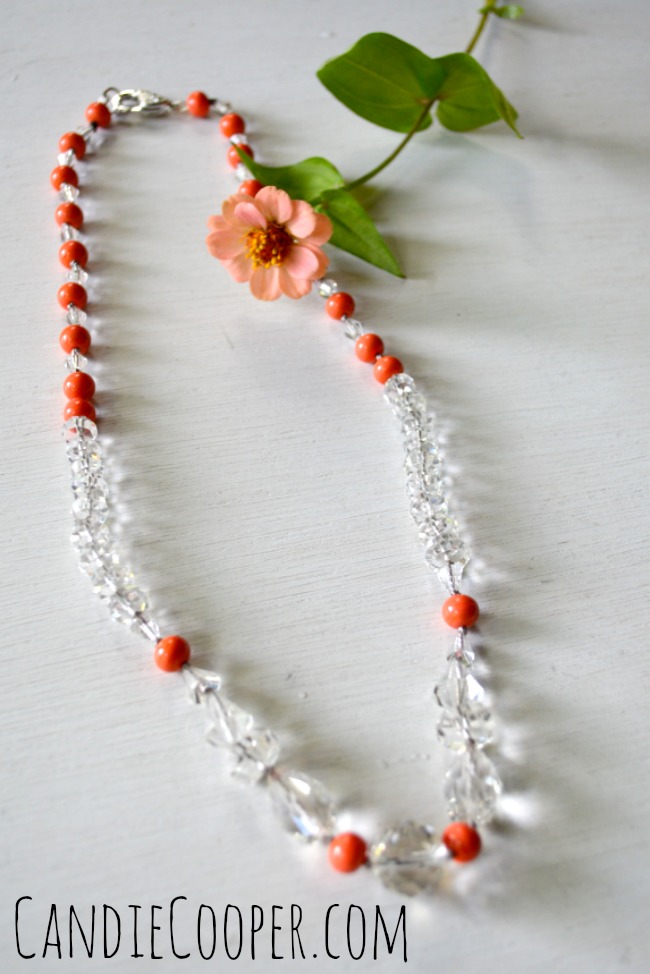
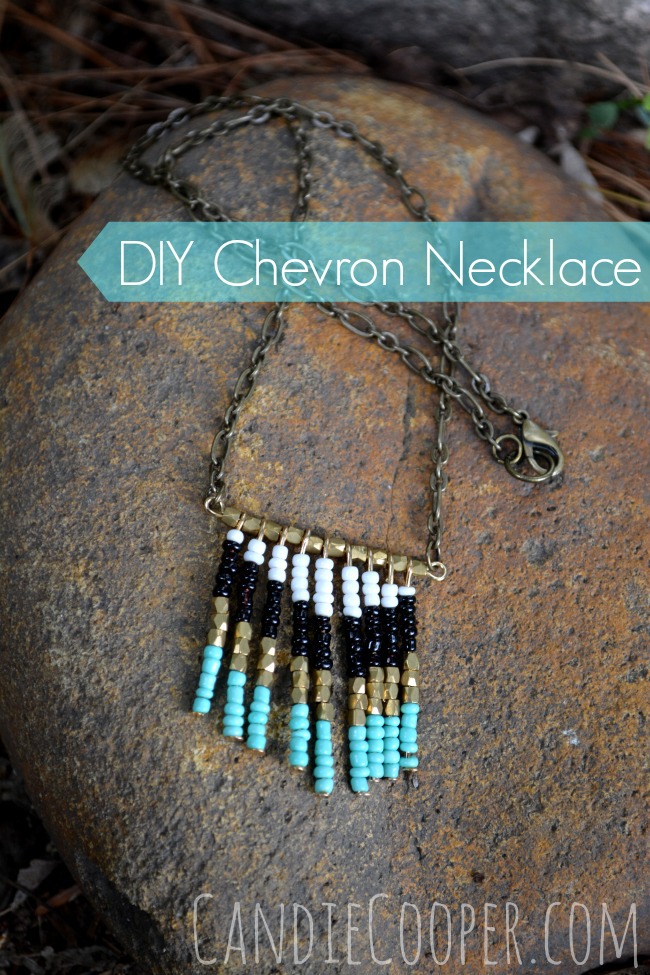
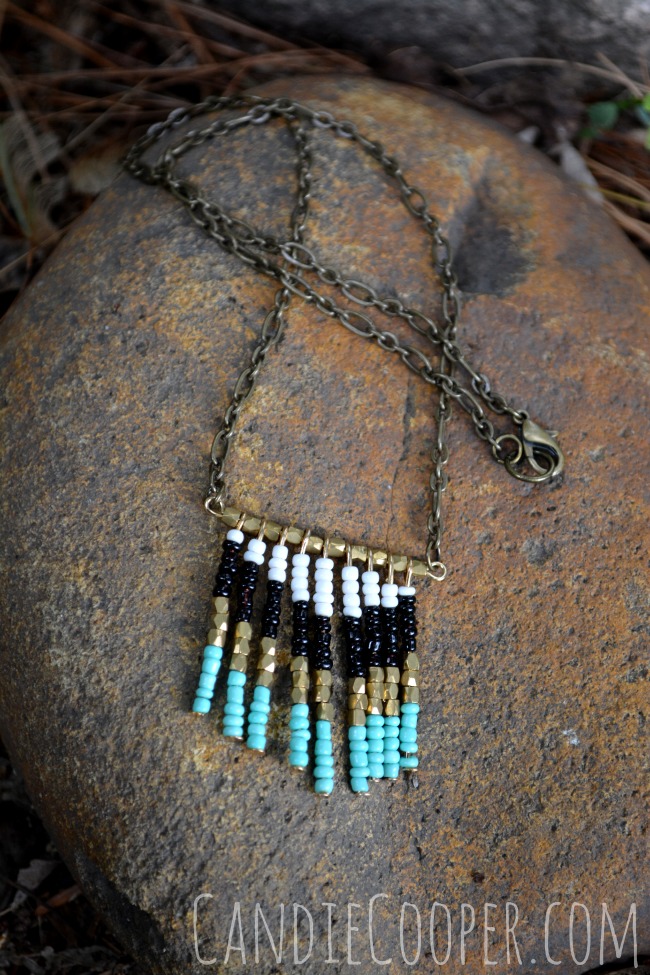
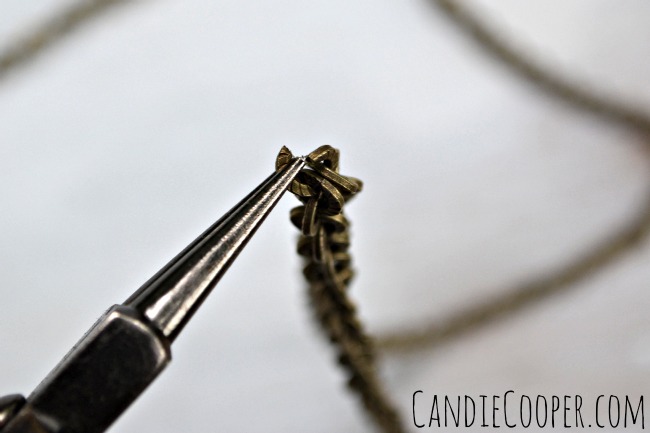
This necklace does not have a clasp.  I simply determined how long I wanted the necklace to be so I could slip it on and off, opened a link of chain from side to side and removed the extra which will be used for a rainy day.Layering Necklace TutorialSlide all the beads to the finished end, string a crimp onto the wire and through the last link of chain and crimp again.  Trim the excess wire.Autumn Layering Necklace TutorialBlissfully simple!
Layering Necklace Tutorial from CandieCooper.comMeet your new favorite necklace!  She can roll solo or party with a few necklaces.

How To Knot a Strand of Pearls or Beads

This post brought to you by Beadalon.com. How to Knot Pearls and Beads with Beadalon Knotting Tool from Candie CooperConfession:  I have a hoard of old necklaces with great intentions of re-doing each and every one of them.  Tell me, I’m not alone.
Vintage Jewelry Re-done tutorialHere are two prime examples.  Stunning, heavy glass and crystal beads topped off with a tired clasp that is about to fall off because the original stringing job has done it’s time and then some.  Here is one idea for making over vintage jewelry and giving it new life!

Before I forget, I like to clean beads like this with a soft toothbrush and Dawn dish soap.  I’m always amazed at how shiny and pretty they look after a good bath.
DIY Knotting Tutorial with Vintage Jewelry from CandieCooper.comFor this makeover, I’m using Beadalon’s Knot-A-Bead tool.  In the past, I’ve tried knotting with the traditional wooden hand knotter tool.  My first attempts with hand knotting were scary and disgusting with big spaces between the knots and beads.  I put the hand knotter in a box and haven’t played with it since.  However, after gaining some confidence with this tool, I may give it a go again.

My first attempts with the Knot-A-Bead came out awesome on the other hand and now I’m a believer and am ready to knot every bead in sight!!

I’m also using a sparkly Upper Clasp from Beadalon and #10 Griffin Silk.  These beads have larger holes, so I can get away with using this heavier silk.

So, here’s how it goes…

Unwind your silk from the card and pull to remove kinks and tighten the silk.  I opted to keep the pattern on the crystal strand, removing the plastic pearls and replacing them with the salmon colored glass beads.  The gray silk made for a perfectly vintage and modern fusion which I found to be super appealing.
How to Cut Bullion WireCut two pieces of French bullion wire.  This is essentially a tiny, tiny, tiny coil of wire that protects your silk where the clasp will rub.  Make sure to get the corresponding bullion wire to your silk size.
How to Knot Pearls or Beads  Getting StartedString one bead, bullion wire, and clasp end onto the silk.  The silk has a needle pre-attached to it so stringing is extra easy!
How to knot a strand of pearls or beads from Candie CooperThread the needle end of silk back through the first bead so the bullion wire makes a loop and the clasp sits in the middle.
G-S Hypo Cement for fibers and bead knottingKnot the silk just below the orange bead and dot with G-S Hypo-cement.  Leave the tail long until you are done knotting.
Knotted Bead Tutorial  StringingNow string the rest of your beads in the desired order onto the silk.  Can I just tell you it took me THREE times to get these beads right?!  I first knotted the whole strand and realized I missed a bead.  Cut, cut, cut.  Ain’t no way those knots were budging!  Made me sick to cut it apart, but I did.  SIGH.  Restrung them.  Fail.  See my next mistake?  Three orange beads in a row!?!

Third time was a charm!

Sanity is not overrated.

Before I forget, put a tiny jump ring (which will serve as a marker) before the last bead at the end of the strand–you will not knot between these two beads.
Beadalon Knot-A-Bead Tutorial with Vintage Jewelry from Candie CooperLay the clasp end over the awl so it drops behind.
How to Use the Knot A Bead Knotting ToolCross the clasp in front of the long tail/string of beads and through the loop.
Using the Beadalon Knot A Bead Knotting Tool.jpgPull the strung end tight and push the short clasp end back over the top of the awl.
Knot A Bead Bead Knotting TutorialPlace the long tail into the yoke/hook and pull snug.
How to Knot a Strand of PearlsContinue to pull snug while sliding the lever on the left to the left.  The awl tapers down the knot and slides it up next  to the last bead perfectly.
Bead and Pearl Knotting TutorialLike this!  Now, go into Zen mode and repeat, repeat, repeat.  I actually found myself day dreaming about chocolate (which I’m trying to back off of) and enjoying the crisp air.  I’ve also watched a lot of movies while working on the Knot-A-Bead in my Lazy Girl chair.
Bebe and the Knot A Bead
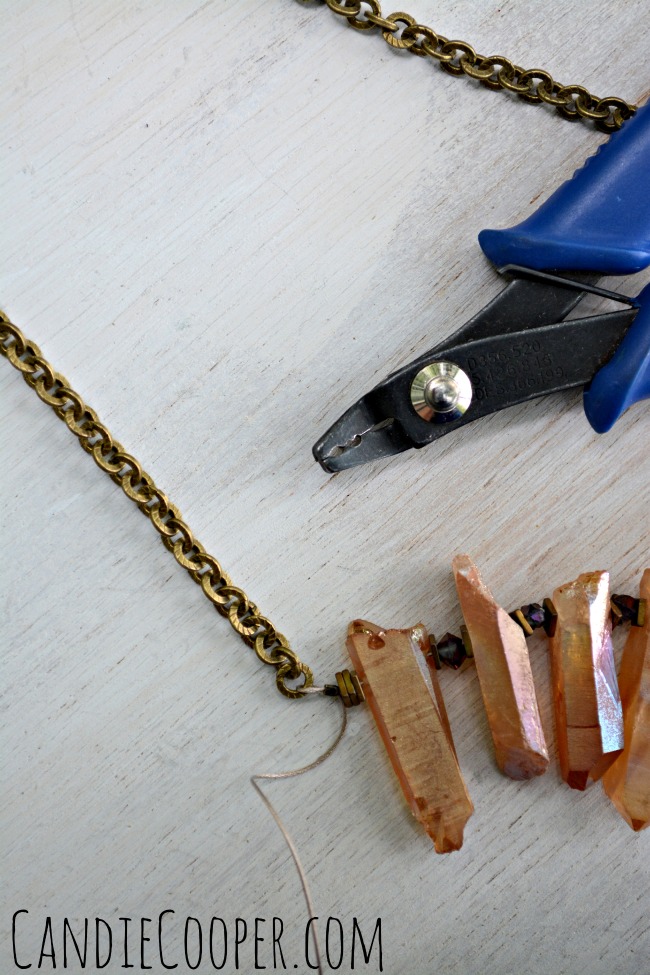
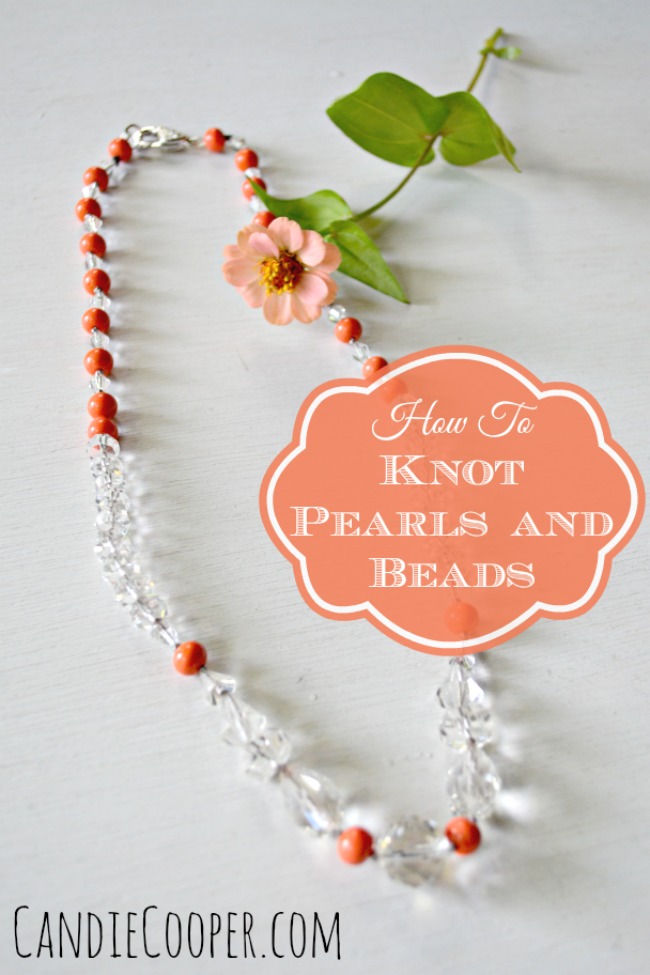
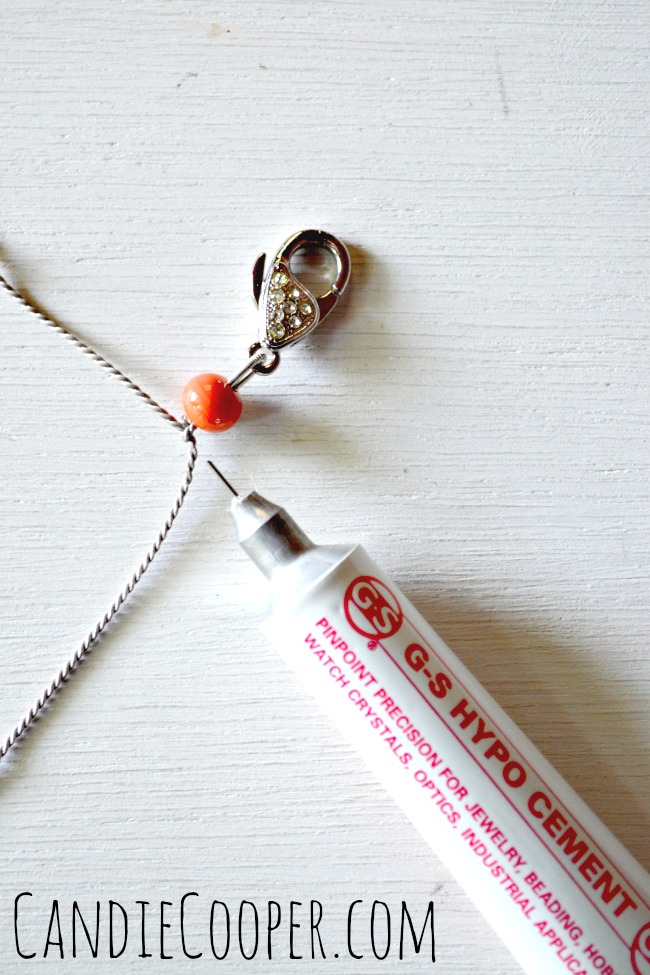
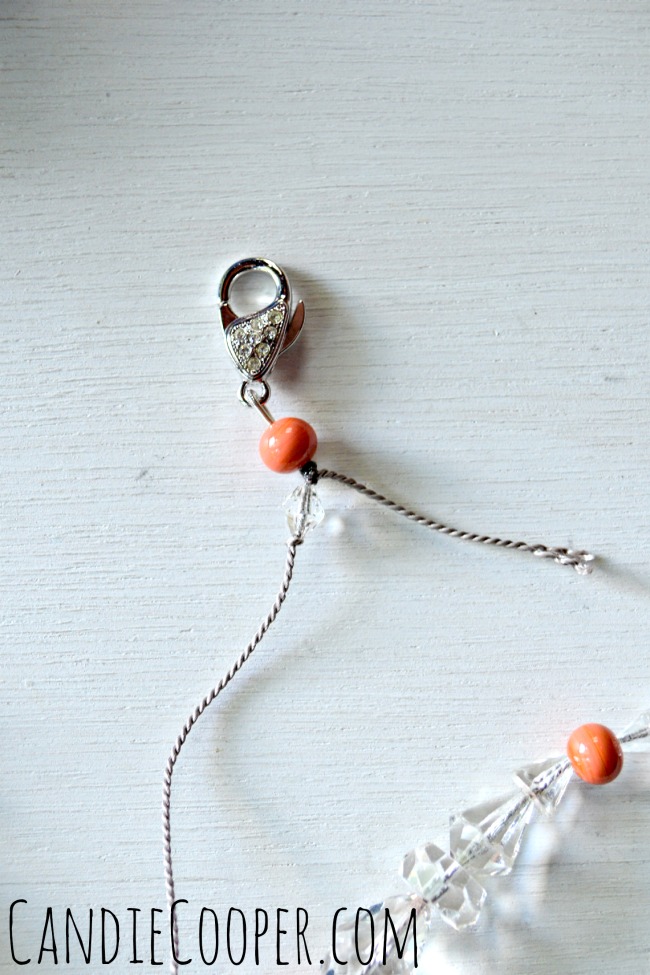
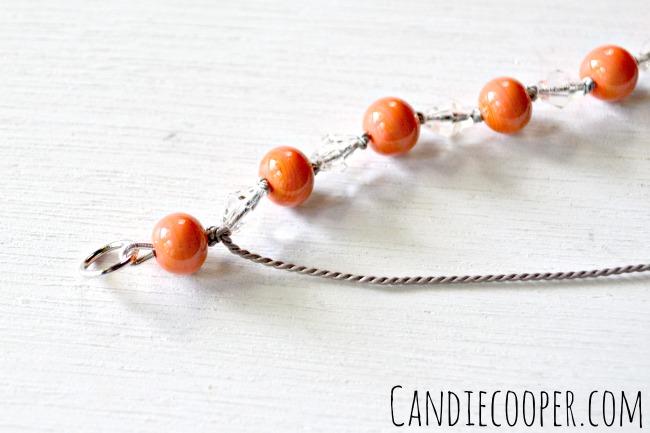
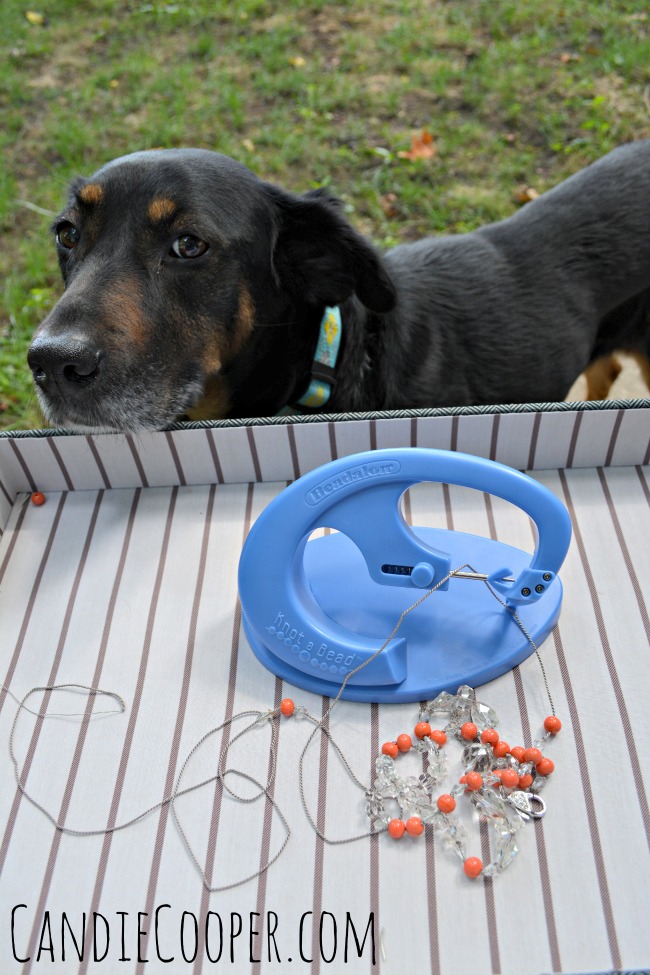
If you are working on your lap (I usually do!), find a tray and put a beading mat down.  Just remember–DO NOT knot between the last two beads or you’ll be in a world of hurt trying to undo one of those knots.
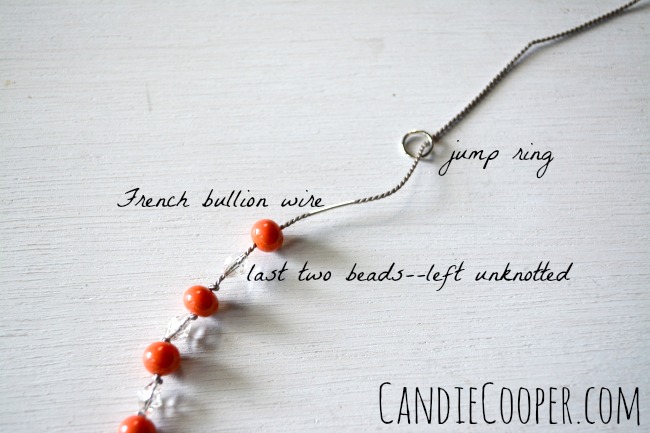
P.S.  It’s very hard to explain to your dog that no, she hasn’t been replaced by the Knot-A-Bead and that you’ll pet her when you’re finished with this tutorial.  She stayed by my side through this whole tutorial.  Good girl.  Treats to come.
Bead Knotting TutorialWhen you come to final two beads, string another piece of bullion wire and the opposite end of the clasp.Jewelry Making Knotting Tutorial-How to finish the endThread the tail of wire back through the orange bead.
How to Knot a Strand of Pearls or BeadsThis cinches up the bullion wire and makes it ready to knot again between the last two beads.  Dot the knot with G-S Hypo cement and leave to dry.  Trim the ends.
Bead Knotting Tutorial from Candie CooperThe thing I love most about knotted strands is how flexible they are!  Just beautiful!  I love this combo so much!
Vintage Necklace Re-Knotted TutorialHave a stash of your grandmother’s jewelry that’s been waiting for you?  Go forth and knot your heart out!

Sari Silk Wrapped Beads

Sari Silk Beads on Leather Cord NecklaceMore sari silk love here on the ol’ blog!

This is a project I did on PBS television’s Beads, Baubles and Jewels last December.  Time really does fly!  It is based off a project in my book, Necklaceology.DIY Sari Silk NecklaceBasically, you wrap big macrame beads with sari silk and then embellish them with stitchery and tiny seed beads.  You’ll need a tapestry needle to thread the silk ribbon through.  The needle will run through the center of the bead and around and round.  Put a little glue inside the bead to keep the ribbon from unraveling.Sari Silk Wrapped Beads with LeatherYou can use the tapestry needle for the leather too.  I’m using Beadalon’s Indian leather and spacer beads here.Sari Silk Wrapped BeadsHere’s a link the the Beads, Baubles and Jewels page with the project, photos, and instructions.

necklaceology 2If you’re curious about Necklaceology, may I invite you to take a peek here?

Let’s here it for the weekend already!!

Wishing you a good one!

Beginner Jewelry Project

DIY Fringe Necklace from Candie Cooper

Chevron Fringe PendantMy husband got me an amazing new camera for my birthday.  He even called Amy at Mod Podge Rocks to see what to get.  How sweet is that?  My birthday is in May and I only recently picked it up (I think the owl button bracelet was my first post with it).  It’s big.  It’s powerful.  There are a lot of dials and buttons.  It’s a Nikon d5200.  I have NO idea how to use it.  So, bear with me as I fumble through getting to know this mega machine.Chevron Fringe Necklace IdeaSee this picture?  It looked great on the mini screen of the camera.   Then, I pull it up and……..Oh.  Hello, blurry pendant.  But!  I really loved the shot with the old brick and brick so I’m documenting it.  Someday when I’m taking fabulously focused pictures, I’ll look back at my humble beginnings and say: Candice, you’ve come a long way baby.

Ha.  My hubs just walked in and said, “that looks nice, honey.”  Love is blind.  I love that guy.

Fringe Necklace from Candie CooperBetter.

Much better (and a lucky shot).

Want to make this necklace?

You might think I strung all the seed beads onto head pins, but I didn’t.  This is actually a very cute pendant from Plaid’s Sea Sparkle line.

I connected each end of the pendant to a piece of chain with a jump ring and finished the end with a little lobster clasp (also connected with jump rings.  It took me about 5 minutes.  Maybe.

This is an especially great project for beginner jewelry makers such as tweens or your friend that wants to make a piece of jewelry with you.  All you need to know is how to open and close a jump ring and you can make the hole thing.  Jump rings are simply round rings with an opening so you can connect all the components together.  You can see opening a jump ring in this tutorial.

Keeping it simple today.  I hope you have a good one!

*Sources

Sea Sparkle components at JoAnn Fabrics and Crafts.

DIY Bungee Cord Jewelry

DIY Bungee Cord Jewelry

Quick to make, I love these sparkly, playful statement bracelets.  Layer em’ up!  DIY Jewelry Making  Bungee Cord Bracelets

How to Make a Bungee Cord BraceletHere’s how to make them:

String your beads on a 20 g. wire and get a measurement.  Add an approximate 3/4″ to this measurement to account for the wrapped loops on either end plus the loops hanging over on the end findings.

Subtract the above measurement from the desired bracelet size (i.e. 7.5″) and cut the bungee cord.  I use a lighter to burn the ends to get rid of frays (do this outside so you don’t choke yourself out).

Attach the fold over end findings to the end of the cord (see the photo above) using chain nose pliers.

Connect the two ends with the wrapped bead link.  Use this tutorial for making a wrapped bead link EXCEPT before wrapping up the loop connect it to the loop on the fold over end finding/cord.

Sparkly Bungee Cord BraceletsDone and done!

*Sources:

Pepperell Braiding Co. for bungee cord

Beadalon 20g. Artistic Wire

Beads from JesseJamesBeads.com