DIY Earring Ideas with Jesse James Beads

DIY Earring Ideas with Candie CooperToday on the show I wanted to share with you some DIY Earring Ideas using Jesse James Beads. *Jesse James Beads sponsored the show, all opinions are my own*

I made three pairs of earrings today, two that were simple and one that was a chandelier pair. You can see the full video below of how I made each of these pairs.

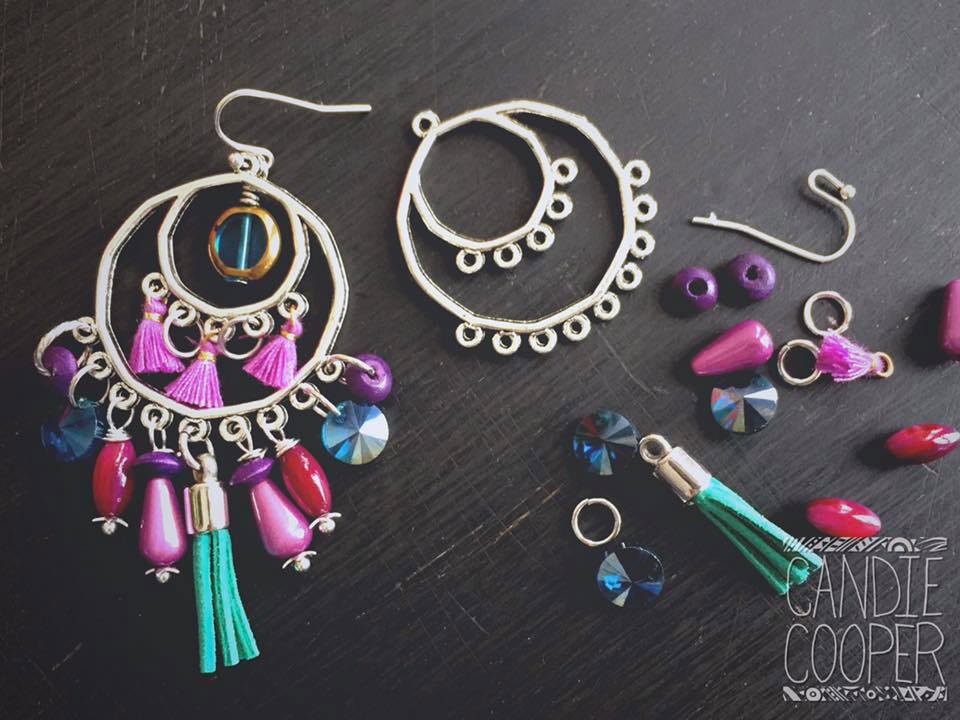
To start us off I pulled out some chandelier findings, which you can find at Jesse James Beads or in my Etsy shop. I went for a true boho style on this earring and had fun playing with the turquoise and purple colors.

One of the cool things about using chandelier findings is that you can use them as earrings or alone as a necklace pendant. The first thing that I suggest doing is counting the number of spaces you have to see where the true middle is. This allows you to figure out how you want the piece to cascade down. If you have a chandelier finding like the one that I used that has a lot of loops, you can use chain to connect them to lighten the look.

When starting your design think about what you want in the middle, this is the center of the whole piece. When making earrings, any earrings, make sure you count your beads out. MakDIY Earring Ideas with Candie Cooper
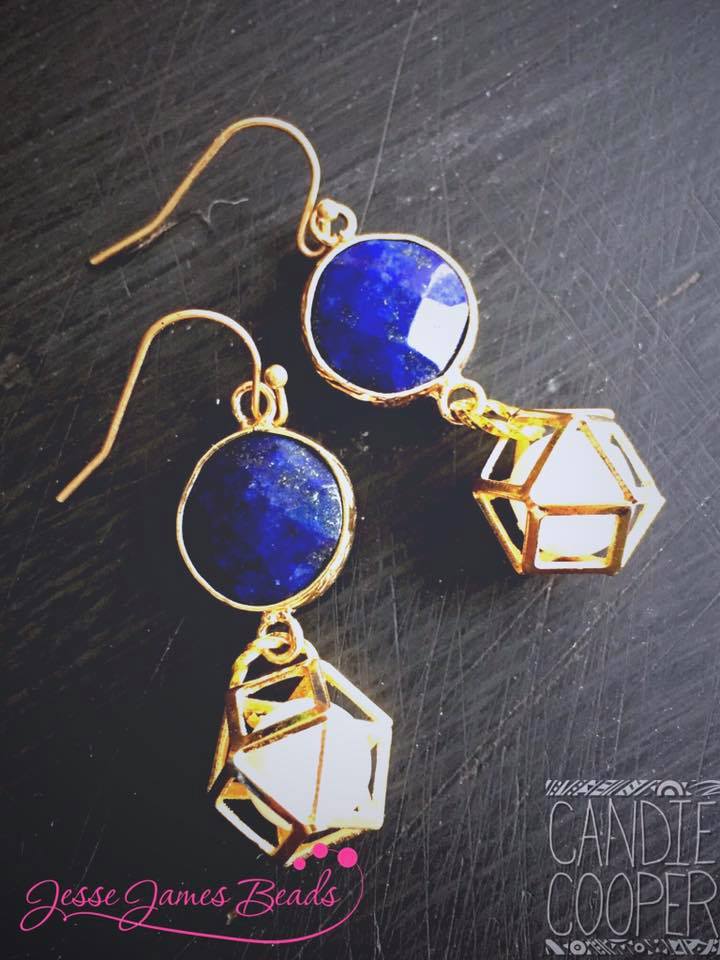
e sure that you have enough to make both sides match. For this project I wanted to use jump rings and the wrapped loop to give it some interest. I also like to mix and match the head pins that I use. I like some that are flat and some that are more decorative, like the ball head pin.

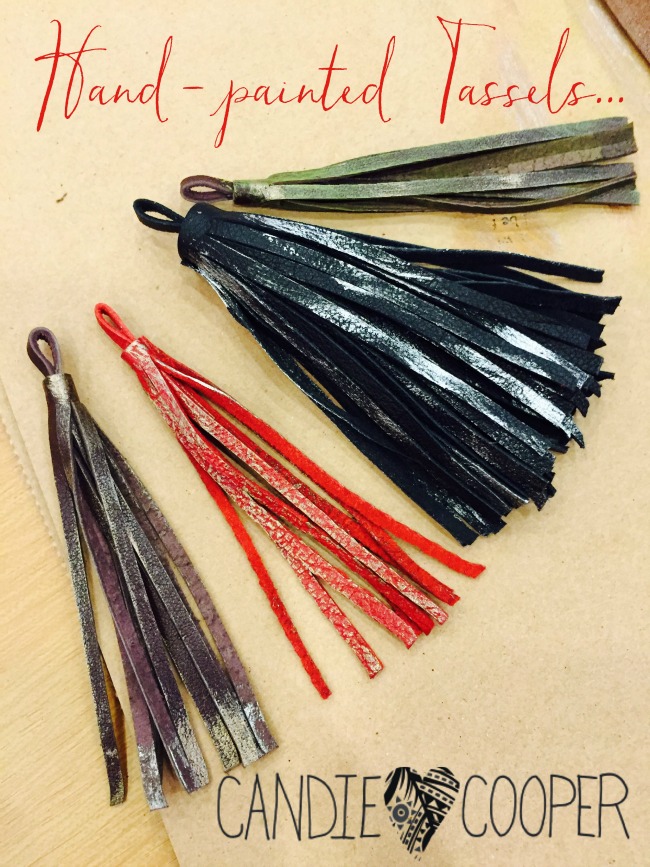
As we worked through the design there were some beads that I wanted to be a little lower. A way to accomplish this is to make the loop larger when doing a wrapped loop or to use multiple jump rings to make the bead hang lower. You can also use jump rings as spacers when you don’t want too many beads close together. I did this on the top ring of the chandelier earrings with the micro tassels.

If I were to sell this pair of chandelier earrings I would make sure to put a little bit of white school glue on the tassels to make sure that they don’t come apart. It will dry clear and you won’t even see it, but you will know it is more secure. A tip when working with multiple colors is to separate the colors with mental findings. This could be with using a metal bead or using the jump rings as I did in this piece.

DIY Earring Ideas with Candie CooperAfter making the chandelier earrings I went with two more that were a little more simple to give you some other DIY earring ideas. For the blue pair I used the Lapis connectors from Jesse Jame Beads and cage beads. This was a quick pair of earrings that look super expensive. They are just a great go to pair of earrings.

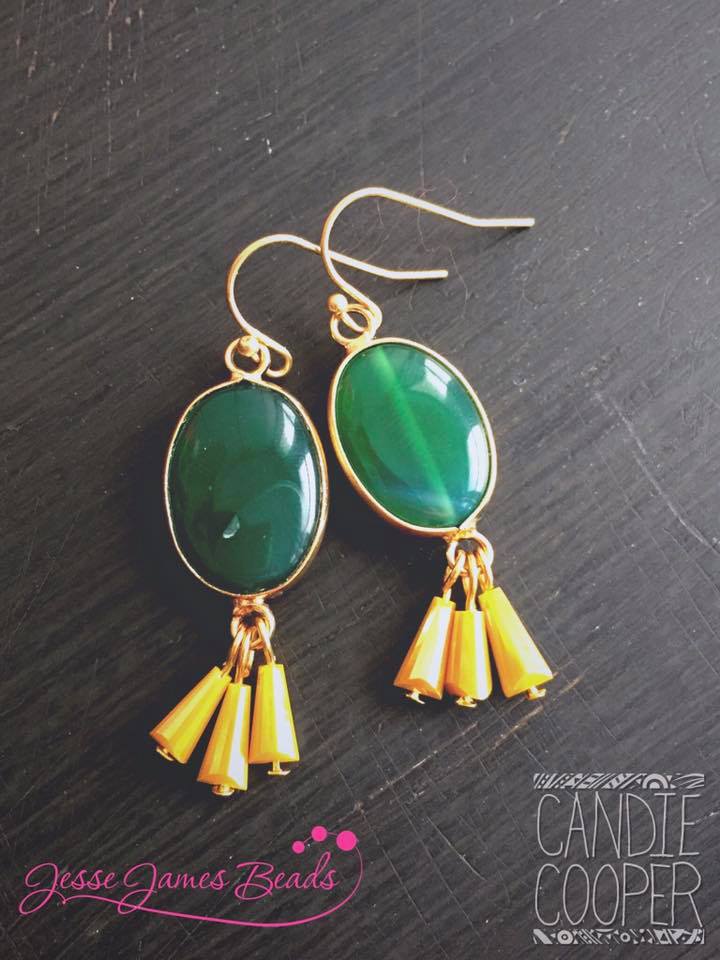
For the third pair I used some of the drop beads that I had been wanting to use and paired them with the Green Agate Stone Connectors. Again another simple pair that look expensive. All I used was the connector and some head pins.


Bead  mixes shown in the video:

Shanghi Nights

Mini Mixes-Midnight Dreamscape

Chinese Dragon Design Mix

Kung Pao Design Mix

Materials List for DIY Earring Ideas:

Beads of choice

Ball Head Pins

Flat Head Pins

Jump rings

Ear Wires

Into the Woods Tassel Necklace

In To The Woods Tassel Necklace by Candie CoooperIn this Facebook Live Video I showed you how to make the Into the Woods Tassel Necklace.
This video was sponsored by Jesse James Beads and Beadalon, all opinions are my own.

In the video I show you how to layer a pendant with a tassel and how to do some basic wire wrapping. Tassels have been a hot trend for a while and something that I love to add into my jewelry. Tassels can be made from a lot of different materials but today I will be showing you a chain tassel.

This necklace features Jesse James Beads’ new collection, Into the Woods. This is a beautiful earthy collection that you could use in so many ways. This necklace could be made with any beads but the Into the Woods collection really gives the piece a unique edge.

Keep reading to see where you can purchase the other supplies for this project.

When you make this project you can select any color pallet that you like. You can try to mix different pallets to get a different look each time with the same technique. If you make this project head over to my Facebook page and post a picture so we can all be inspired! While you are there be sure to turn on the notifications to see the LIVE Facebook videos. There is a new video almost every weekday at 2:30pm EST.

Supplies:

We already talked about the beads needed for this tassel necklace but there are a few other items you will need to finish the project.

You can find wire and chain for this project on Beadalon’s website. If you need a bail making plies to complete the project you can pick up the bail making plier with your Jesse James Beads order or you can see the full selection of jewelry making pilers on Beadalon’s website.


LIVE from Beadalon-Wire Wrapped Cabochon Pendants with Wyatt White

This post sponsored by Beadalon.  All opinions are my own.  Thanks Beadalon for supporting mine and many others love of DIY jewelry.Wire Wrapping BailsIs anyone else intrigued with pendants like these?

They just. don’t. stop.

Wire turning and twisting, up then down and around and ta daaaa–you’ve got a pendant.

Yesterday on the live show, I had Wyatt White from Beadalon show the basics of making wire wrapped cabochon pendants.  He actually shows how to make the wrapped crystal on the right using a Swarovski faceted flat back.

According to Wyatt, you can set lots of things with this technique.  He’s a wizard and if you’re curious about wire wrapping and setting cabs, definitely watch this video.  He has designed special banding pliers from Beadalon that make the wrapping process really easy.  So many comments were expressing excitement about these pliers.  We like easy around here so thanks Wyatt!Beadalon Wire Wrapping Giveaway

Materials:

Wire Wrapping Component & Stone Setting Booklet, by Wyatt White

Double Band Banding Pliers

Single Band Banding Pliers

Practice Wire Kit

Candie Cooper and Wyatt WhiteWatch the replay of the live video for how to make amazing pendants like these.  And join us daily on my Facebook page at 2:30 EST for fun daily doses of DIY jewelry and mixed media techniques.


Get Aligned! Making Chakra Jewelry

This post brought to you by Dakota Stones.  Sponsored posts help to keep the lights on here at CandieCooper.com.  Thanks, Dakota Stones!How to Make Chakra Jewelry with Dakota Stones on Candie Cooper's blog7
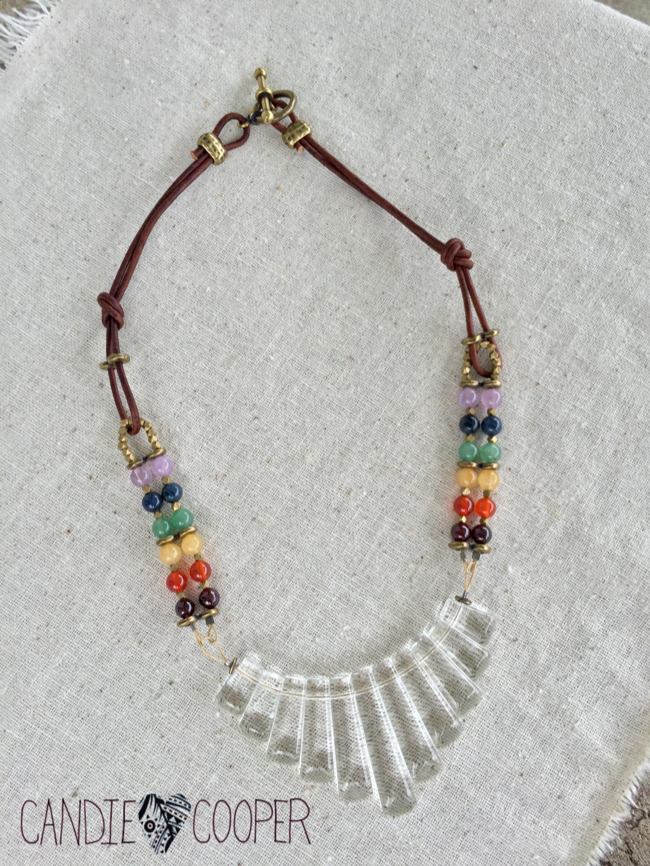
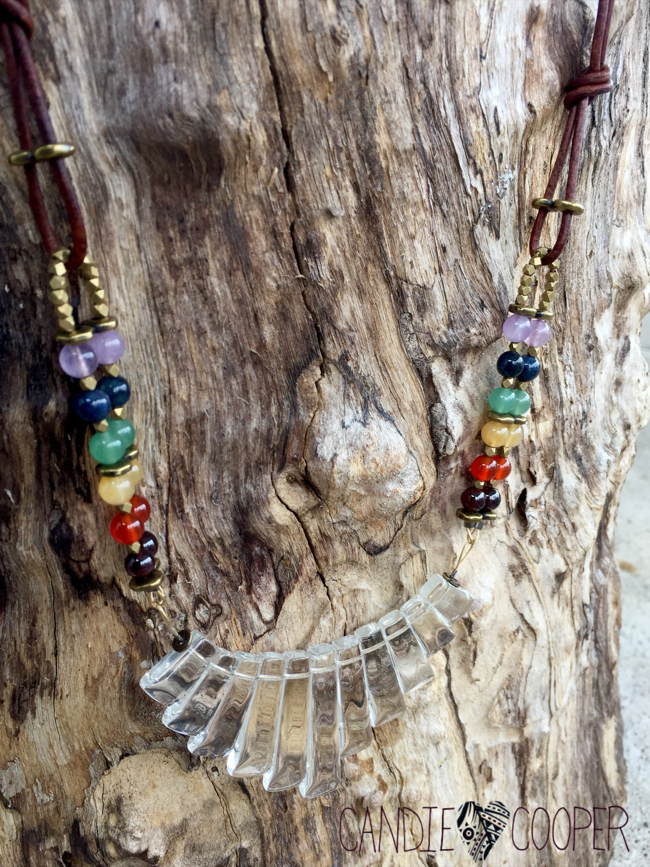
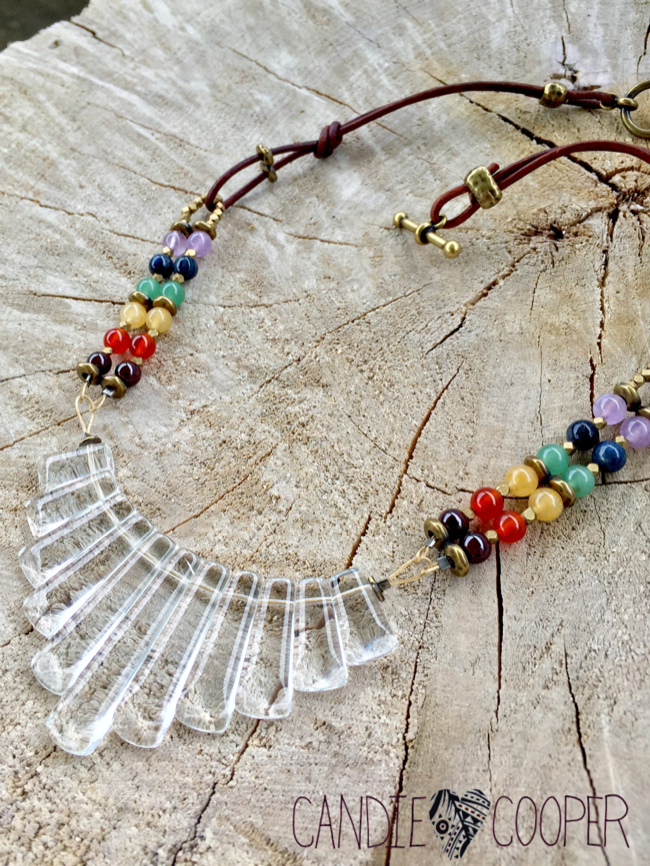
Years ago, a lady brought a piece of Chakra jewelry that she wanted to change around a bit.  My younger self had no idea what these little gems represented.
How to Make Chakra Jewelry with Dakota Stones on Candie Cooper's blog5Fast forward ten years and here we are.  I’m very much aware of the chakras and the possible power of natural stones.  Thank you, yoga, self-help books, Pinterest (the other self-help book).  It’s so interesting to learn about the power of natural stones.

It’s so interesting to learn about the power of natural stones.

That’s why when Dakota Stones and I talked about possible projects, I was thrilled when the chakra jewelry idea came up.  Happily, I’m taking the chakra challenge with my friend Jess Prill that works at Dakota Stones.  Jess is an amazing designer-you might’ve seen her pieces in Stringing Magazine.
How to Make Chakra Jewelry with Dakota Stones on Candie Cooper's blog6DS sent this beautiful set of gems–If you are curious about what each stone aids in, read the blog post at Dakota Stones here.  I’ll put links to each stone on the DS site at the bottom of this post.
How to Make Chakra Jewelry with Dakota Stones on Candie Cooper's blog15
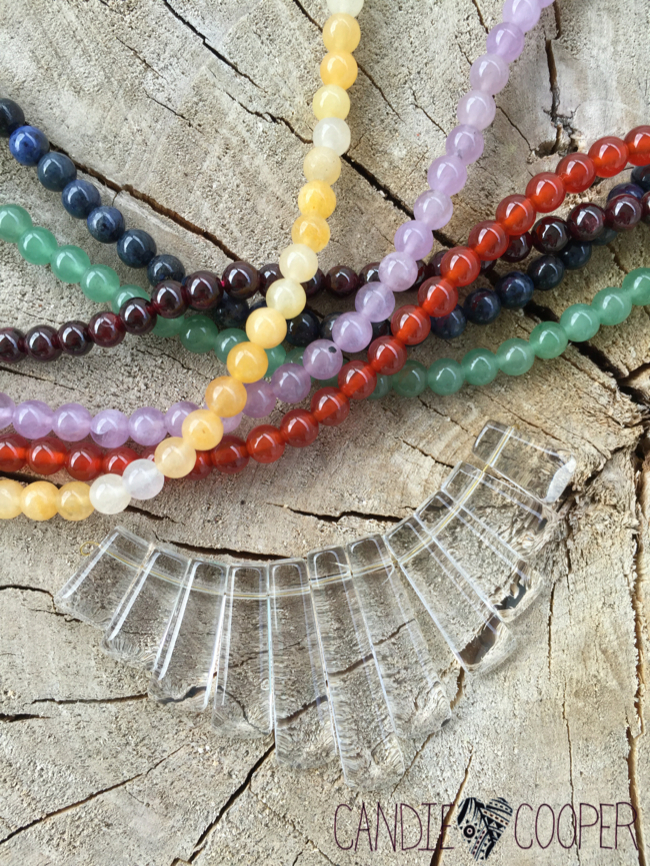
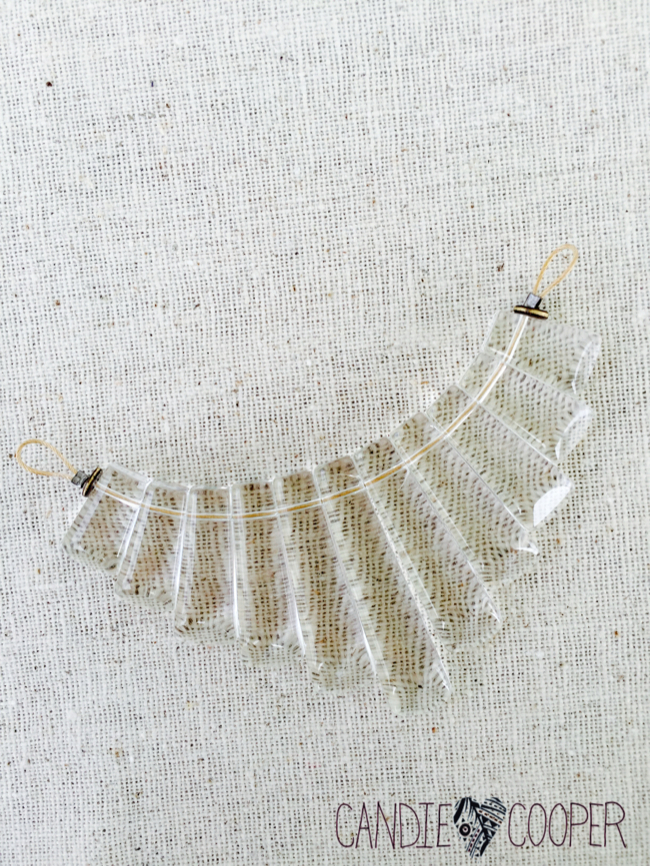
I started with a crystal fan pendant from Dakota.  These things are radiant and I love how crystal clear they are.  Seems like a good start for aligning those chakras right?
How to Make Chakra Jewelry with Dakota Stones on Candie Cooper's blog2Next I strung the gems in the appropriate order, peppered with Tierra Cast double hole spacer beads.  By the way, I’m using .024, 49 strand gold Beadalon wire.  When working with gems, it’s a good idea to use thicker wire—plus, I love seeing the thick wire connections.
How to Make Chakra Jewelry with Dakota Stones on Candie Cooper's blog16Zip it all up with a little bit of round leather (this is 2mm diameter).  Here’s how:
How to Make Chakra Jewelry with Dakota Stones on Candie Cooper's blog3That’s another Tierra Cast bead which is key in holding the clasp in place.
How to Make Chakra Jewelry with Dakota Stones on Candie Cooper's blog4Use a touch of Loctite gel on either side and slide the bead into place. Keep a piece of paper nearby to grab the extra adhesive that oozes out.
How to Make Chakra Jewelry with Dakota Stones on Candie Cooper's blog13
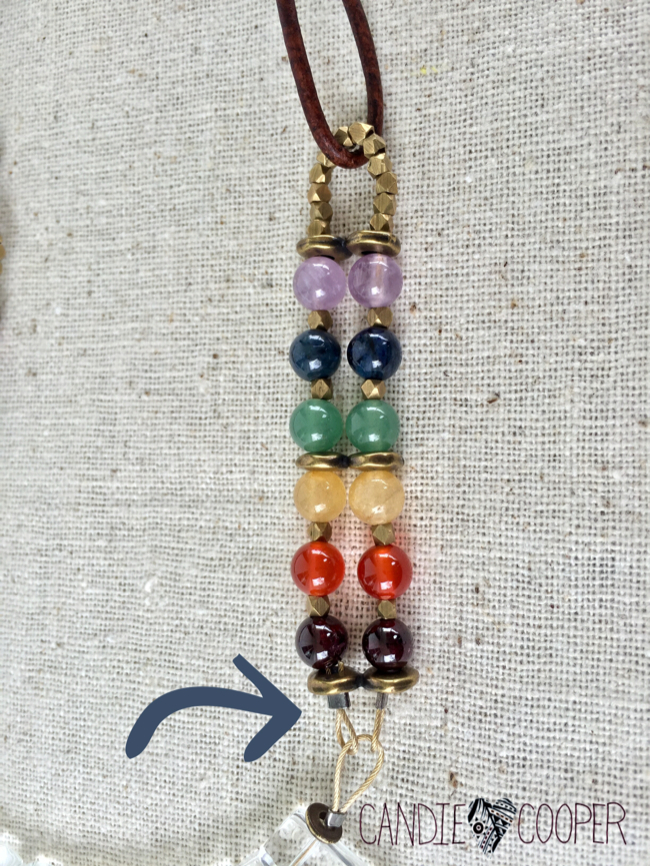
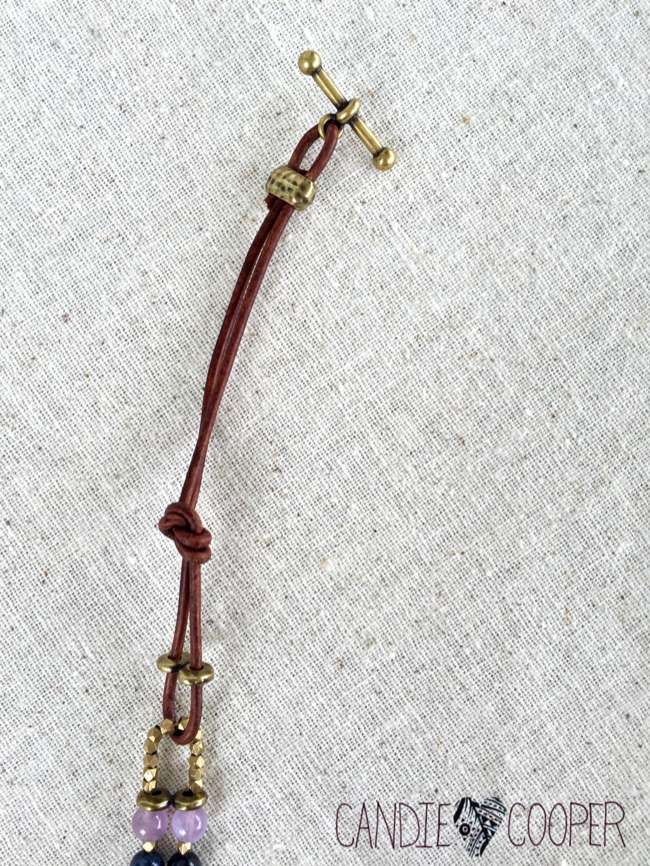
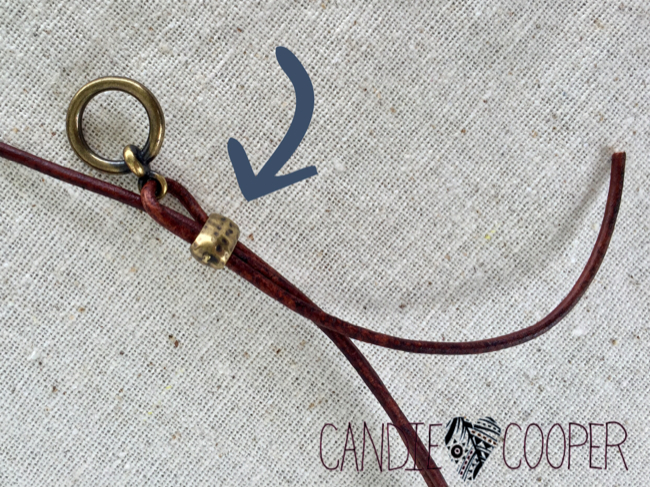
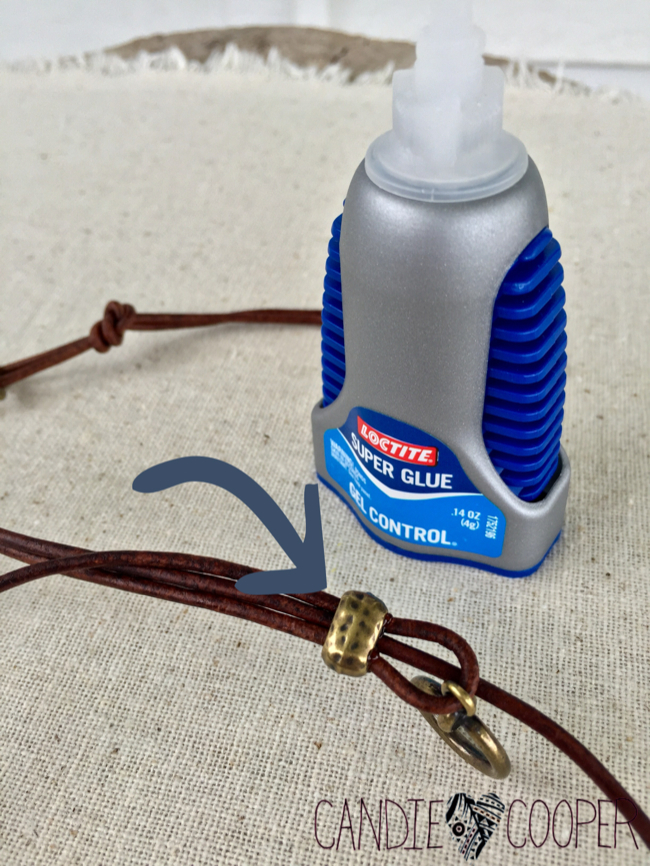
That’s all there is to it.  I can’t wait to take it for a test drive.  And when I’m not wearing it, I’ll keep it on my dresser where I can see it daily (always a good reminder to take a breath and slow down, be grateful).
How to Make Chakra Jewelry with Dakota Stones on Candie Cooper's blog8Do you follow CandieCooper.com on Facebook? I’ve been doing live videos there.  This week I will feature a quick 5-minute chakra piece and give away the gems to make it.How to Make Chakra Jewelry with Dakota Stones on Candie Cooper's blog11How to Make Chakra Jewelry with Dakota Stones on Candie Cooper's blog7How to Make Chakra Jewelry with Dakota Stones on Candie Cooper's blog12Be sure to check out my chakra partner in crime Jess Prill’s piece on the Dakota blog here.

Visit Dakota Stones for the best gems on the web–I’ve been a long time fan of their products and am thrilled they’re going to sponsor a few days here on the blog!

Chakra Stones used above–


Ride ‘Em Cowgirl! Make an Inlaid Leather Cuff Bracelet

This post is sponsored by leathercord USA–all thoughts and opinions are mine.DIY Leather Jewelry Making: How to make a cuff bracelet with inlaid leather on Candie Coopers blog1Saddle up, cowgirls and boys because I’ve got a saucy DIY leather cuff bracelet I think you’re going to love.  It uses leathercord USA’s braid, round and bolo leathers which are set down in a silver cuff.  It doesn’t take too long to make, but you do need a touch of patience because super glue dries fast and there are a lot of cords to keep organized.

Ok?  That’s your warning.DIY Leather Jewelry Making: How to make a cuff bracelet with inlaid leather on Candie Coopers blog12Meet the natural dyed leather look from leathercord USA.  It is my very favorite because the dye is more transparent.  I always love using earthy brights in my jewelry and these leather cords fit the bill.  When you visit the lcusa website, look for the word “natural” in front of the color.DIY Leather Jewelry Making: How to make a cuff bracelet with inlaid leather on Candie Coopers blog11Select a couple round cords (1 to 1.5 diameter), bolo cord (3mm), and flat braid (3 strand-2mm) in colors that make your heart sing.  The cuff blank you can get from me–two sizes large and small. Email or comment for details!  To prep the cuff, I used my chain nose pliers to open up the little ridge of metal so I could push the cords down in.DIY Leather Jewelry Making: How to make a cuff bracelet with inlaid leather on Candie Coopers blog10You can lay out your leather cording or you can wing it like I did.  I actually think I got very lucky how well these fit down in the recessed silver cuff area.  Use your trusty Loctite Gel Adhesive to secure the leather jewelry cords to the silver cuff blank.DIY Leather Jewelry Making: How to make a cuff bracelet with inlaid leather on Candie Coopers blog9Press and hold the cords down a bit in between–this is where you need the patience because sometimes the glue oozes out and you have to be quick!DIY Leather Jewelry Making: How to make a cuff bracelet with inlaid leather on Candie Coopers blog8Trim the cords and put some glue down in, behind the silver flap, and tuck them in.

It was at this point where I thought to myself, I think I was a little inspired by my skirt!  Haha. And that I have a pink problem–it’s a go to color as of late. This was a super fun project loaded with instant gratification.

Be sure to visit leathercord USA to check out the natural dyed leather lines and style for all your jewelry making needs. leathercord USA to check out the natural dyed leather lines and style for all your jewelry making needs. DIY Leather Jewelry Making: How to make a cuff bracelet with inlaid leather on Candie Coopers blog7DIY Leather Jewelry Making: How to make a cuff bracelet with inlaid leather on Candie Coopers blog3DIY Leather Jewelry Making: How to make a cuff bracelet with inlaid leather on Candie Coopers blog4DIY Leather Jewelry Making: How to make a cuff bracelet with inlaid leather on Candie Coopers blog2DIY Leather Jewelry Making: How to make a cuff bracelet with inlaid leather on Candie Coopers blog5

Ouch! A Remedy for Chapped Hands and a New Issue of Stringing Magazine

Candie Cooper in winter Stringing jewelry magazineIt’s always exciting to see my projects go to print.  Big thanks to Stringing magazine for including three of my designs in their winter issue!  I don’t like to kiss and tell so this is as much as I’ll show.  It’s on newsstands now or there are digital copies available which are especially great for tablet users!dry chapped handsWinter is still here.

Still here.

And my hands are dry and chapped.  I wanted to share one of my new favorite fixes:Rose salve remedy for chapped handsC.O. Bigelow’s Rose Salve No. 012.  You can get it Bath and Body Works or online of courseRose Salve heals dry chapped hands in winterThere are lots of things I love about it–it’s pink, it smells nice, all in a compact tin.  I keep it in my jewelry making pliers kit.

I don’t know about you, but by the end of winter, my skin is comparable to a 220 grit piece of sand paper.  I try to drink more water, use lotions after showering and so on, but inevitably I am dried up.

Totes.Rose Salve relief from dry chapped handsSo this has been one of my recent treats for my dried up, cracked and chapped handsies.My happy hands hahaThe thing is, don’t stop after one application.  As soon as your hands feel good, put it on again….and then again to rehydrate them.

Happy hands make good jewelry.C.O. Bigelow Rose Salve heals dry skinPlus, I’m a sucker for a vintage looking tin.  I will totally recycle this thing into jewelry when it’s empty (and that won’t be long if we keep getting hammered with these cold bursts!).

Until next time, sweet people!

DIY Painted Leather Cuffs That Will Knock Your Socks Off!

How to paint and embellish leather cuff bracelets LeatherCordUSA.comThis post brought to you by leathercordUSA.com.Candie Cooper demoing in the LeatherCordUSA booth at the To Bead True Blue
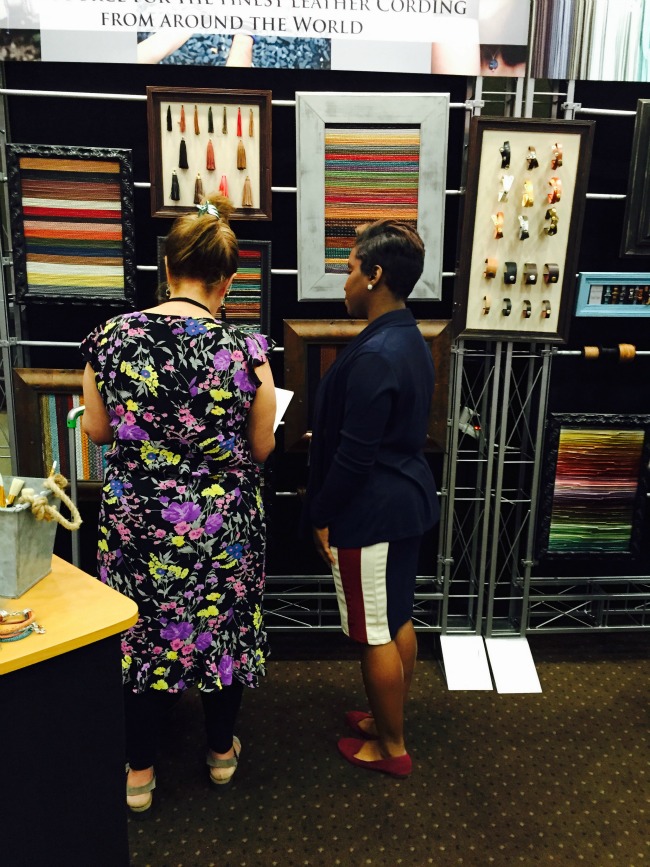
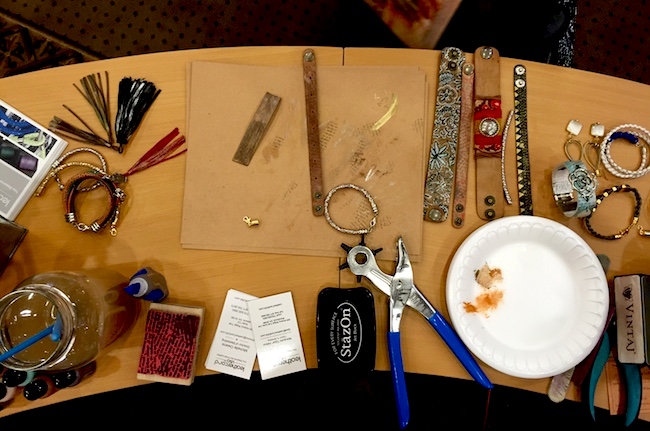
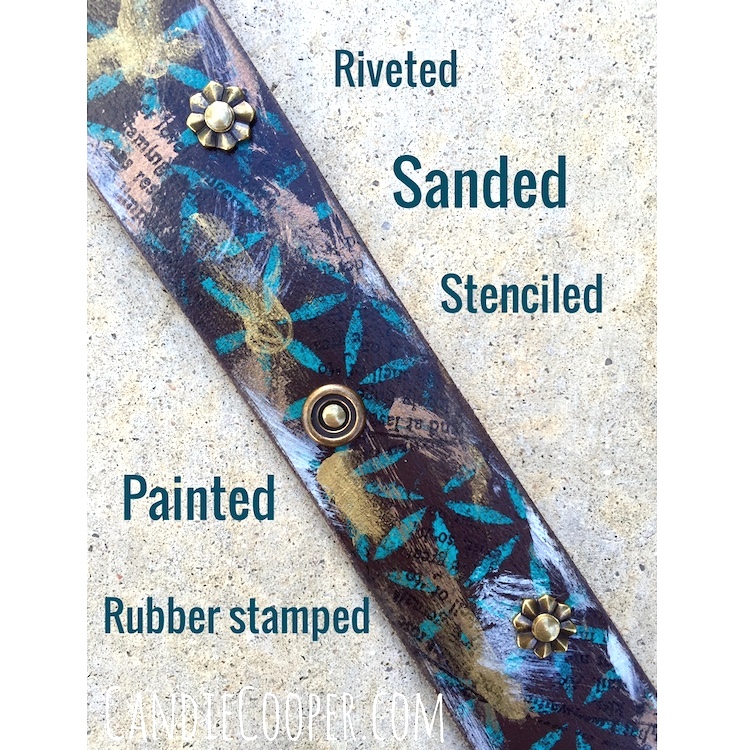
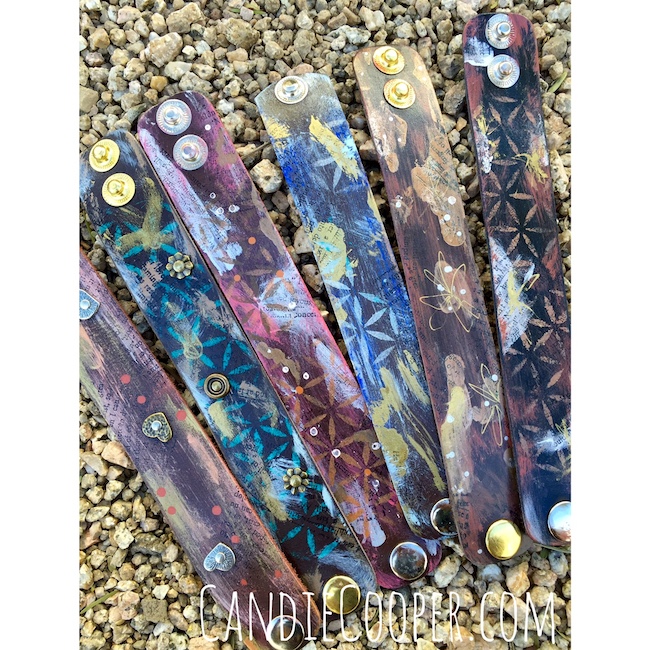
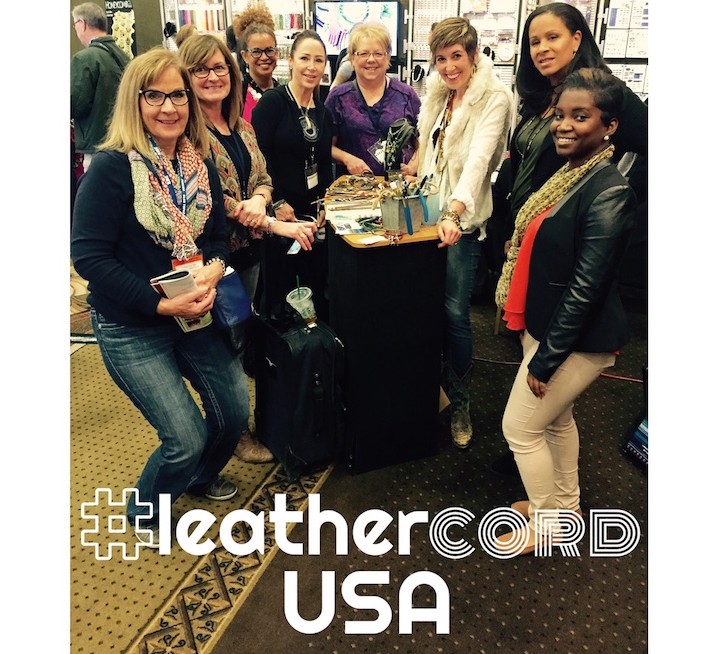
All last week, I worked in the
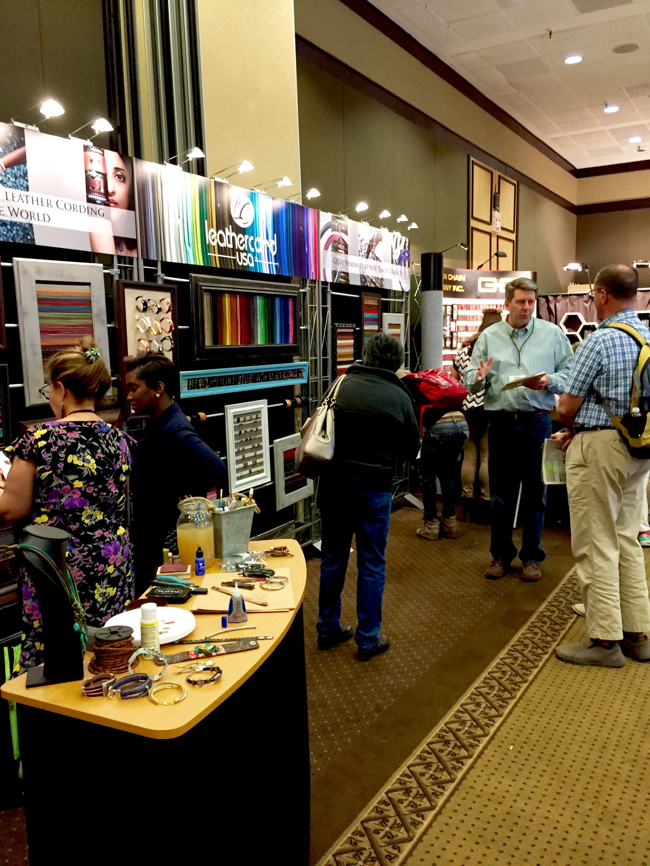
 leathercord USA booth showing mixed media techniques to use with leather at the To Bead True Blue Show in Tucson.  Holy cow.  I painted cuff after cuff and after each one, I fell a little more in love with the process.  These are some of my new friends I made as well as Michelle and Que that work at LCUSA.  It is lovely visitors like these that make my job fun.  If I didn’t say it at the time–thank you from the bottom of my heart for stopping by and watching, asking questions and chatting.  YOU are my favorite part of these gigs.Leathercord USA booth at the To Bead True Blue showWe were hoppin’ at the LCUSA booth and people were really digging the new metallic gold and silver gecko printed and stitched leather (it really is magical looking–you get lost looking at it).  The tassels were also hot sellers!Leathercord USA at To Bead True Blue show in TucsonIf you do art shows or craft festivals, you know that displaying work can be a challenge.  I overheard compliments on the frames of leather over and over in the booth.  It really is a great idea.

Now onto some techniques!

If you love artsy jewelry and building up layer after layer (or making artsy messes in my world), I think you’ll find this post right up your ally because I’m going to show you some new ideas on how to paint and embellish leather.LeatherCord USA tassels

Do you remember that post that was all about painting leather tassels?  That’s one of the first leather surfaces I tried adding Ranger Patina paints on.  These are a few tassels I splashed some metallic paints on with a stiff bristle brush.

Here’s a peek at my demo area in the leathercord USA booth–there’s a little bit of everything, no doubt!
Candie Cooper in the LeatherCordUSA boothRemarkably CLEAN and tidy by my standards though.  I don’t trust an artist with a clean work surface 😉  Haha.
How to paint and distress leatherThis is a detail of one of the cuffs.  Believe it or not–these take about 10 minutes to create, start to finish.  Tracy at Tierra Cast put the rivets on for me (thanks Tracy).  I love these simple little details that add so much!

leathercord USA makes the cuffs in all different sizes and finishes.  You can see them here.
Painted leather cuffs by Candie Cooper with LeatherCordUSA cuffsQue at leathercord USA filmed me painting one.  This is me talking in the video.  If you like it or have questions, let me know in the comments.

Have fun! (useful supply list at end)

LeatherCord USA cuffs (wholesale order on site or ArtBeads.com has them)

Stencil1 Stencils

Sakura PenTouch gold pens

Ranger Patina paints

Stayz On Ink pad

Leather hole punch

Tierra Cast rivetables